Pumpkin Cheeseball Recipe That Will Impress All Your Guests This Fall
If you’ve ever been stumped about what to bring to a party, let me tell you about my go-to!
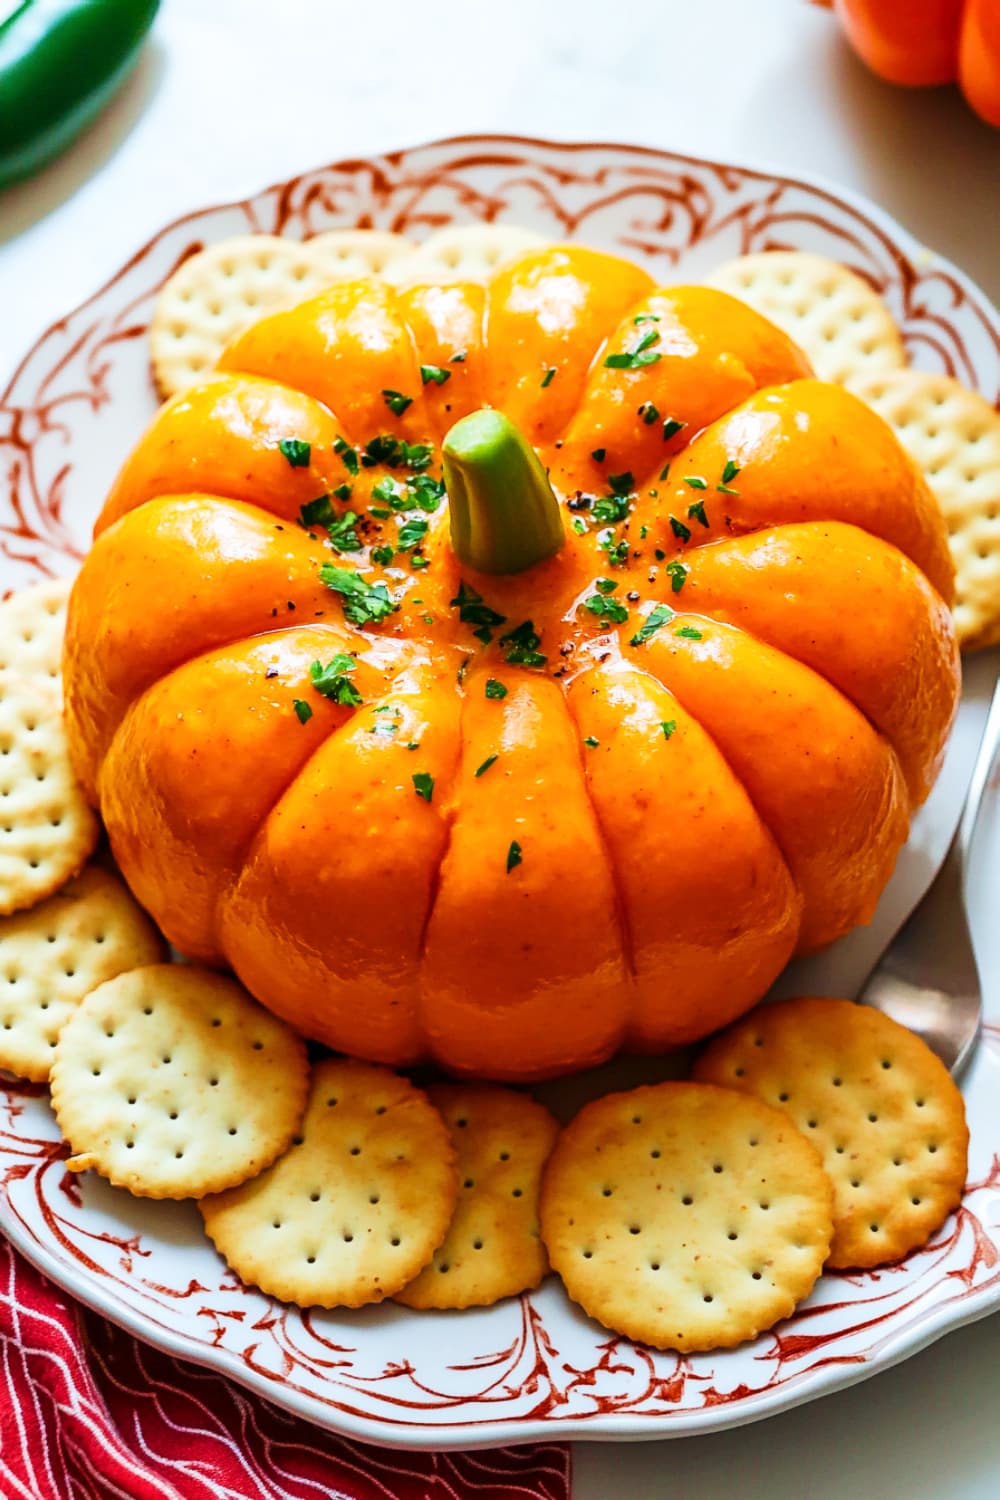
When it comes to Fall Appetizers, there’s nothing quite as fun as a Pumpkin Shaped Cheese Ball.
It’s the kind of dish that’s easy to make but looks like you spent hours on it – the perfect blend of presentation and flavor! Whether it’s for Thanksgiving Appetizers or just a cozy fall night, this is a winner.
You’re going to learn how to create a Pumpkin Cheese Ball Recipe that will stand out on any table, and honestly, it might just become your new favorite. This isn’t just about a cute design; it’s about flavor, simplicity, and making something people won’t stop talking about.
Why You’ll Love This Recipe:
- It’s an incredibly easy Cheese Ball Recipe, even for beginners.
- A showstopper for any gathering, from Halloween Party Vegetables to Thanksgiving Snacks.
- Packed with bold, savory flavors like jalapeño and cheddar, perfect with Cheese And Crackers.
- Great Decoration Ideas For Halloween and an ideal match for your favorite Spooky Appetizers Easy!
Pumpkin Cheese Ball Recipe
This Pumpkin Shaped Cheese Ball Recipe is designed for anyone who wants to impress their guests with a delicious yet easy-to-make appetizer. It’s creamy, savory, and perfect for the fall season. Whether you’re looking for Thanksgiving Appetizers, Halloween Treats And Appetizers, or just a cozy addition to your table, this one will surely be a hit!
- Preparation Time: 15 minutes
- Chilling Time: 1 hour
- Total Time: 1 hour 15 minutes
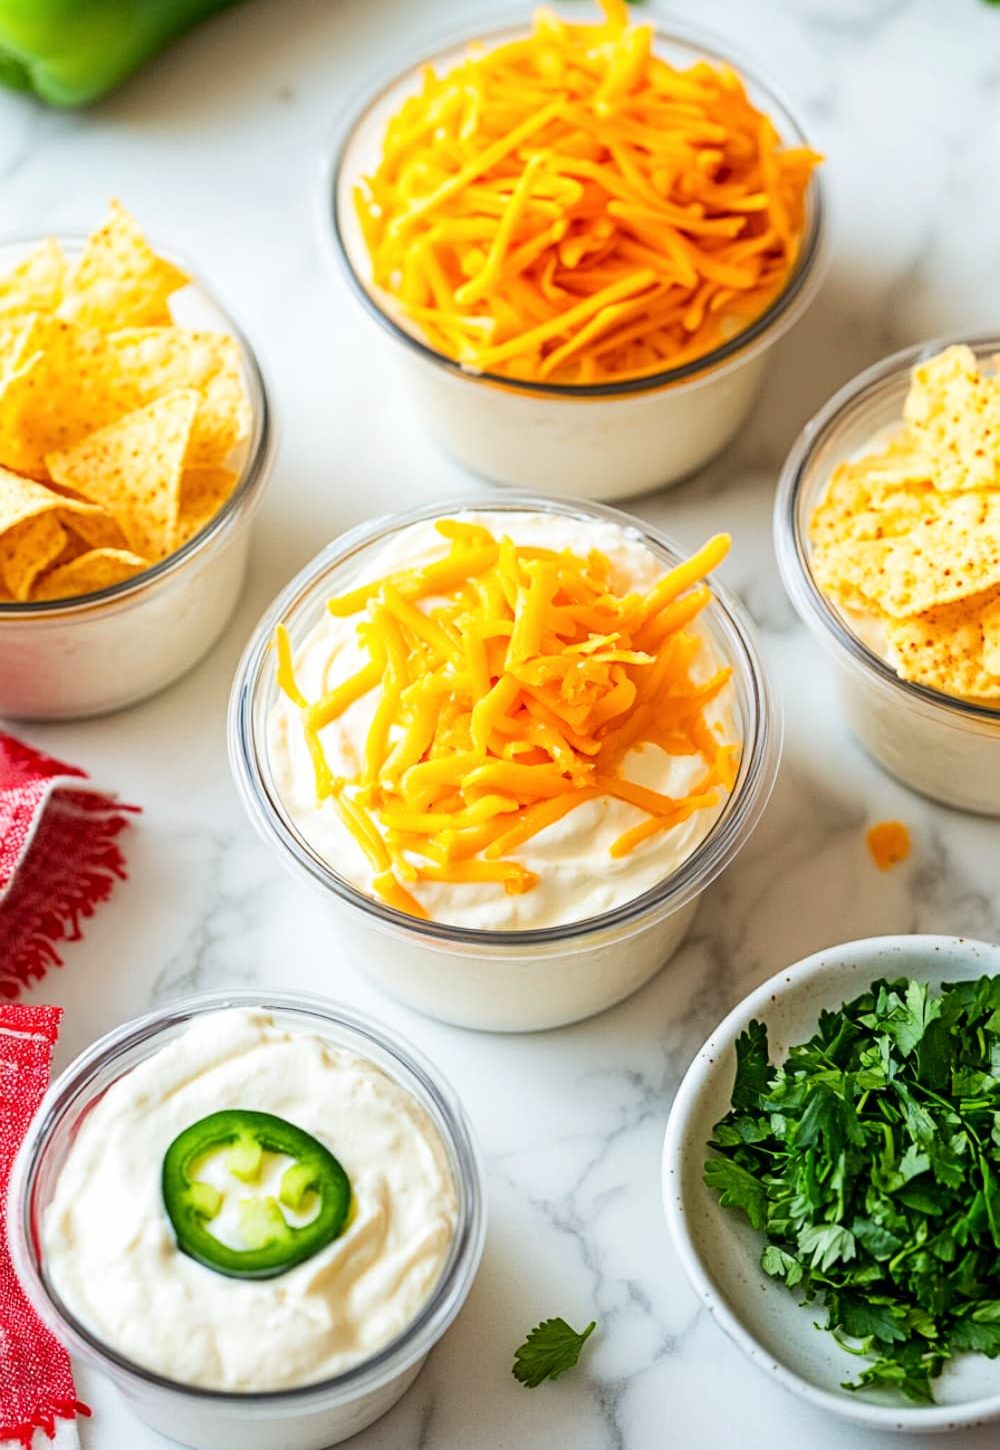
Ingredients
- 8 oz (225g) cream cheese, softened (for a dairy-free option, use plant-based cream cheese)
- 2 cups (200g) sharp cheddar cheese, shredded (substitute with dairy-free shredded cheese)
- 1 tbsp (15g) plain Greek yogurt (or dairy-free alternative like coconut yogurt)
- 1 tsp garlic powder
- 1 tsp onion powder
- 1 tsp smoked paprika (adds a smoky depth to the flavor)
- 1 small jalapeño, finely chopped (optional, or leave out if avoiding heat)
- ½ cup (50g) crushed nacho cheese-flavored chips (like Doritos)
- Healthy alternative: roasted pumpkin seeds for a crunchier, low-carb option
- 1 small green bell pepper, stem cut off to use as a “pumpkin stem”
- Fresh parsley or chives, finely chopped for garnish
Instructions
Step 1: Prepare the Cheese Mixture
- In a large mixing bowl, combine the softened cream cheese, shredded cheddar, Greek yogurt, garlic powder, onion powder, and smoked paprika. If you’re using jalapeño, mix that in now. Using a spatula, mix until smooth and well-blended.
- Tip: Ensure the cream cheese is fully softened before mixing to avoid any lumps. Let it sit at room temperature for about 20 minutes if necessary.
- Alternative: For a lighter option, swap out Greek yogurt with plain coconut yogurt, which gives a slightly tangy taste.
Step 2: Shape Your Cheese Ball
- Scoop the cheese mixture onto a large piece of plastic wrap. Form it into a round ball, using your hands to gently shape it. Once it’s in a rough ball shape, wrap it tightly in the plastic wrap.
- Tip: If you’re finding it tricky to form a smooth ball, wet your hands slightly to help smooth out the surface.
- Alternative: If you prefer smaller, bite-sized portions, divide the mixture into mini cheese balls instead of one large ball. Perfect for Halloween Snacks!
Different methods for shaping the pumpkin ball
- Basic Hand-Shaping:
- After forming the mixture into a rough ball using plastic wrap, gently press down slightly on the top to flatten the bottom, giving it a more pumpkin-like shape.
- Use your fingers to define subtle ridges around the ball by pinching sections of the cheese ball. This will help create the rounded segments of the pumpkin.
- String Method:
- After wrapping the cheese ball in plastic wrap, use pieces of kitchen string (or thick thread) to wrap around the ball. Criss-cross the string tightly around the ball, mimicking the natural grooves of a pumpkin. This creates deep, defined ridges.
- Once shaped, chill the cheese ball for at least an hour. Before serving, remove the string and plastic wrap, and you’ll have a perfectly grooved pumpkin.
- Spoon Pressing:
- After forming the ball, use the back of a spoon to press ridges into the ball. Start from the top and gently press downward to create the grooves. Repeat this evenly around the ball for a more natural, textured appearance.
- Mold Pressing (if you have a pumpkin mold):
- For a consistent and easy shape, press the cheese ball mixture into a pumpkin-shaped mold before chilling. This provides even ridges and a well-defined pumpkin form.
Step 3: Chill the Cheese Ball
- Place the wrapped cheese ball in the fridge to chill for at least 1 hour. This will help the flavors meld together and firm up the texture, making it easier to decorate later.
- Tip: Don’t skip this step! Chilling helps the ball hold its shape and makes it easier to coat with toppings.
Step 4: Add the Pumpkin Coating
- After the cheese ball has chilled, unwrap it and gently press the crushed nacho-flavored chips (or roasted pumpkin seeds) all around the outside to create a vibrant, orange Pumpkin Cheese Ball Doritos crust.
- Alternative: For a healthier or allergy-friendly option, you can use finely chopped roasted pumpkin seeds, sunflower seeds, or even crushed gluten-free crackers.
Step 5: Create the Pumpkin Look
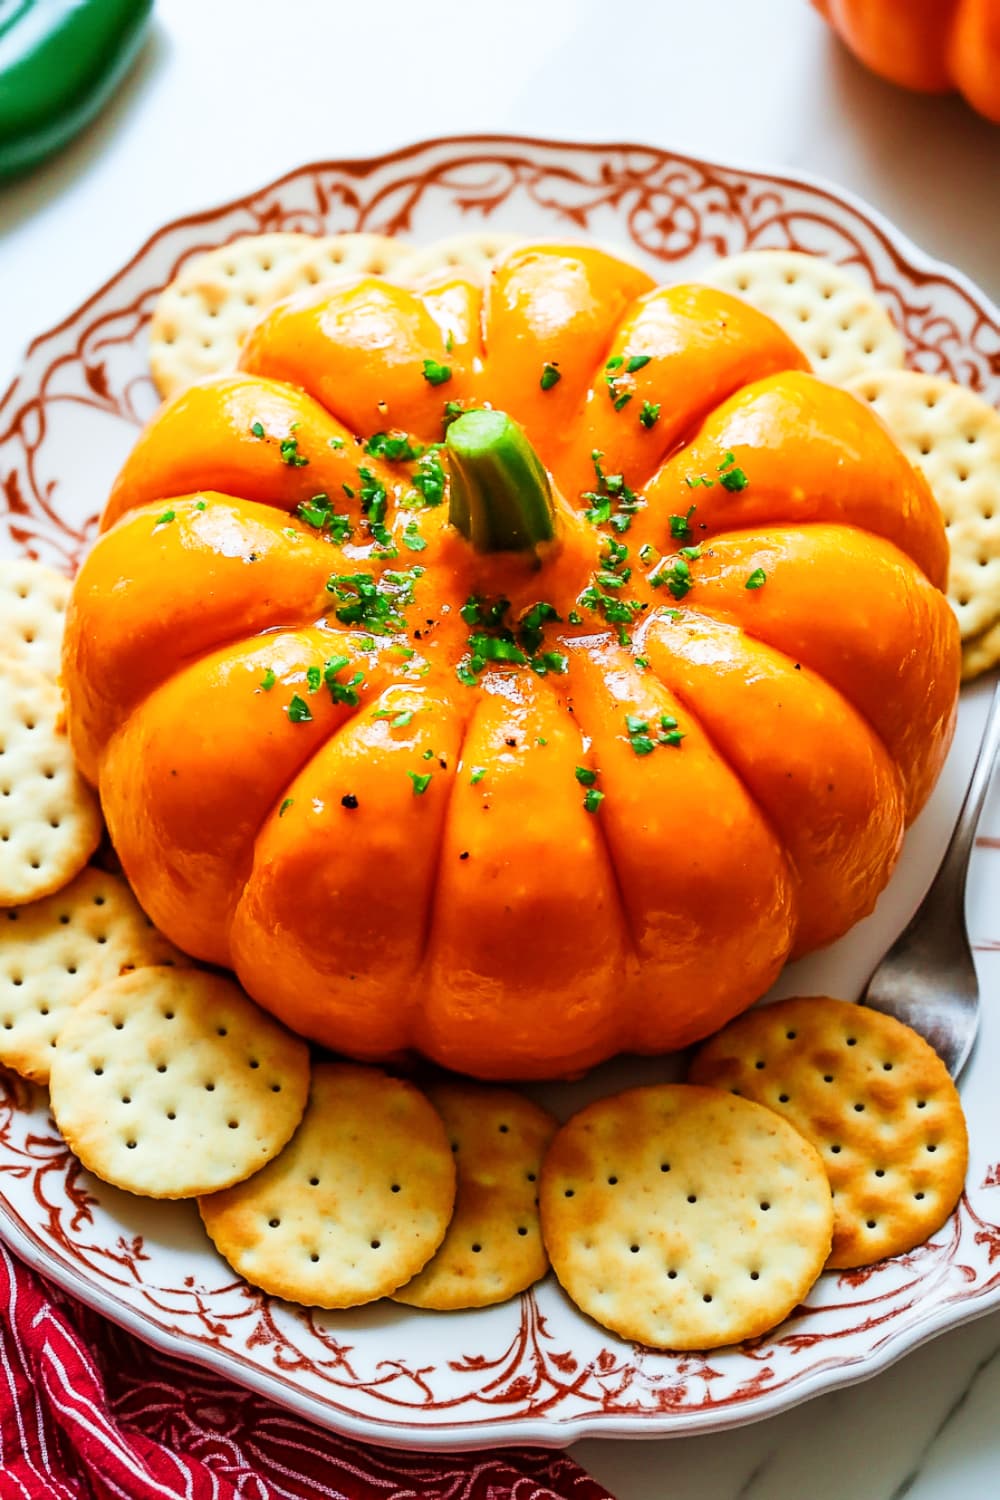
- Use the back of a spoon to gently press lines into the cheese ball to mimic the ridges of a pumpkin. Place the green bell pepper stem on top to complete the look.
- Tip: To make the ball more pumpkin-like, don’t be afraid to exaggerate the ridges slightly.
Step 6: Garnish and Serve
- Sprinkle fresh parsley or chives over the top for a touch of green. Serve alongside Cheese And Crackers, sliced vegetables like carrots and celery, or even add some fun Halloween Party Vegetables for color!
- Alternative Presentation: For a stunning holiday spread, consider surrounding your Cheese Pumpkin with some autumn-themed decorations like mini pumpkins, dried cranberries, or rustic wooden boards.
Notes to Remember:
- Allergen Substitutes: Dairy-free options work just as well here. Opt for a plant-based cream cheese and cheddar if lactose is a concern.
- Healthy Swaps: You can easily swap out the nacho-flavored chips for seeds or nuts if you’re aiming for a low-carb or healthier version.
- Make Ahead: This cheese ball can be made the night before and stored in the fridge. Just wait to add the crunchy coating until right before serving for the best texture.
Garnishing & Decoration Options:
- For Halloween: Add some spooky touches like edible googly eyes to turn your Pumpkin Cheese Ball into a fun Halloween Food To Bring To A Party!
- For Thanksgiving: Surround it with cranberries and rosemary sprigs for a more elegant touch, perfect for a Thanksgiving Brunch.
- Green Halloween Dessert: Add a bit of green food coloring to the cheese mixture and surprise your guests with a “green” twist!
A few additional instructions and clarifications would be helpful to ensure readers have the best cooking experience:
- Adjusting the Firmness of the Cheese Ball:
Some readers may find the cheese ball too soft or too firm depending on the type of cream cheese or yogurt they use. If the mixture is too soft, add a bit more shredded cheese or refrigerate for an additional 15-20 minutes to firm it up before shaping. If too firm, let it sit out for a few minutes to soften slightly before forming the ball. - Preventing Over-Crushing the Coating:
When using crushed nacho chips like Doritos, it’s important not to crush them too finely. If the pieces are too small, they won’t provide the crunchy texture that contrasts with the smooth cheese. Aim for a rough crush with some larger pieces left intact. - Handling Jalapeño Heat:
If you’re using jalapeños in your Pumpkin Cheese Ball Recipe, remember that the seeds and membranes carry most of the heat. For a milder version, remove the seeds and white membranes. If you want a spicier kick, leave some seeds intact. Also, wash your hands thoroughly after handling jalapeños to avoid transferring the heat to your eyes or skin.
Other options for Crafting the Pumpkin Stem for Your Cheese Ball
- Use Fresh Herbs:
- Rosemary: Cut a sprig of rosemary to the desired length and insert it into the top of the cheese ball.
- Thyme: A small sprig of thyme can also be used to create a simple yet effective stem.
- Parsley: For a bright green color, a parsley sprig can be used.
- Edible Garnishes:
- Green Olives: Slice a green olive lengthwise and insert it into the cheese ball for a stem-like appearance.
- Pickled Peppers: A small, pickled pepper can add a spicy kick and a realistic stem shape.
- Green Onion: Cut a thin slice of green onion and use it as a stem.
Common Mistakes to Avoid When Making a Pumpkin Shaped Cheese Ball
To ensure your Pumpkin Cheese Ball Recipe turns out perfectly every time, here’s a guide to avoiding common mistakes:
1. Ingredient Selection
- Mistake: Using low-fat cream cheese or pre-shredded cheese.
- Solution: Use full-fat cream cheese for the best texture and flavor. Pre-shredded cheese often contains anti-caking agents that can affect the creaminess. Grate your own sharp cheddar for a smoother, creamier consistency.
- Allergen Substitution Tip: If using dairy-free alternatives, make sure they’re designed for spreading and melting to avoid a grainy texture.
2. Preparation Pitfalls
- Mistake: Not softening the cream cheese enough before mixing.
- Solution: Let the cream cheese sit at room temperature for at least 20 minutes before mixing. This ensures a smooth blend without lumps.
- Mistake: Skipping the chilling step.
- Solution: Chilling the Cheese Ball is essential for shaping and coating. If it’s too warm, it won’t hold its form or keep the toppings intact.
3. Cooking Techniques
- Mistake: Over-crushing the coating.
- Solution: When using nacho chips or seeds to coat the cheese ball, don’t crush them too finely. Larger pieces add the right crunch, while too fine of a crush can result in a soggy texture after a few hours.
- Mistake: Rushing the process.
- Solution: Take your time when shaping the Cheese And Crackers ball and pressing in the “pumpkin” ridges. The more carefully you shape it, the more visually appealing the end result.
4. Seasoning and Flavoring
- Mistake: Under-seasoning the cheese mixture.
- Solution: Don’t be shy with spices! The combination of garlic powder, onion powder, and smoked paprika adds depth to the flavor. Taste and adjust seasoning before chilling. If using dairy-free alternatives, note that they may require a bit more seasoning.
- Mistake: Over-spicing with jalapeños.
- Solution: For those sensitive to heat, remove the seeds and membranes of the jalapeño or reduce the amount to control the spice level. Alternatively, leave it out entirely for a mild, family-friendly version.
5. Presentation Tips
- Mistake: Poor presentation of the pumpkin shape.
- Solution: Use the back of a spoon or your hands to carefully create defined pumpkin ridges. The bell pepper stem adds a realistic touch. To keep the vibrant orange color, apply the crushed chips just before serving.
- Alternative Garnish: If you’re serving this as Thanksgiving Snacks or Halloween Food To Bring To A Party, consider additional garnishes like fresh parsley for a pop of green or roasted pumpkin seeds for texture contrast.
Pairing Suggestions & Seasonal Variations
1. Pairing Suggestions
- Beverages: Serve your Pumpkin Cheese Ball with a crisp white wine like Sauvignon Blanc or a sparkling cider, which balances the richness of the cheese.
- Sides: Pair with fresh vegetables, whole-grain crackers, or artisan breads to complement the creamy texture. For an autumn vibe, add roasted squash or sweet potato slices.
- Main Courses: This appetizer works well with a cozy autumn meal like roasted turkey, pumpkin soup, or even a Thanksgiving Brunch spread.
2. Seasonal Variations
- Fall/Winter: Add spices like cinnamon or nutmeg to the cheese mixture for a warm, autumnal flavor. You can also swap jalapeños with roasted red peppers for a milder seasonal twist.
- Spring/Summer: For lighter Cheese Ball Recipes, swap out heavier ingredients with light herbs like fresh dill or basil. You can also replace the nacho chips with crushed almonds or sunflower seeds for a fresher, more spring-like flavor.
Pro Tips for Mastering the Pumpkin Shaped Cheese Ball
- Choosing the Right Cheese:
Use full-fat cream cheese and freshly grated sharp cheddar for a creamy, rich texture. Pre-shredded cheese often contains anti-caking agents that can prevent it from blending smoothly. For a dairy-free version, opt for a high-quality plant-based cream cheese that spreads well, ensuring a smooth texture. - Perfecting the Shape:
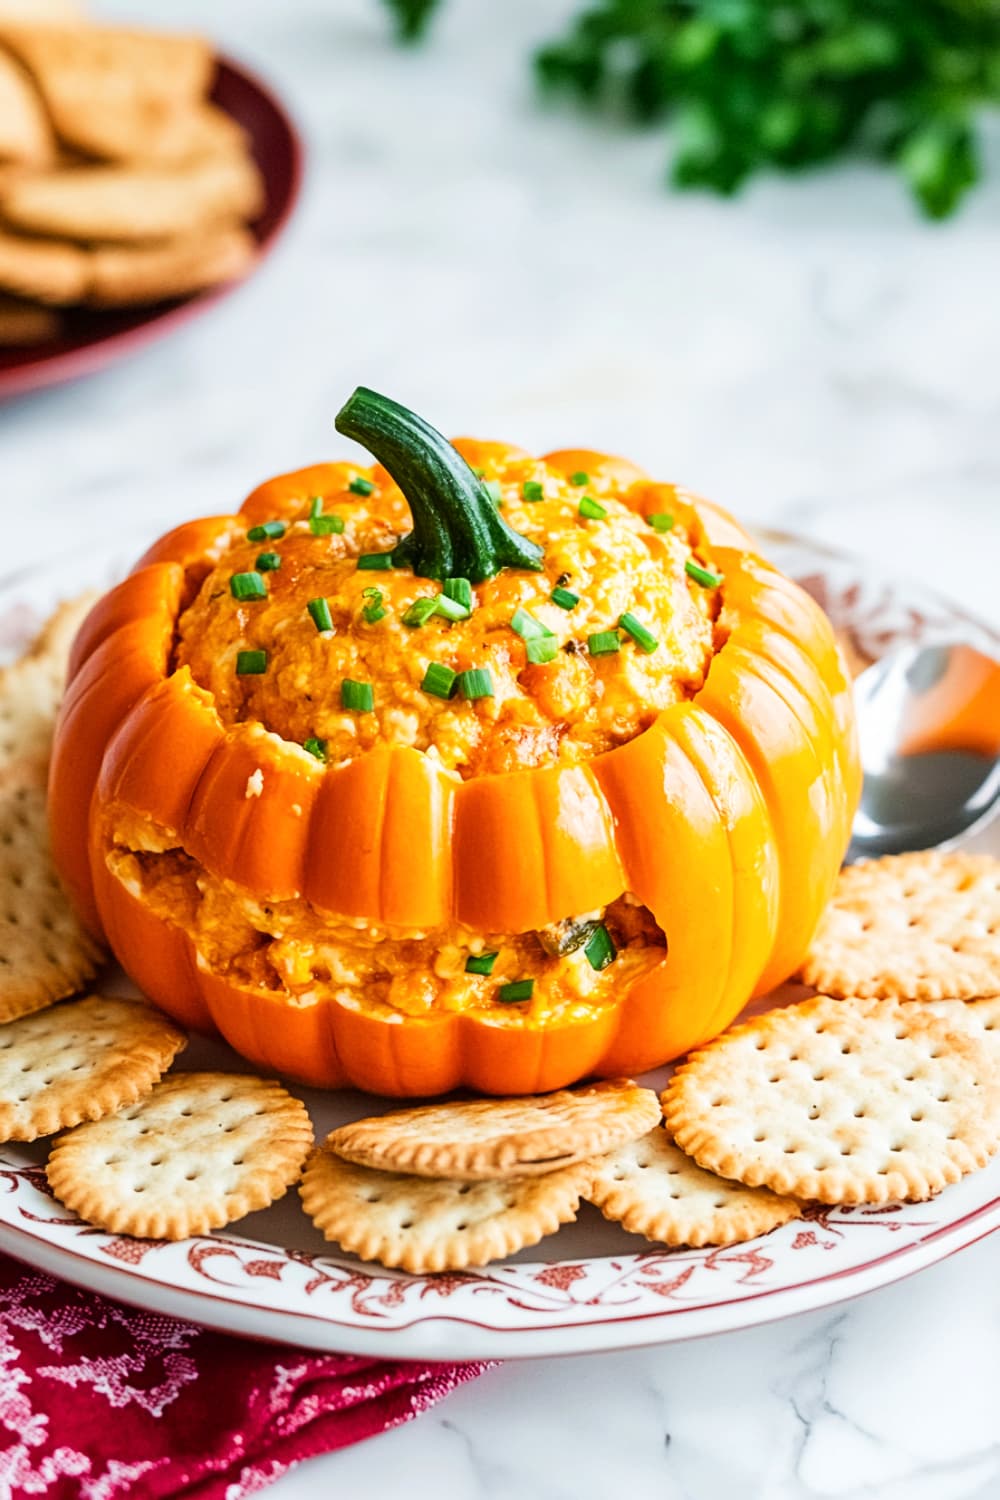
To achieve the iconic Pumpkin Shaped Cheese Ball, chill the cheese mixture for at least an hour to firm it up before shaping. Use plastic wrap to help mold the ball and create the pumpkin ridges with the back of a spoon. For the stem, an green bell pepper works great, but a zucchini stem or celery stalk can also add a creative touch. - Customizing the Coating:
Crushed nacho chips give a vibrant orange color and a satisfying crunch, but for a healthier or allergy-friendly version, substitute with roasted pumpkin seeds or crushed almonds. For a Halloween twist, consider adding black sesame seeds or edible glitter to give the dish a spooky flair. - Balancing Flavor with Heat:
If you’re using jalapeños in the Pumpkin Cheese Ball Recipe, remember that the seeds pack the most heat. For a more family-friendly version, remove the seeds or use roasted red peppers for a mild flavor. You can also add a pinch of cayenne pepper for those who love a spicy kick. - Serving at the Right Temperature:
Let the cheese ball sit out for about 10-15 minutes before serving. This ensures that it softens slightly and is easier to spread on crackers or vegetables without losing its shape.
FAQs About the Pumpkin Shaped Cheese Ball
Q1: Can I make the cheese ball ahead of time?
- Yes! The Pumpkin Cheese Ball Recipe can be made up to two days in advance. Store it in the fridge wrapped in plastic wrap. Wait to add the coating (like crushed chips) until just before serving to keep it crunchy.
Q2: What are some gluten-free options for the coating?
- You can use gluten-free tortilla chips, roasted pumpkin seeds, or crushed gluten-free crackers. These alternatives provide great texture and are perfect for those with dietary sensitivities.
Q3: Can I freeze the cheese ball?
- Freezing is not recommended as the texture of the cream cheese may change and become grainy upon thawing. However, you can store it in the refrigerator for up to 3 days.
Q4: What can I serve alongside the cheese ball?
- Serve with an assortment of crackers, pretzels, and fresh vegetables like celery, carrots, and bell peppers. You can also pair it with toasted bread or whole-grain crackers for a healthier option.
Q5: How do I adjust the spiciness?
- To reduce the heat, omit the jalapeños or substitute them with milder ingredients like roasted red peppers. For extra spice, leave the jalapeño seeds in or add a pinch of cayenne pepper.
Closing Thoughts
This Pumpkin Shaped Cheese Ball is a fun, festive addition to your holiday spread, whether you’re serving it as Thanksgiving Snacks or a centerpiece for Halloween Treats And Appetizers.
It’s easy enough for beginners but versatile enough for more experienced cooks to get creative with ingredients and presentation.
I’d love to hear how your version turned out—feel free to share your experience in the comments or tag me on social media!
Whether you followed the recipe exactly or added your own twist, I’m excited to see your delicious results. Happy cooking!
Pumpkin Shaped Cheese Ball Recipe
Ingredients
- 8 oz 225g cream cheese, softened (or plant-based)
- 2 cups 200g shredded sharp cheddar (or dairy-free)
- 1 tbsp 15g Greek yogurt (or dairy-free)
- 1 tsp garlic powder
- 1 tsp onion powder
- 1 tsp smoked paprika
- 1 small jalapeño finely chopped (optional)
- ½ cup 50g crushed nacho cheese chips (or roasted pumpkin seeds)
- 1 small orange bell pepper stem for garnish
- Fresh parsley or chives for garnish
Instructions
Step 1: Prepare the Cheese Mixture
- In a large mixing bowl, combine the softened cream cheese, shredded cheddar, Greek yogurt, garlic powder, onion powder, and smoked paprika. If you're using jalapeño, mix that in now. Using a spatula, mix until smooth and well-blended.
Step 2: Shape Your Cheese Ball
- Scoop the cheese mixture onto a large piece of plastic wrap. Form it into a round ball, using your hands to gently shape it. Once it’s in a rough ball shape, wrap it tightly in the plastic wrap.
Step 3: Chill the Cheese Ball
- Place the wrapped cheese ball in the fridge to chill for at least 1 hour. This will help the flavors meld together and firm up the texture, making it easier to decorate later.
Step 4: Add the Pumpkin Coating
- After the cheese ball has chilled, unwrap it and gently press the crushed nacho-flavored chips (or roasted pumpkin seeds) all around the outside to create a vibrant, orange Pumpkin Cheese Ball Doritos crust.
Step 5: Create the Pumpkin Look
- Use the back of a spoon to gently press lines into the cheese ball to mimic the ridges of a pumpkin. Place the green bell pepper stem on top to complete the look.
Step 6: Garnish and Serve
- Sprinkle fresh parsley or chives over the top for a touch of green. Serve alongside Cheese And Crackers, sliced vegetables like carrots and celery, or even add some fun Halloween Party Vegetables for color!
