15 Romantic Cake Recipes to Sweeten Up Your Valentine’s Day
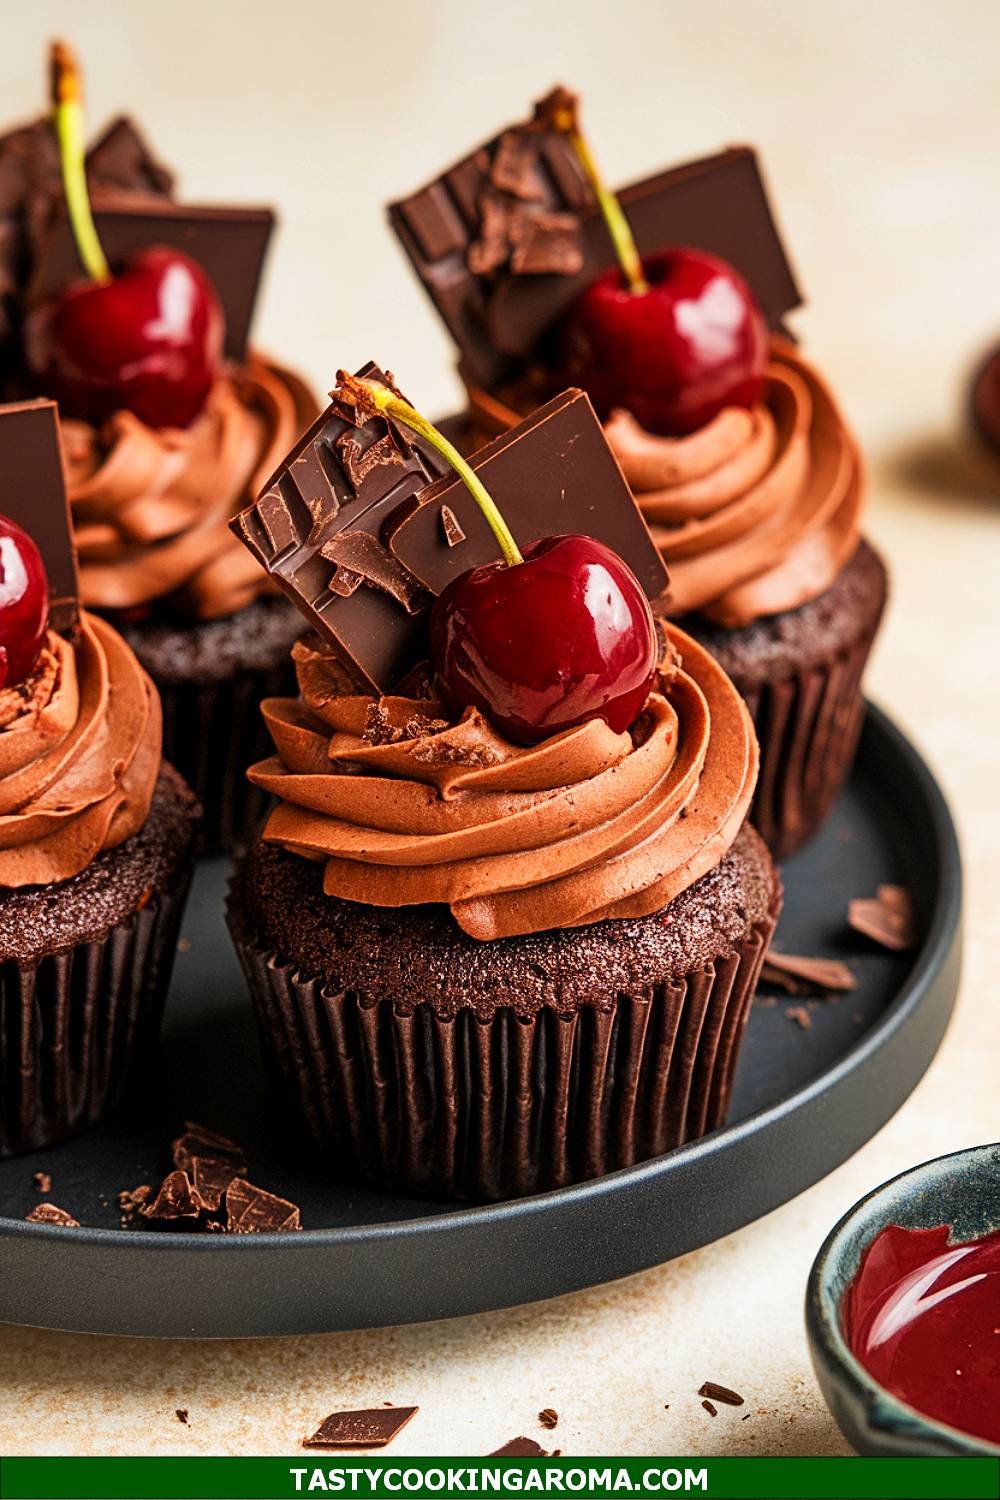
Valentine’s Day is just around the corner, and if you’re looking for creative and easy Valentines Cake Ideas, you’re in the right place!
Forget the idea that baking has to be complicated—these recipes for Pink Birthday Cakes, Torte Cupcakes, or even a dreamy Heart Cake DIY are as fun as they are simple. Whether you’re surprising someone with a Valentines Cake For Him or want to indulge in a sweet treat with friends, this recipe list has you covered.
Why You’ll Love This Recipe List:
- Quick, fuss-free cakes like Dump Cakes and even compact, on-the-go desserts like Cherry Cake Pops.
- Beautiful designs that feel professional, yet are totally achievable at home (think Bolo Vintage and Vintage Birthday Cakes!).
- Recipes that prioritize flavor—like buttery White Cherry Cake or velvety Red Velvet Cherry Cake.
- If you skip these, you could miss out on cakes so good they’re basically edible love letters!
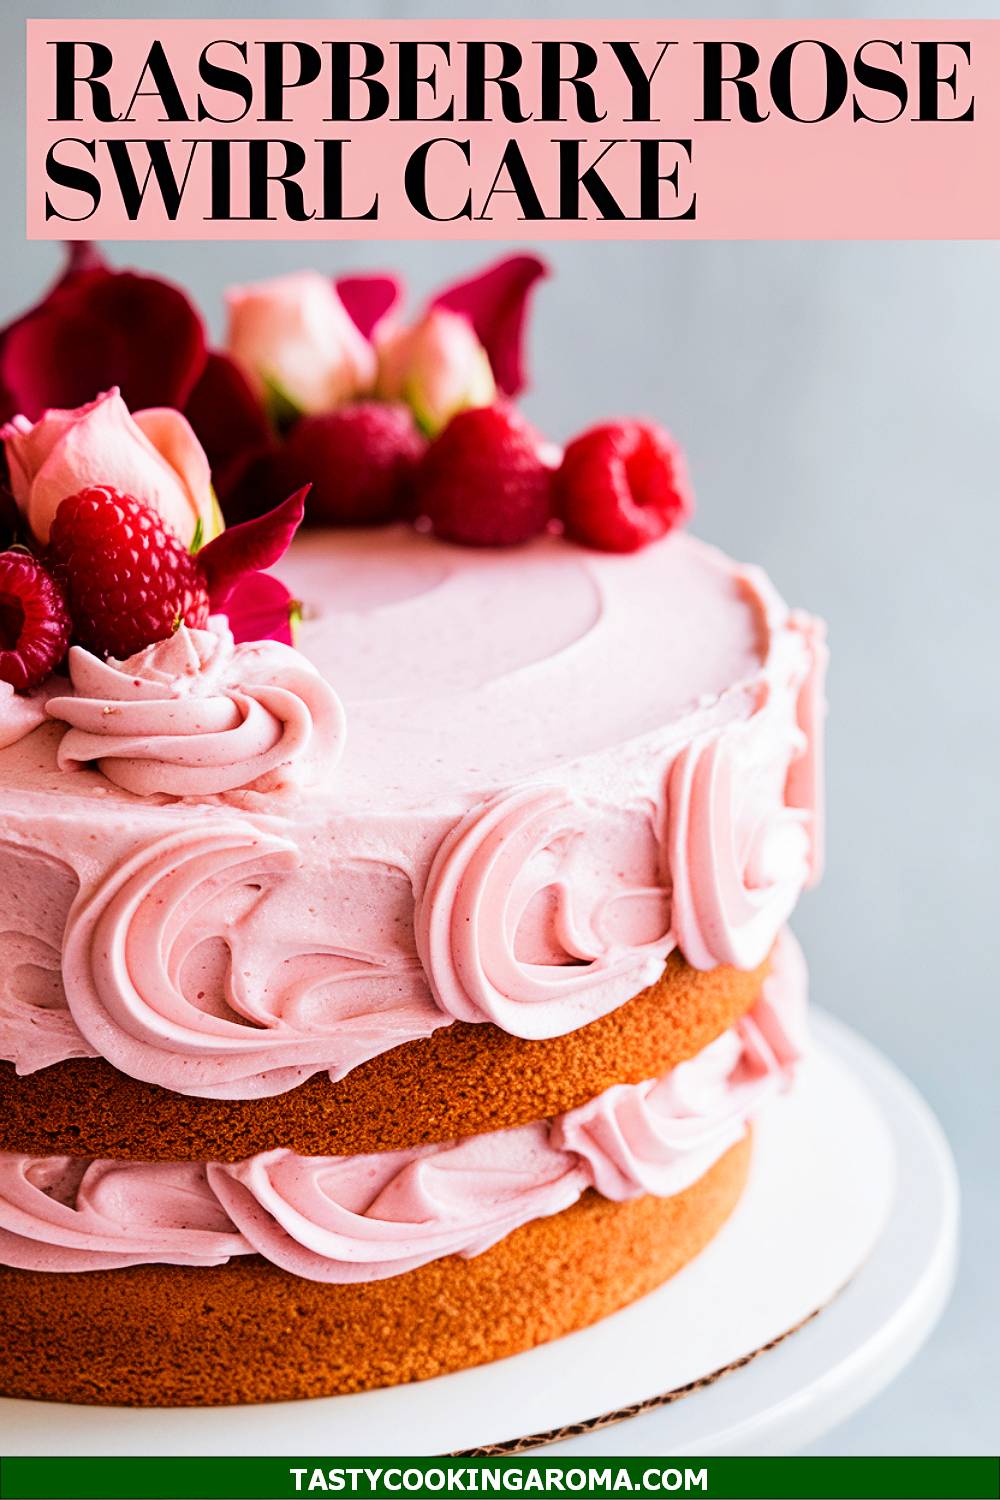
Raspberry Rose Swirl Cake
This Raspberry Rose Swirl Cake is a showstopper with its beautiful pink swirls and delicate floral notes. The blend of tart raspberries and subtle rose flavor makes it a perfect Valentine’s Day treat that feels light yet indulgent. It’s surprisingly easy to make, and the marbled design always gets compliments! Whether you’re baking for a romantic dinner or a small gathering, this cake adds an elegant touch to the celebration.
Serving Size: 8 servings
Time Needed: 1 hour 15 minutes
Ingredients
- 2 ½ cups all-purpose flour
- 1 teaspoon baking powder
- ½ teaspoon baking soda
- ½ teaspoon salt
- 1 cup unsalted butter, softened
- 1 ¾ cups granulated sugar
- 4 large eggs
- 1 teaspoon vanilla extract
- ½ cup raspberry puree (strained)
- ½ teaspoon rose water
- ¾ cup whole milk
- Pink food coloring (optional)
Instructions
- Preheat your oven to 350°F (175°C) and grease two 8-inch round cake pans. Line the bottoms with parchment paper for easy release.
- In a medium bowl, whisk together the flour, baking powder, baking soda, and salt. Set aside.
- In a large bowl, cream the butter and sugar until light and fluffy. Beat in the eggs one at a time, then add the vanilla extract.
- Mix the raspberry puree with the rose water in a small bowl. Add pink food coloring if you want a more vibrant swirl.
- Alternate adding the dry ingredients and milk to the butter mixture, starting and ending with the dry ingredients. Divide the batter into two bowls, stirring the raspberry-rose mixture into one of them.
- Spoon dollops of both batters into the prepared pans, then use a knife to gently swirl them together for a marbled effect.
- Bake for 30–35 minutes or until a toothpick inserted into the center comes out clean. Cool completely before frosting or serving.
Quick Pros of the Recipe
- Beautiful marbled design that looks professional.
- Light and fragrant flavor from rose water and raspberries.
- Perfect for Valentine’s Day or any romantic occasion.
- Customizable with different colors or flavors.
Ingredient Substitutions or Customization Ideas: Swap the raspberry puree for strawberry or blackberry puree for a different fruit flavor. If you don’t have rose water, a splash of almond extract works as a lovely substitute.
Cooking Tips and Tricks: Be gentle when swirling the batters to avoid overmixing. For extra flair, top the cake with fresh raspberries and edible rose petals.
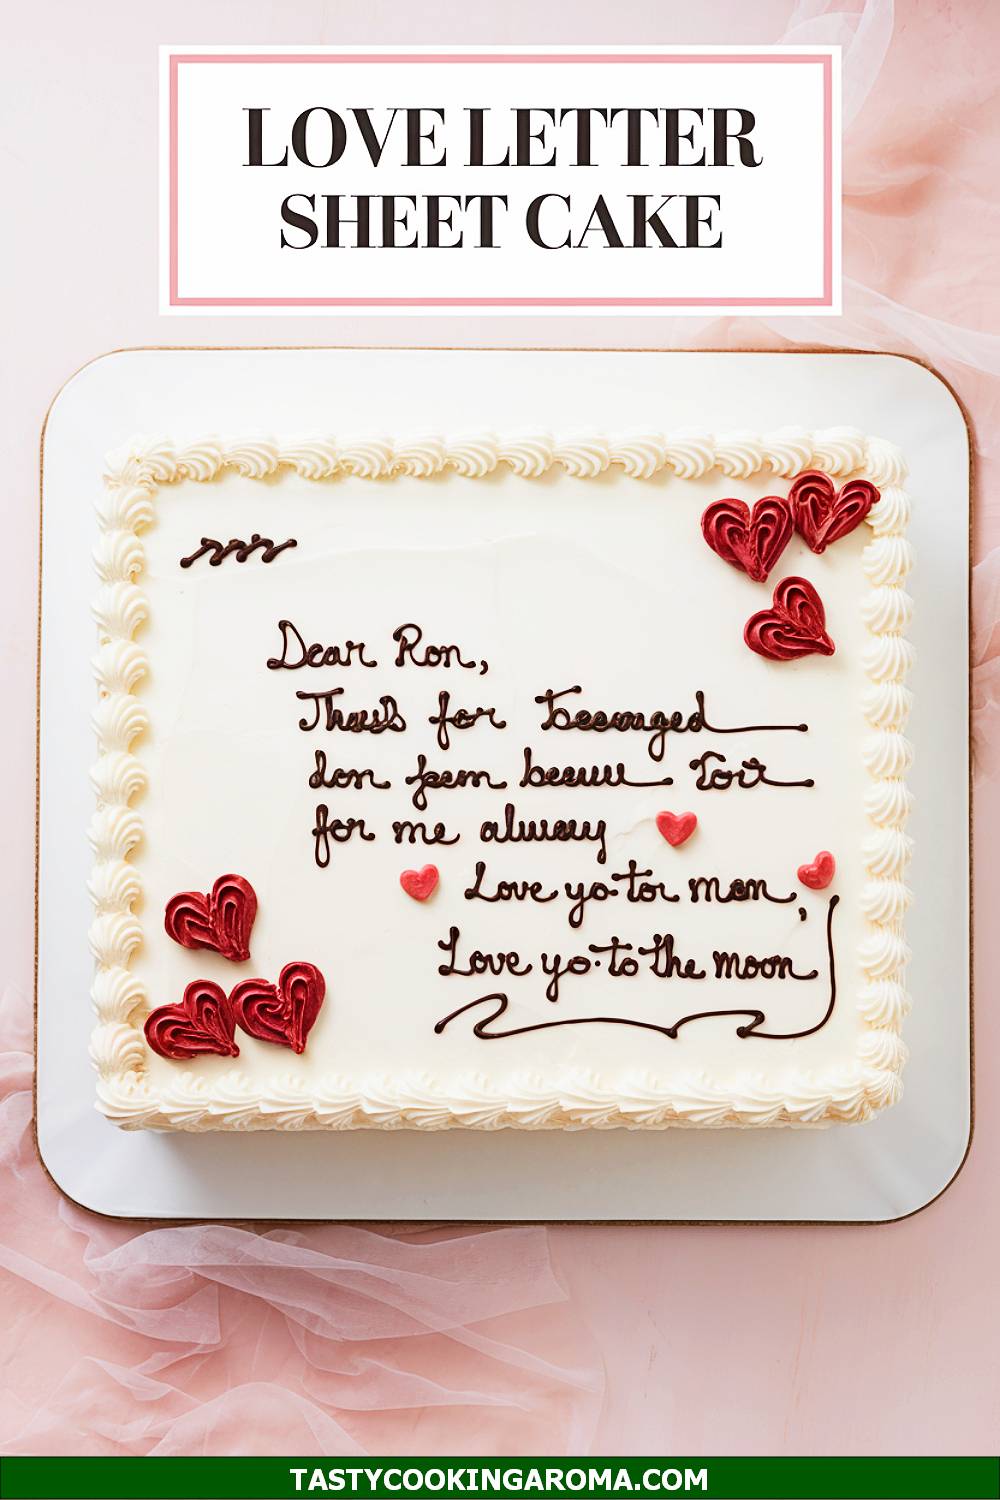
Love Letter Sheet Cake
Imagine turning a simple sheet cake into a personalized love letter, and that’s exactly what this recipe delivers! This cake is all about customization—decorate it with sweet messages, doodles, or even edible glitter to make it uniquely yours. The moist vanilla base pairs perfectly with a smooth buttercream icing that’s easy to pipe. It’s a heartfelt and fun way to say “I love you” without breaking a sweat.
Serving Size: 12 servings
Time Needed: 1 hour
Ingredients
- 2 ¾ cups all-purpose flour
- 1 tablespoon baking powder
- ¾ teaspoon salt
- 1 cup unsalted butter, softened
- 2 cups granulated sugar
- 4 large eggs
- 1 tablespoon vanilla extract
- 1 cup whole milk
- Your favorite buttercream frosting
- Gel food coloring for decoration
- Edible markers (optional)
Instructions
- Preheat your oven to 350°F (175°C). Grease and line a 9×13-inch rectangular cake pan with parchment paper.
- In a medium bowl, whisk together the flour, baking powder, and salt. Set aside.
- In a large bowl, cream the butter and sugar until fluffy, then beat in the eggs one at a time. Stir in the vanilla extract.
- Alternate adding the dry ingredients and milk to the butter mixture, starting and ending with the dry ingredients. Pour the batter into the prepared pan and level the top with a spatula.
- Bake for 35–40 minutes or until a toothpick inserted in the center comes out clean. Let the cake cool completely before decorating.
- Frost the cake with buttercream and use gel food coloring or edible markers to write messages and draw designs. Get creative!
Quick Pros of the Recipe
- Customizable for personal messages and designs.
- Simple yet impressive presentation.
- Moist vanilla cake that’s universally loved.
- Perfect for beginners or kids to help decorate.
Ingredient Substitutions or Customization Ideas: Use chocolate cake instead of vanilla for a richer flavor. Dairy-free milk and vegan butter can easily make this recipe suitable for vegans.
Cooking Tips and Tricks: Chill the cake for 15 minutes after frosting to make decorating easier. Use a toothpick to lightly sketch your designs before committing with frosting or markers.
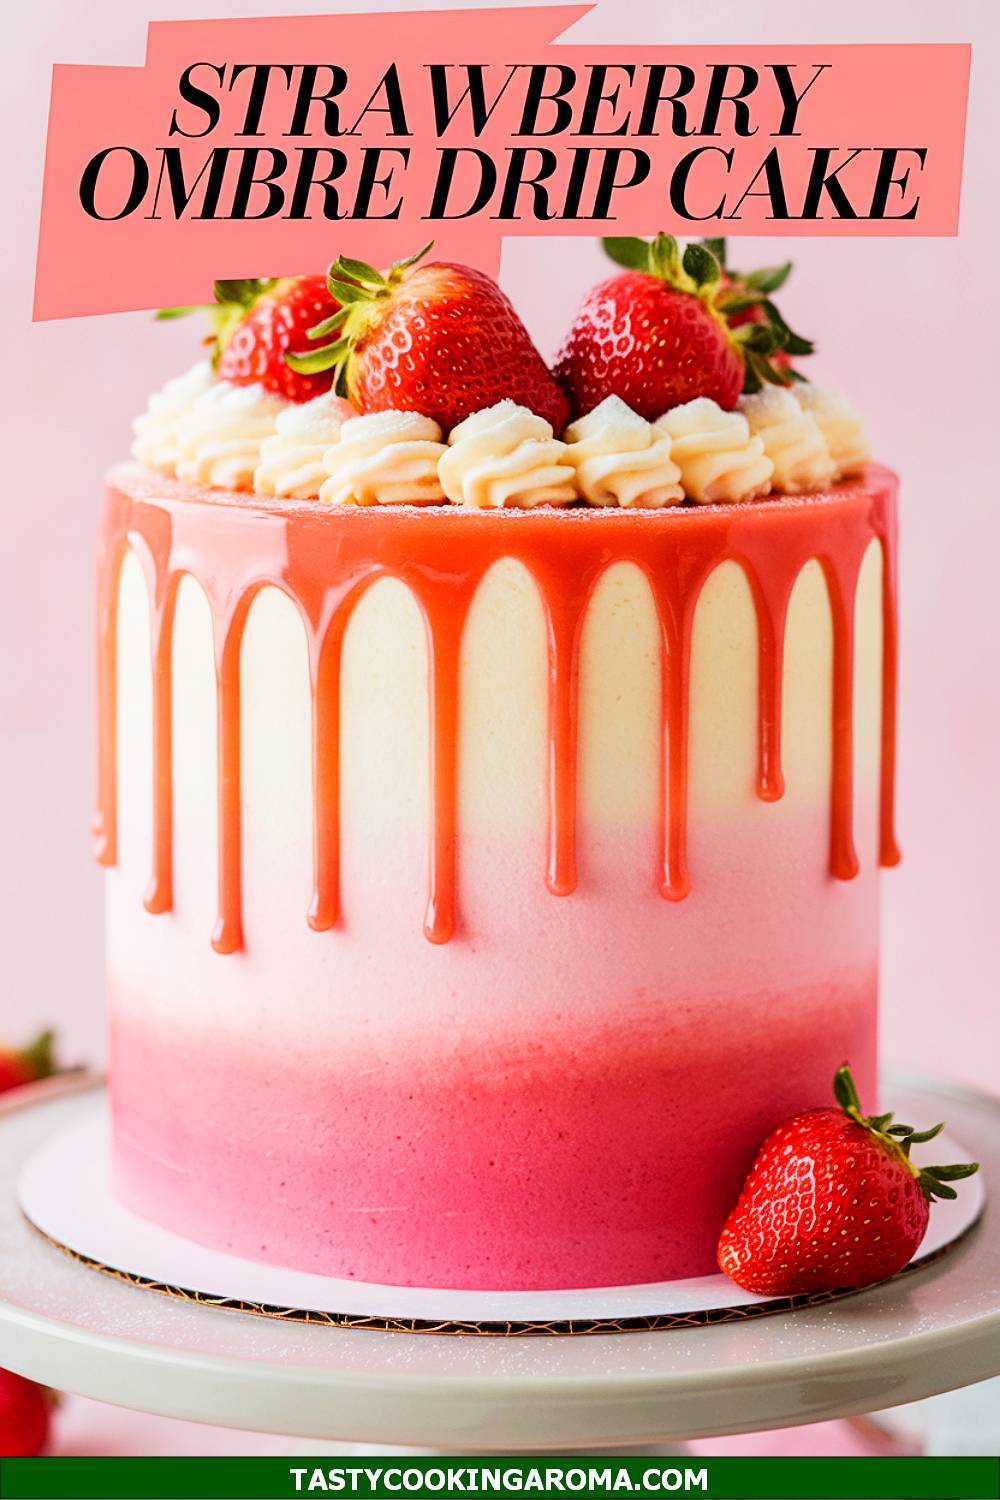
Strawberry Cream Ombre Drip Cake
If you want a cake that screams “Valentine’s Day,” the Strawberry Cream Ombre Drip Cake is the one. It features soft, pink ombre layers that are as delicious as they are beautiful. The light strawberry flavor in both the cake and cream frosting pairs perfectly with the white chocolate drip on top. This cake is a little more advanced but totally worth the effort for a special occasion.
Serving Size: 10 servings
Time Needed: 2 hours
Ingredients
- 2 ¾ cups all-purpose flour
- 1 tablespoon baking powder
- ½ teaspoon salt
- 1 cup unsalted butter, softened
- 2 cups granulated sugar
- 4 large eggs
- 1 teaspoon vanilla extract
- ½ cup strawberry puree
- 1 cup whole milk
- Pink food coloring (optional)
- White chocolate ganache (for the drip)
- Fresh strawberries for garnish
Instructions
- Preheat your oven to 350°F (175°C) and grease three 6-inch round cake pans. Line the bottoms with parchment paper.
- In a medium bowl, whisk together the flour, baking powder, and salt. Set aside.
- Cream the butter and sugar in a large bowl until fluffy. Add the eggs one at a time, followed by the vanilla extract and strawberry puree.
- Alternate adding the dry ingredients and milk to the wet mixture, starting and ending with the dry ingredients. Divide the batter evenly into three bowls, tinting each a different shade of pink for the ombre effect.
- Pour the batters into the prepared pans and bake for 25–30 minutes or until a toothpick comes out clean. Let the layers cool completely.
- Frost the cake with strawberry cream frosting, starting with the darkest layer on the bottom and working up to the lightest. Drizzle white chocolate ganache over the top and decorate with fresh strawberries.
Quick Pros of the Recipe
- Stunning ombre design with a professional look.
- Delicious combination of strawberry and white chocolate.
- Perfect for Valentine’s Day or anniversaries.
- Customizable with different colors or fruit flavors.
Ingredient Substitutions or Customization Ideas: Use raspberry puree instead of strawberry for a tangier flavor. Add edible glitter or sprinkles for extra flair.
Cooking Tips and Tricks: Chill the cake layers before frosting to make stacking easier. Use a spoon to control the drip effect for a clean look.
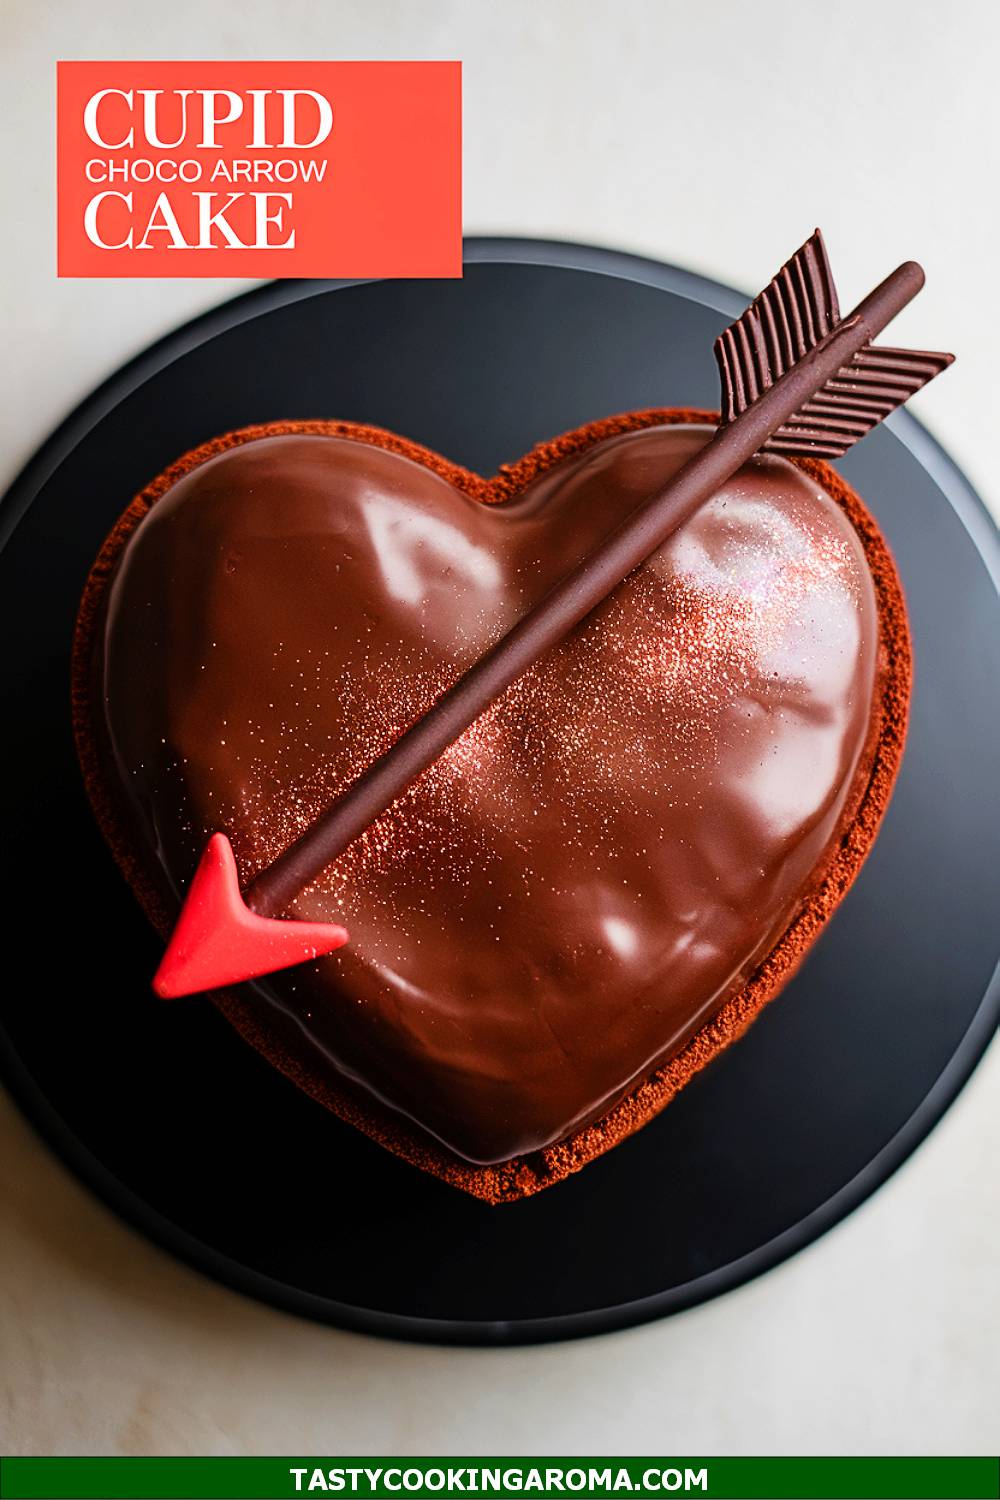
Cupid’s Chocolate Arrow Cake
This cake is perfect for anyone who loves chocolate and a touch of whimsy! The rich, moist chocolate layers are paired with creamy frosting and decorated with a playful cupid’s arrow design that screams Valentine’s Day. It’s not overly complicated to make, yet the results look like something straight out of a bakery. Trust me, this is a showstopper for a romantic dinner or a fun Valentine’s gathering.
Serving Size: 6 servings
Time Needed: 1 hour 30 minutes
Ingredients
- 1 ½ cups all-purpose flour
- ¾ cup cocoa powder
- 1 ½ teaspoons baking powder
- ½ teaspoon baking soda
- 1 cup granulated sugar
- ½ cup brown sugar
- 2 large eggs
- ¾ cup whole milk
- ½ cup vegetable oil
- 1 teaspoon vanilla extract
- 1 cup boiling water
- Chocolate frosting (store-bought or homemade)
- Fondant or candy for cupid’s arrow decoration
Instructions
- Preheat your oven to 350°F (175°C) and grease two 8-inch round cake pans. Line the bottoms with parchment paper for easier removal.
- In a large mixing bowl, sift together the flour, cocoa powder, baking powder, and baking soda. Stir in the granulated sugar and brown sugar.
- In a separate bowl, whisk together the eggs, milk, vegetable oil, and vanilla extract. Gradually mix the wet ingredients into the dry ingredients until smooth.
- Slowly add the boiling water to the batter, stirring constantly. The batter will be thin, but that’s normal—it helps create a moist texture.
- Divide the batter evenly between the prepared pans and bake for 30-35 minutes, or until a toothpick inserted into the center comes out clean.
- Allow the cakes to cool completely before frosting. Decorate with chocolate frosting and add fondant or candy to create a cupid’s arrow across the top.
Quick Pros of the Recipe
- Rich, chocolatey flavor perfect for Valentine’s Day.
- Fun and creative cupid’s arrow design.
- Moist texture thanks to the boiling water addition.
- Easy to customize with different frosting or decorations.
Ingredient Substitutions or Customization Ideas: Swap whole milk with almond milk for a dairy-free version. You can also use red or pink frosting for a more festive Valentine’s look.
Cooking Tips and Tricks: Freeze the cake layers for 20 minutes before frosting to make them easier to handle. Use a piping bag for clean and precise cupid’s arrow details.
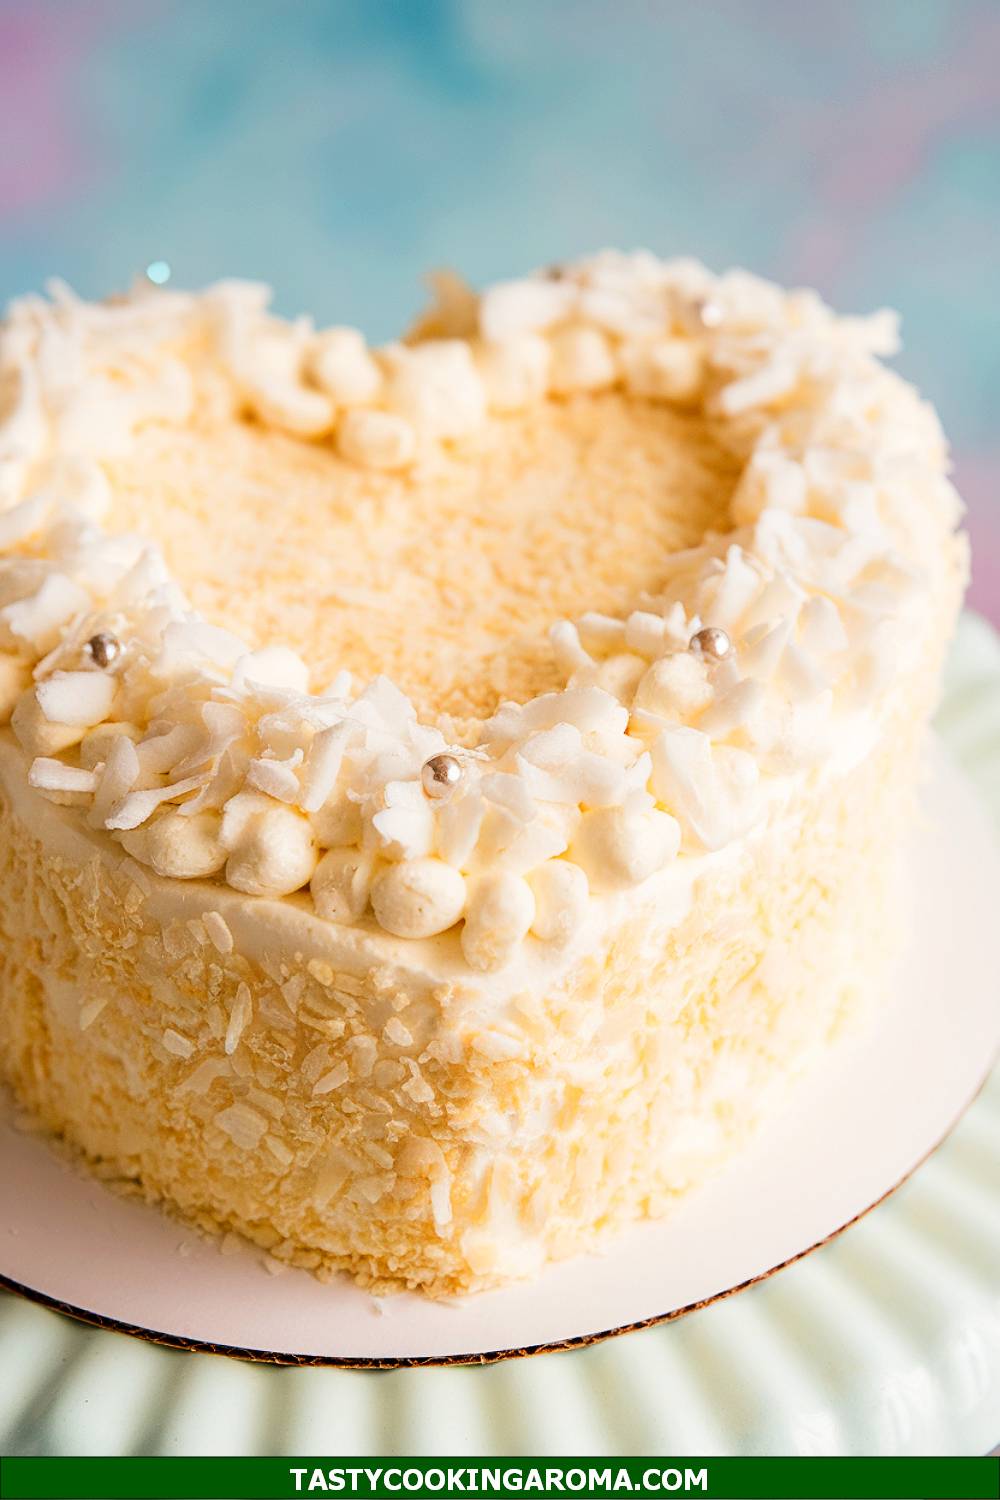
Heart-Shaped Coconut Cloud Cake
If you’re dreaming of a light and fluffy dessert, this heart-shaped coconut cloud cake is a must-try. It’s airy, delicately sweet, and covered in shredded coconut for a snowy, romantic vibe. The heart shape makes it ideal for Valentine’s Day, and the simplicity of its flavors ensures it will please just about anyone. Plus, it’s easy to make with a basic heart-shaped pan!
Serving Size: 6-8 servings
Time Needed: 1 hour
Ingredients
- 1 ¾ cups all-purpose flour
- 1 teaspoon baking powder
- ½ teaspoon baking soda
- ½ cup unsalted butter, softened
- 1 cup granulated sugar
- 2 large eggs
- 1 teaspoon vanilla extract
- ¾ cup coconut milk
- 1 cup shredded coconut (for topping)
- Whipped cream or cream cheese frosting
Instructions
- Preheat your oven to 350°F (175°C) and grease a heart-shaped cake pan.
- In a medium bowl, whisk together the flour, baking powder, and baking soda. Set aside.
- In a large bowl, cream the butter and sugar until light and fluffy. Add the eggs one at a time, beating well after each addition. Stir in the vanilla extract.
- Alternately add the dry ingredients and coconut milk to the butter mixture, beginning and ending with the dry ingredients. Mix until just combined.
- Pour the batter into the prepared pan and bake for 25-30 minutes, or until a toothpick inserted into the center comes out clean.
- Let the cake cool completely before frosting with whipped cream or cream cheese frosting. Sprinkle shredded coconut generously over the top and sides.
Quick Pros of the Recipe
- Light and fluffy texture with a subtle coconut flavor.
- Heart shape makes it perfect for Valentine’s Day.
- Simple ingredients that are easy to find.
- Great for those who prefer less sugary desserts.
Ingredient Substitutions or Customization Ideas: Use almond or oat milk instead of coconut milk if you prefer. Add a layer of fruit jam between the cake layers for extra flavor.
Cooking Tips and Tricks: Toast the shredded coconut lightly before adding it to the cake for a nutty flavor boost. Be sure not to overmix the batter to keep the cake light and airy.
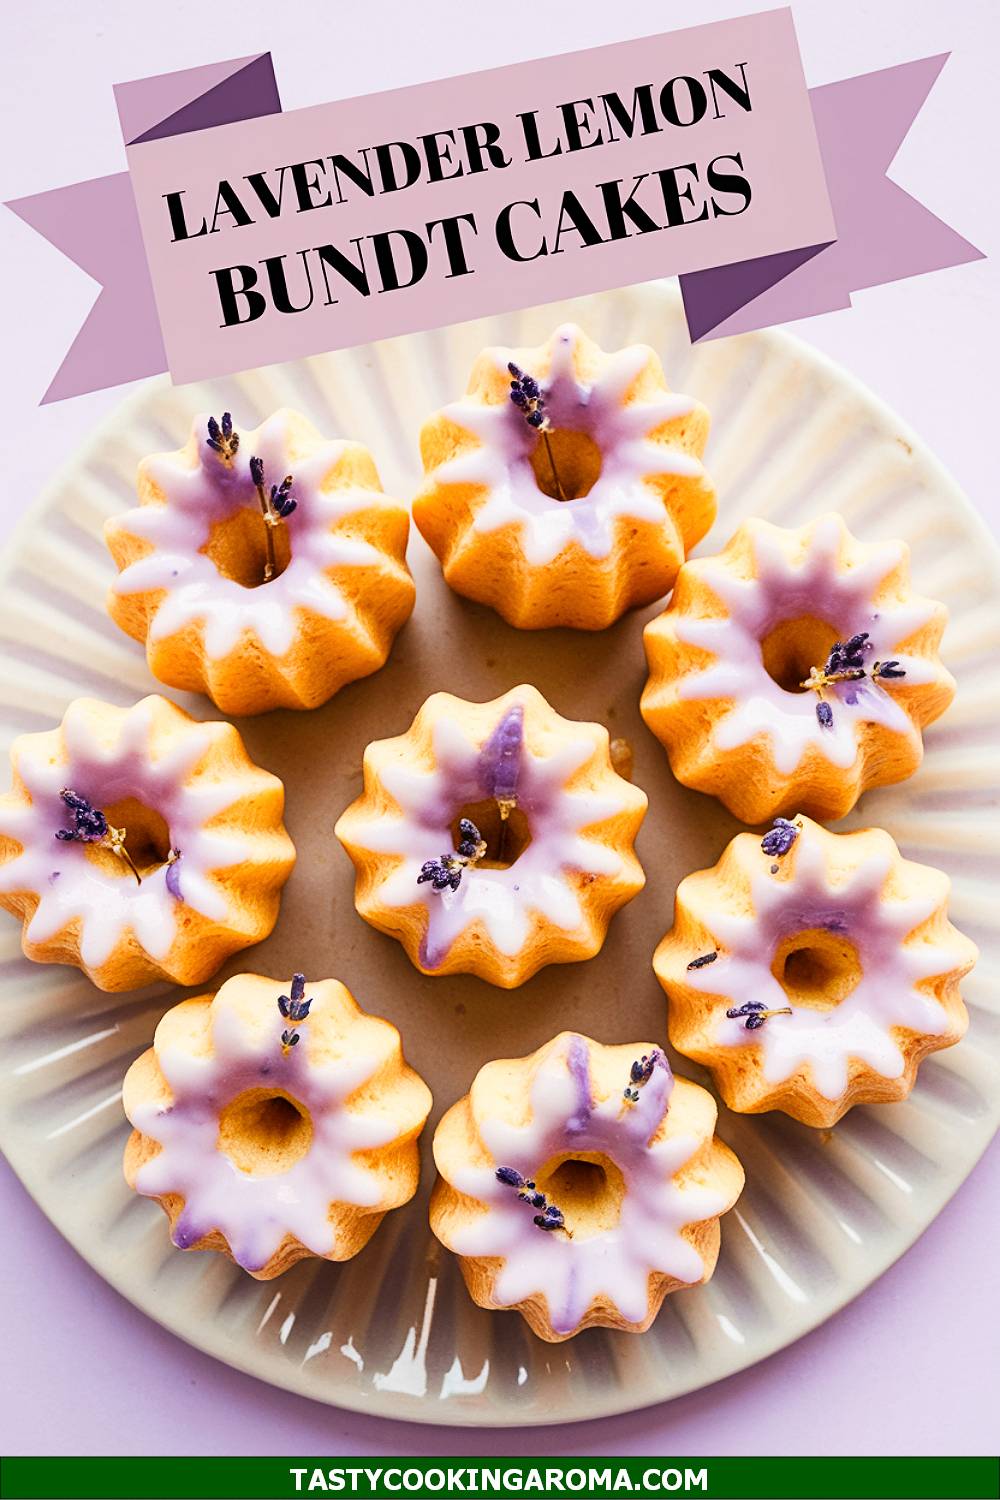
Lavender Lemon Mini Bundt Cakes
These lavender lemon mini bundt cakes are tiny bites of heaven. The floral notes from the lavender pair beautifully with the bright citrusy lemon flavor, making these cakes both refreshing and unique. Their small size makes them perfect for Valentine’s Day gifts or individual servings at a romantic dinner. Plus, they look absolutely adorable and are sure to impress anyone who sees them!
Serving Size: 6 mini bundt cakes
Time Needed: 1 hour 15 minutes
Ingredients
- 1 ½ cups all-purpose flour
- 1 teaspoon baking powder
- ½ teaspoon salt
- ½ cup unsalted butter, softened
- ¾ cup granulated sugar
- 2 large eggs
- 1 tablespoon dried culinary lavender
- 1 teaspoon lemon zest
- 2 tablespoons fresh lemon juice
- ½ cup whole milk
- Powdered sugar for dusting
Instructions
- Preheat your oven to 350°F (175°C) and grease a mini bundt cake pan.
- In a medium bowl, whisk together the flour, baking powder, and salt. Set aside.
- In a large bowl, cream the butter and sugar until light and fluffy. Beat in the eggs one at a time, followed by the lavender, lemon zest, and lemon juice.
- Alternately add the dry ingredients and milk to the butter mixture, mixing until just combined.
- Fill each mini bundt mold about ¾ full with batter. Bake for 20-25 minutes, or until a toothpick inserted into the center comes out clean.
- Let the cakes cool in the pan for 10 minutes before transferring them to a wire rack to cool completely. Dust with powdered sugar before serving.
Quick Pros of the Recipe
- Unique combination of lavender and lemon flavors.
- Perfectly portioned individual servings.
- Visually stunning presentation.
- Great for gifting or sharing.
Ingredient Substitutions or Customization Ideas: Swap lavender with chamomile for a different floral twist. Add a lemon glaze on top for extra sweetness and shine.
Cooking Tips and Tricks: Use a fine mesh strainer to sprinkle powdered sugar evenly over the cakes. Make sure to grease the mini bundt pan thoroughly to prevent sticking.
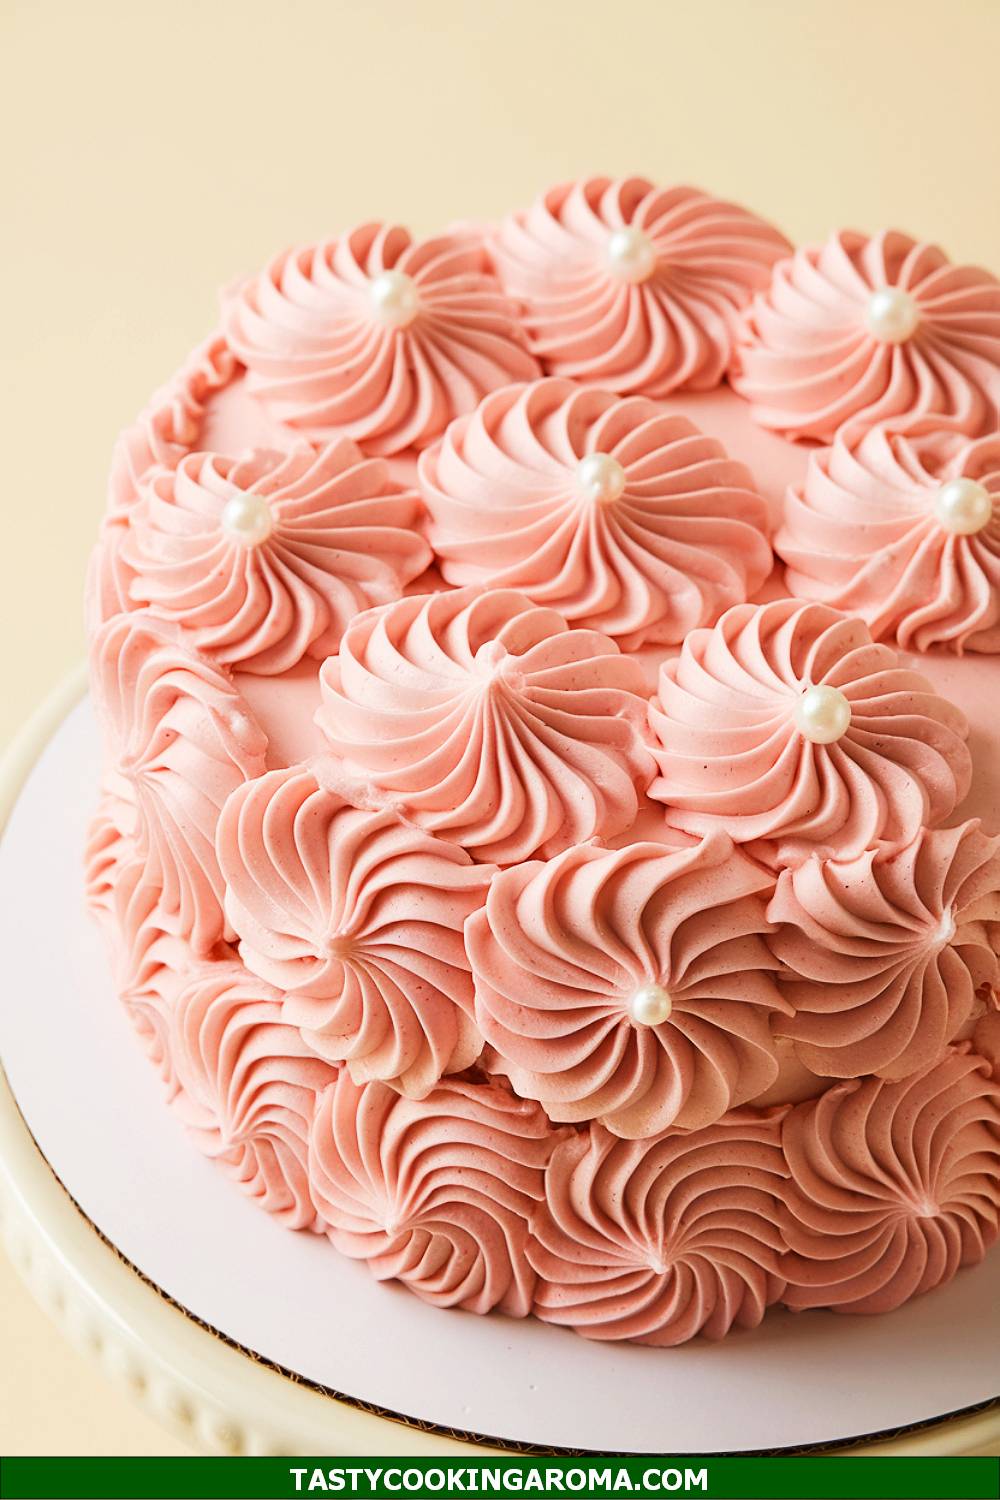
Blush Pink Pinwheel Cake with Edible Pearls
This cake is an absolute showstopper! The blush pink swirls create a dreamy pinwheel effect that’s both elegant and playful, making it perfect for Valentine’s Day or a romantic celebration. The edible pearls add a touch of sophistication, and the soft, fluffy cake layers melt in your mouth. It’s surprisingly easy to make, but it looks like something straight out of a bakery window.
Serving Size: 8 servings
Time Needed: 1 hour 30 minutes
Ingredients
- 2 1/2 cups all-purpose flour
- 2 tsp baking powder
- 1/2 tsp salt
- 1 cup unsalted butter, softened
- 1 3/4 cups granulated sugar
- 4 large eggs
- 1 tsp vanilla extract
- 1 cup whole milk
- Pink food coloring
- Edible pearls for decoration
Instructions
- Preheat your oven to 350°F (175°C) and grease two 9-inch round cake pans. Line the bottoms with parchment paper for easy removal.
- In a medium bowl, whisk together the flour, baking powder, and salt. Set aside.
- In a large mixing bowl, cream the butter and sugar together until light and fluffy, about 3-4 minutes. Add the eggs one at a time, mixing well after each addition, then stir in the vanilla extract.
- Alternate adding the dry ingredients and milk to the butter mixture, starting and ending with the dry ingredients. Mix until just combined.
- Divide the batter in half. Add pink food coloring to one half and mix until you get your desired shade.
- Pour both batters into the cake pans in alternating spoonfuls to create a pinwheel effect. Use a knife or skewer to gently swirl the colors together.
- Bake for 25-30 minutes or until a toothpick inserted in the center comes out clean. Let the cakes cool completely before decorating.
- Frost the cake with your favorite buttercream and decorate with edible pearls for a polished finish.
Quick Pros of the Recipe
- Beautiful, eye-catching design with minimal effort.
- Customizable color palette for different occasions.
- Moist and fluffy cake texture that everyone loves.
- Edible pearls add a touch of luxury.
Ingredient Substitutions or Customization Ideas: You can swap the edible pearls for heart-shaped sprinkles for a more playful vibe. For a different flavor, substitute vanilla extract with almond or rose extract.
Cooking Tips and Tricks: Use gel food coloring for more vibrant colors without altering the batter’s consistency. Keep a light hand while swirling the colors to avoid over-mixing.
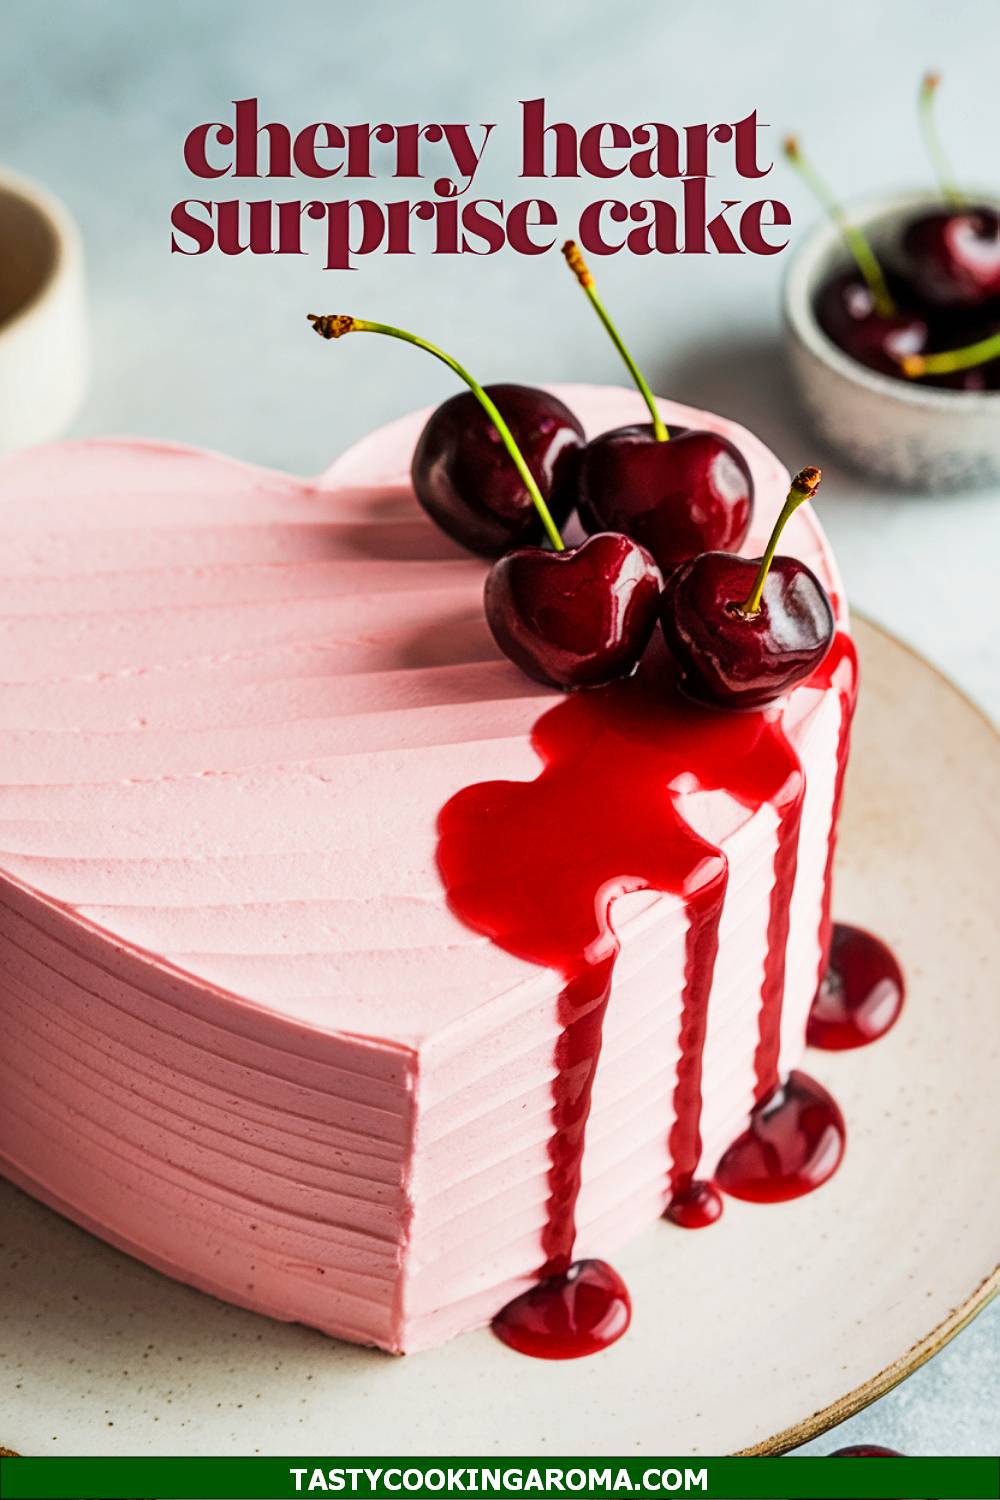
Cherry Heart Surprise Cake
This cake is a delightful surprise for anyone who loves cherries! With a hidden heart-shaped cherry layer inside, it’s perfect for a romantic Valentine’s Day treat. The combination of sweet cherries and soft vanilla cake creates a flavor explosion that’s hard to resist. Plus, the surprise inside makes it so much fun to slice into and share.
Serving Size: 8 servings
Time Needed: 2 hours
Ingredients
- 2 cups all-purpose flour
- 1 1/2 tsp baking powder
- 1/2 tsp salt
- 1 cup unsalted butter, softened
- 1 1/2 cups granulated sugar
- 4 large eggs
- 1 tsp vanilla extract
- 3/4 cup whole milk
- 1/2 cup cherry puree (from fresh or canned cherries)
- Red food coloring
Instructions
- Preheat your oven to 350°F (175°C) and grease a 9×13-inch cake pan. Line it with parchment paper for easy removal.
- In a medium bowl, whisk together the flour, baking powder, and salt. Set aside.
- In a large mixing bowl, cream the butter and sugar until light and fluffy. Add the eggs one at a time, mixing well after each addition.
- Stir in the vanilla extract, then alternate adding the dry ingredients and milk to the batter. Mix until just combined.
- Divide the batter into two bowls. Leave one plain and add the cherry puree and red food coloring to the other, stirring until evenly mixed.
- Pour the cherry batter into the prepared pan and bake for 20-25 minutes, or until a toothpick inserted in the center comes out clean. Let it cool completely, then use a heart-shaped cookie cutter to cut out hearts.
- Prepare the plain batter and pour half of it into a greased loaf pan. Arrange the cherry hearts upright in a row, then pour the remaining plain batter over them, ensuring the hearts are completely covered.
- Bake for 30-35 minutes or until a toothpick inserted in the center comes out clean. Let cool before slicing to reveal the hidden hearts!
Quick Pros of the Recipe
- Unique hidden heart design that surprises and delights.
- Sweet cherry flavor pairs wonderfully with vanilla.
- Perfect for gifting or special occasions.
- Fun and interactive to make!
Ingredient Substitutions or Customization Ideas: Use strawberry or raspberry puree instead of cherry for a different fruity twist. You can also dye the plain batter pink for an all-pink cake.
Cooking Tips and Tricks: Chill the cherry hearts slightly before placing them in the batter to help them hold their shape during baking. Use a sharp knife for clean, even slices that show off the heart design.
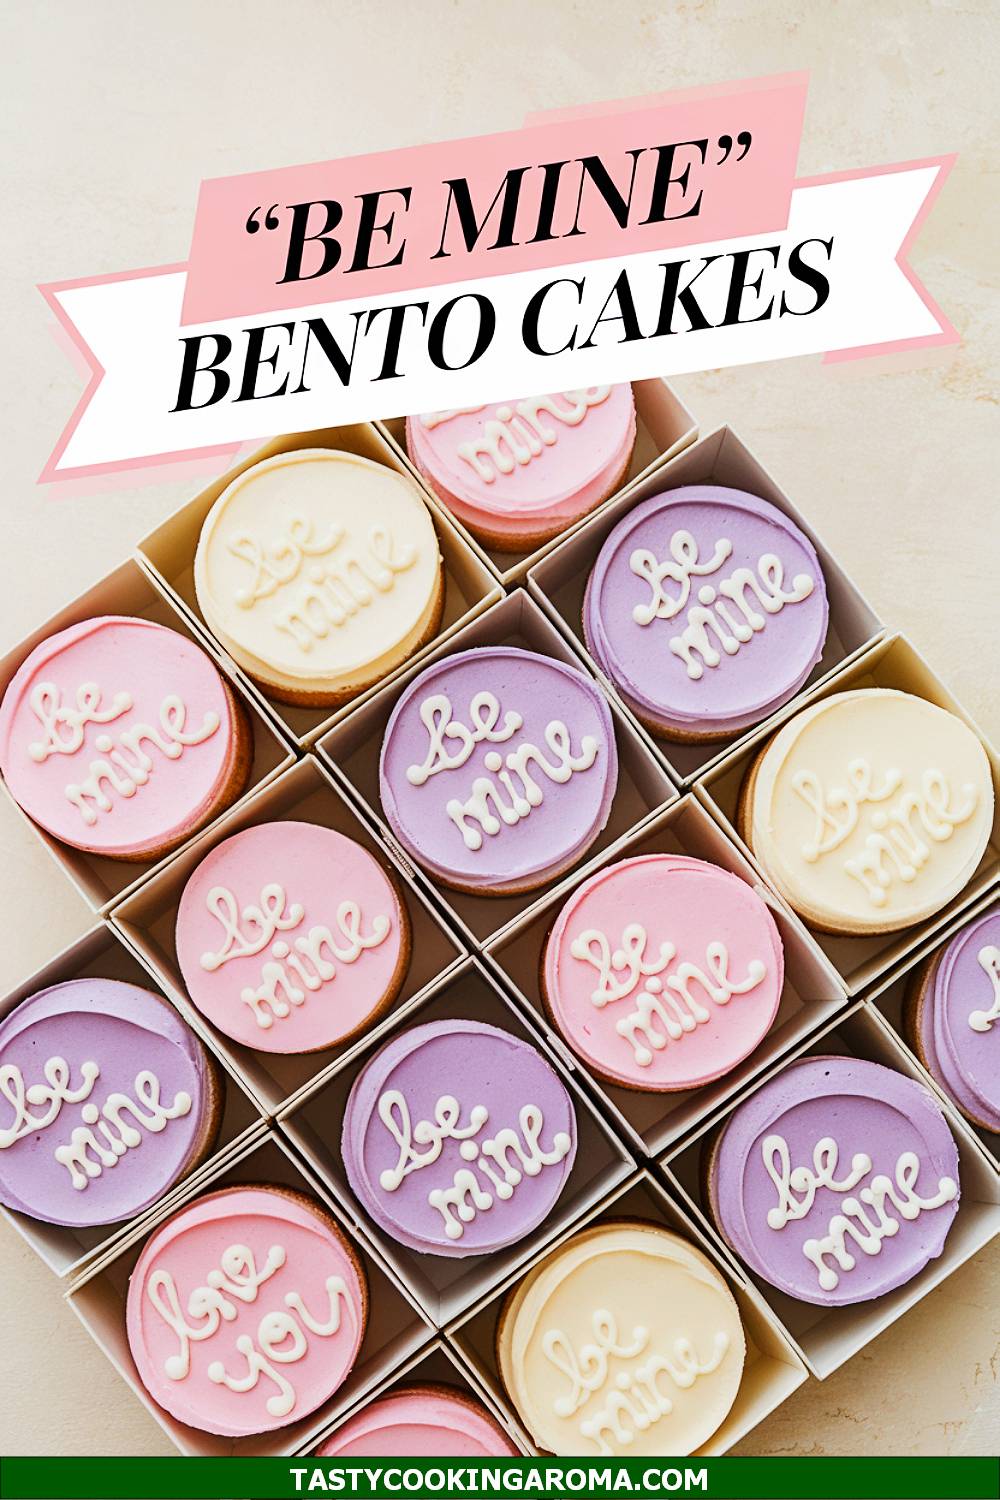
Tiny “Be Mine” Bento Cakes
These tiny bento cakes are just the cutest! They’re small, personal-sized cakes, perfect for an intimate Valentine’s Day celebration or as a thoughtful gift. The “Be Mine” message on top adds a sweet, romantic touch, and you can customize the flavors and decorations however you like. They’re also super fun to make and decorate, especially if you’re short on time but want something special.
Serving Size: 2 servings (per bento cake)
Time Needed: 1 hour
Ingredients
- 1 cup all-purpose flour
- 1/2 tsp baking powder
- 1/4 tsp salt
- 1/2 cup unsalted butter, softened
- 3/4 cup granulated sugar
- 2 large eggs
- 1 tsp vanilla extract
- 1/2 cup milk
- Buttercream frosting (store-bought or homemade)
- Gel food coloring (optional)
Instructions
- Preheat your oven to 350°F (175°C) and grease a 9×13-inch cake pan. Line with parchment paper for easy removal.
- In a medium bowl, whisk together the flour, baking powder, and salt. Set aside.
- In a large mixing bowl, cream the butter and sugar until fluffy. Add the eggs one at a time, mixing well after each addition, then stir in the vanilla extract.
- Alternate adding the dry ingredients and milk to the batter, mixing until just combined. Pour the batter into the prepared pan and bake for 20-25 minutes, or until a toothpick comes out clean.
- Once cooled, use a round cookie cutter to cut out small, circular cake layers. Stack them with frosting in between and frost the outside for a smooth finish.
- Decorate with piped designs, edible glitter, or a “Be Mine” message using a piping bag and contrasting colored frosting.
Quick Pros of the Recipe
- Adorable and personal-sized for gifting or sharing.
- Customizable flavors and decorations.
- Quick and easy to bake and assemble.
- Perfect for creative decorating fun!
Ingredient Substitutions or Customization Ideas: Swap vanilla extract with citrus zest for a zesty twist. You can also use chocolate frosting or add sprinkles for extra fun.
Cooking Tips and Tricks: Chill the cakes before frosting to make them easier to handle and decorate. Use an offset spatula for a smooth, professional-looking finish.
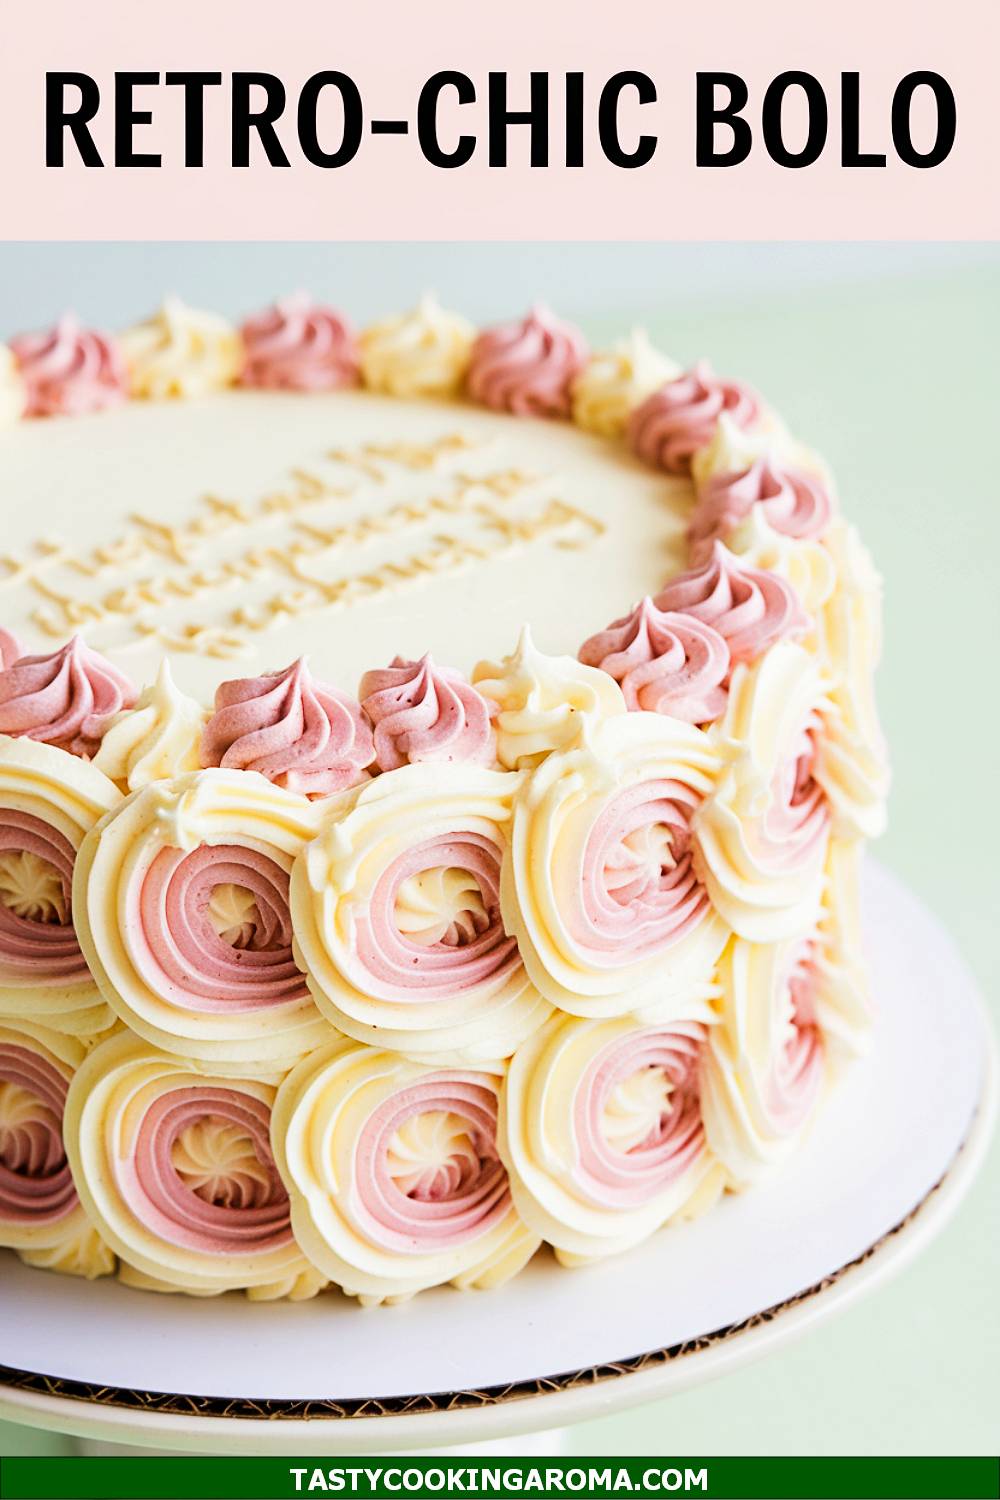
Retro-Chic Bolo with Whipped Heart Rosettes
This Retro-Chic Bolo is a charming nod to vintage-style cakes, featuring delicate whipped heart rosettes that make it perfect for Valentine’s Day or any special occasion. The pastel-colored frosting and intricate piping give it a nostalgic feel, while the soft, moist cake layers are simply irresistible. It’s surprisingly easy to decorate, making it a great choice for beginners who want to try their hand at vintage cake designs. This cake is sure to be the centerpiece of your Valentine’s table, with both its stunning look and delicious taste stealing the show.
Serving Size: 8 servings
Time Needed: 1 hour 30 minutes
Ingredients
- 2 cups all-purpose flour
- 1 ½ cups granulated sugar
- 1 cup unsalted butter, softened
- 4 large eggs
- 1 teaspoon vanilla extract
- 1 teaspoon baking powder
- ½ teaspoon baking soda
- ½ cup buttermilk
- Pastel-colored buttercream frosting (pink, white, or light blue)
Instructions
- Preheat your oven to 350°F (175°C) and grease two 8-inch round cake pans. Line the bottoms with parchment paper for easy removal.
- In a mixing bowl, cream the butter and sugar together until light and fluffy. Add the eggs one at a time, beating well after each addition, then mix in the vanilla extract.
- In a separate bowl, sift together the flour, baking powder, and baking soda. Gradually add the dry ingredients to the wet mixture, alternating with the buttermilk until fully combined.
- Divide the batter evenly between the prepared pans and bake for 25-30 minutes, or until a toothpick inserted into the center comes out clean. Let the cakes cool completely before frosting.
- Frost the cake with the pastel-colored buttercream, using a piping bag fitted with a star tip to create heart-shaped rosettes around the edges. Add any additional vintage-inspired decorations, like edible pearls or sprinkles.
Quick Pros of the Recipe
- Classic vintage aesthetic with minimal effort.
- Perfectly moist and flavorful cake layers.
- Customizable frosting colors to match any occasion.
- Beginner-friendly decorating technique.
Ingredient Substitutions or Customization Ideas: Swap the buttermilk for a dairy-free alternative like almond milk mixed with a teaspoon of vinegar if needed. You can also experiment with different frosting flavors, such as strawberry or lavender, for a unique twist.
Cooking Tips and Tricks: Chill the cake layers in the fridge for 30 minutes before frosting to prevent crumbs from mixing into your buttercream. Practice piping the rosettes on parchment paper before decorating the cake to perfect your technique.
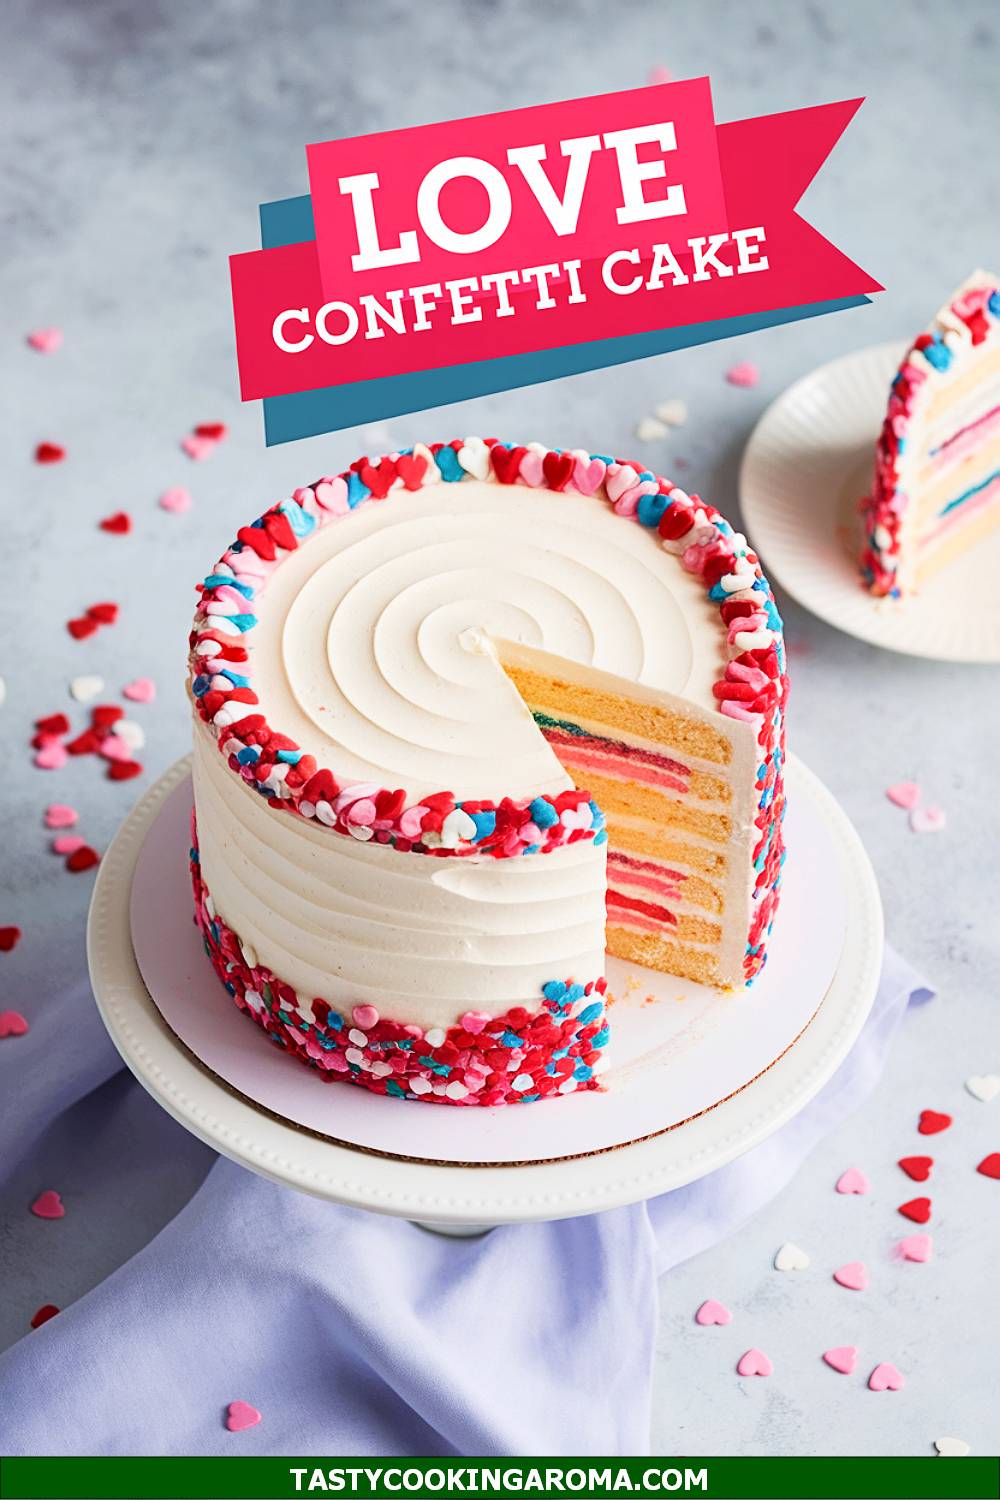
Sprinkled Valentine’s Confetti Cake
Who doesn’t love a cake bursting with colorful sprinkles? This Sprinkled Valentine’s Confetti Cake is a delightful treat that combines fluffy vanilla cake with a generous helping of Valentine-themed sprinkles folded into the batter. It’s bright, cheerful, and perfect for a casual Valentine’s Day celebration with family or friends. Plus, the sprinkle-filled batter makes baking this cake a fun activity for kids to join in on too!
Serving Size: 10 servings
Time Needed: 1 hour
Ingredients
- 2 ½ cups all-purpose flour
- 1 ¾ cups granulated sugar
- 1 cup unsalted butter, softened
- 4 large eggs
- 1 teaspoon vanilla extract
- 1 teaspoon baking powder
- ½ teaspoon baking soda
- 1 cup whole milk
- 1 cup Valentine-themed sprinkles
- Vanilla buttercream frosting
- Extra sprinkles for decoration
Instructions
- Preheat your oven to 350°F (175°C) and grease two 9-inch round cake pans. Line the bottoms with parchment paper for easy removal.
- In a large bowl, cream the butter and sugar together until fluffy. Add the eggs one at a time, beating well after each addition, then stir in the vanilla extract.
- In a separate bowl, whisk together the flour, baking powder, and baking soda. Gradually mix the dry ingredients into the wet mixture, alternating with the milk until smooth. Gently fold in the sprinkles to avoid color bleeding.
- Divide the batter evenly into the prepared pans and bake for 30-35 minutes, or until a toothpick inserted in the center comes out clean. Let the cakes cool completely before frosting.
- Frost the cake with vanilla buttercream and decorate with extra sprinkles on top for a festive finish.
Quick Pros of the Recipe
- Perfect for casual, fun Valentine’s Day celebrations.
- Bright, colorful presentation that kids will adore.
- Moist and fluffy vanilla cake base.
- Customizable with any type of sprinkles.
Ingredient Substitutions or Customization Ideas: Use chocolate cake batter instead of vanilla for a richer flavor. Swap out the sprinkles for candy hearts or edible glitter for a more sophisticated look.
Cooking Tips and Tricks: Mix the sprinkles into the batter gently to prevent them from sinking to the bottom or bleeding their colors. Use clear vanilla extract if you want to keep the cake’s color as light as possible.
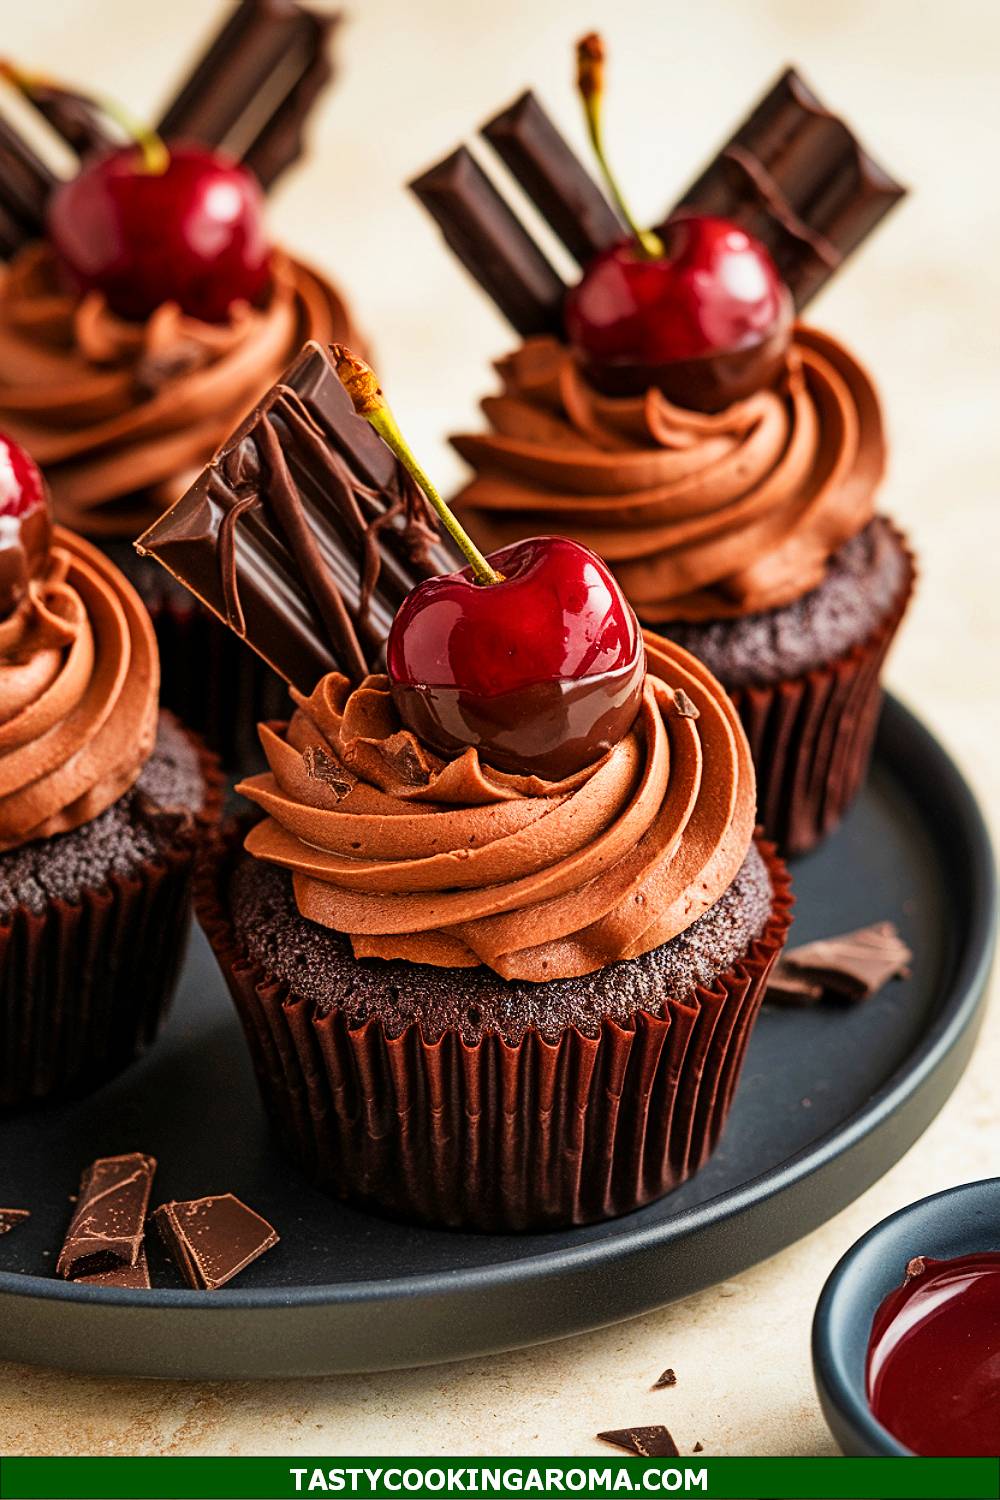
Chocolate-Covered Cherry Torte Cupcakes
If you’re looking for a decadent Valentine’s treat, these Chocolate-Covered Cherry Torte Cupcakes are the ultimate indulgence. With a rich chocolate cupcake base, a sweet cherry filling, and a luscious chocolate ganache topping, they’re a flavor match made in heaven. The best part? Each cupcake is topped with a whole cherry for a romantic finishing touch. These are perfect for gifting or sharing with a loved one on Valentine’s Day.
Serving Size: 12 cupcakes
Time Needed: 1 hour
Ingredients
- 1 cup all-purpose flour
- 1 cup granulated sugar
- ½ cup unsweetened cocoa powder
- 1 teaspoon baking powder
- ½ teaspoon baking soda
- ½ cup vegetable oil
- 2 large eggs
- ½ cup milk
- 1 teaspoon vanilla extract
- ½ cup cherry pie filling
- ½ cup heavy cream
- ½ cup semi-sweet chocolate chips
- 12 maraschino cherries
Instructions
- Preheat your oven to 350°F (175°C) and line a 12-cup muffin tin with cupcake liners.
- In a bowl, whisk together the flour, sugar, cocoa powder, baking powder, and baking soda. In a separate bowl, combine the oil, eggs, milk, and vanilla extract.
- Gradually mix the wet ingredients into the dry ingredients until smooth. Divide the batter evenly among the cupcake liners and bake for 18-20 minutes, or until a toothpick inserted into the center comes out clean. Let the cupcakes cool completely.
- Using a small knife or cupcake corer, remove the center of each cupcake and fill with a spoonful of cherry pie filling. Replace the tops of the cupcakes.
- To make the ganache, heat the heavy cream in a small saucepan until it begins to simmer. Pour the hot cream over the chocolate chips in a bowl and stir until smooth. Spoon the ganache over each cupcake and top with a maraschino cherry.
Quick Pros of the Recipe
- Rich, decadent chocolate flavor.
- Sweet cherry filling adds a fruity surprise.
- Beautiful presentation with the cherry garnish.
- Perfect for gifting or sharing.
Ingredient Substitutions or Customization Ideas: For a boozy twist, soak the cherries in a bit of kirsch or rum before using them as a topping. You can also use white chocolate for the ganache if you prefer.
Cooking Tips and Tricks: Use a piping bag to neatly fill the cupcakes with cherry filling. Make the ganache ahead of time and let it cool slightly for easier spreading.
FAQ
How can I make these recipes healthier?
You can make these recipes healthier by using alternatives like whole wheat flour, natural sweeteners (like honey or maple syrup), and light cream instead of heavy cream. For cakes like the Raspberry Rose Swirl Cake or the Heart-Shaped Coconut Cloud Cake, cutting back on sugar or using lower-calorie toppings can preserve flavor while reducing calories. Additionally, incorporating fresh fruits like cherries or strawberries can add natural sweetness and nutrients to your desserts.
Are these cakes suitable for beginners?
Yes, many of these recipes are beginner-friendly! For example, the Love Letter Sheet Cake, Sprinkled Valentine’s Confetti Cake, and White Chocolate Cherry Dump Cake are straightforward and require minimal decorating skills. If you’re worried about presentation, you can start with simpler designs like the classic Heart Cake DIY (using a heart-shaped pan) before moving on to the more intricate options such as the Vintage Lace Buttercream Heart Cake.
What makes these cakes special for Valentine’s Day?
Each of these recipes is crafted to celebrate love! The use of romantic visuals, like heart shapes, pink and red colors, and themes of roses, adds a heartfelt touch. Cakes like the Cherry Heart Surprise Cake, Cupid’s Chocolate Arrow Cake, and DIY Mini Red Velvet Cake Stacks are not only delicious but also perfect for creating sentimental moments with your loved ones. Additionally, options like the Valentine Bento Cakes and Tiny “Be Mine” Bento Cakes are ideal for personal gifting.
Do these ideas include cakes suitable for sharing with kids?
Absolutely! Options like the Sprinkles Birthday Cake (aka Sprinkled Valentine’s Confetti Cake) or the adorably small Lavender Lemon Mini Bundt Cakes are perfect for kids and families to enjoy together. The bright colors, playful decorations, and fun flavors make these cakes both eye-catching and delicious for young ones. You can even turn it into a baking activity with kids helping to decorate a Pink Birthday Cake!
Can I make these cakes ahead of time?
Yes, most of these cakes can be made in advance. For instance, the Chocolate-Covered Cherry Torte Cupcakes, Red Velvet Cherry Cake, and Mini Cakes Birthday Recipe hold up well when stored in an airtight container. Decorations such as whipped cream rosettes or frosting designs on cakes like the Retro-Chic Bolo with Whipped Heart Rosettes can be added just before serving to maintain freshness.
Which cake is best for a Valentine’s Day celebration for him?
If you’re looking for a Valentines Cake Ideas For Him, consider options like the rich and bold Chocolate Heart Cake (like the Cupid’s Chocolate Arrow Cake) or a creatively made Heart Cake With Cherries such as the Cherry Heart Surprise Cake. These flavors are indulgent and sure to please!
Conclusion
This list of Valentines Cake Ideas offers something for everyone, whether you’re planning a romantic surprise, hosting a Mini Cakes Birthday Recipe for a loved one, or enjoying a quiet date night at home.
From the elegant Raspberry Rose Swirl Cake and the charming Love Letter Sheet Cake to frilly designs like the Vintage Lace Buttercream Heart Cake and the playful Sprinkled Valentine’s Confetti Cake, these recipes balance creativity and deliciousness. Options like the Heart Cake DIY basics or the vibrant Pink Birthday Cakes ensure there’s a cake for every skill level and style preference.
Personal touches like decorating with cherries in a Heart Cake With Cherries or preparing adorable Valentine Bento Cakes make moments shared with loved ones even sweeter. These ideas also work beautifully as gifts, especially the fanciful Tiny “Be Mine” Bento Cakes or the decadent Chocolate-Covered Cherry Torte Cupcakes. With diverse options ranging from classic Heart Valentines Cake designs to trendy ideas like the Retro-Chic Bolo with Whipped Heart Rosettes, this collection is perfect for Valentine’s Day or even as Pretty Birthday Cakes.
Now it’s your turn! Which cake are you most excited to try first?
- Save this article for your next celebration, share it with friends looking for Valentines Day Small Cakes inspiration, and let us know your favorite idea in the comments below.
- Let’s make this Valentine’s Day one to remember with these gorgeous—and delicious—desserts!
