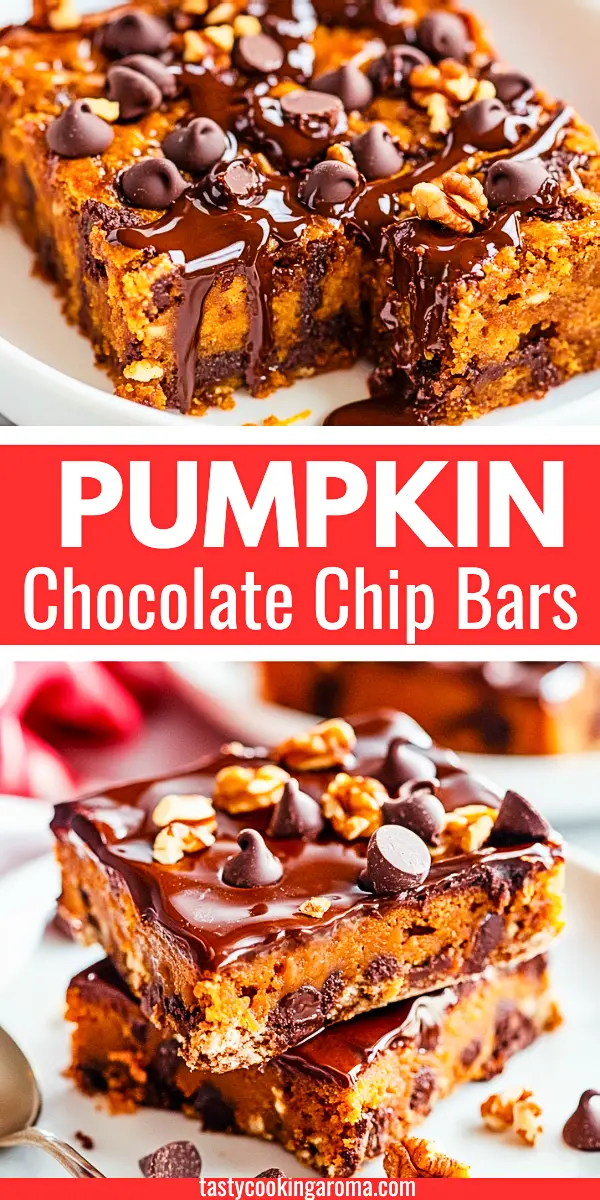
Say Hello to the Ultimate Fall Snack: Pumpkin Chocolate Chip Bars Recipe
Ever find yourself craving something sweet and comforting that doesn’t take forever to make?
Well, you’re in the right place because these Pumpkin Chocolate Chip Bars are exactly what you need. Whether you’re whipping them up for a quick snack or impressing guests at a fall gathering, this recipe delivers big on flavor with minimal effort.
In this post, you’ll learn how to make incredibly moist, chocolatey Pumpkin Bars that are easy for anyone to master—even if baking isn’t usually your thing.
I’ll walk you through each step with tips on how to get the perfect gooey center and that delightful balance of pumpkin spice and chocolate. Trust me, after you try these, your dessert game will never be the same.
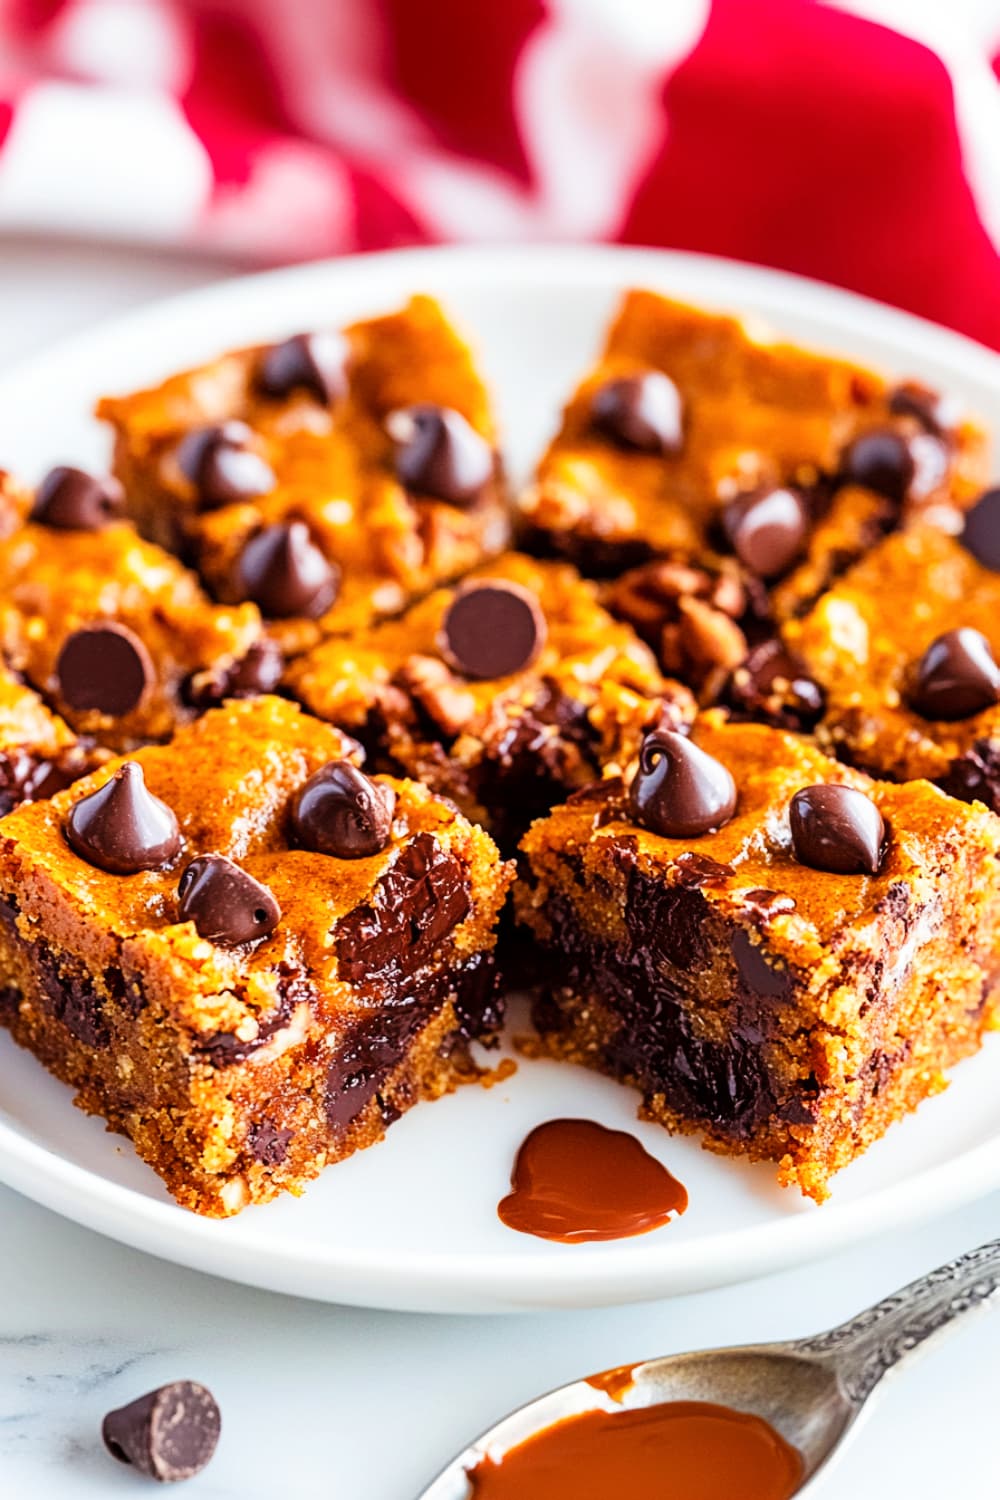
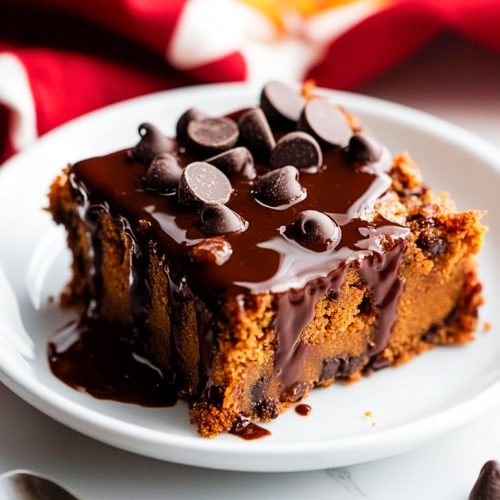
Pumpkin Chocolate Chip Bars Recipe
Preparation Time: 15 minutes
Cooking Time: 25-30 minutes
Total Time: 40-45 minutes
Servings: 4 people
Ingredients:
- 1 cup (120g) all-purpose flour (substitute: gluten-free flour blend)
- 1/2 cup (120g) canned pumpkin puree (or freshly steamed and mashed pumpkin)
- 1/2 cup (100g) light brown sugar
- 1/4 cup (60ml) melted butter (substitute: coconut oil for a dairy-free option)
- 1 egg (substitute: flax egg for vegan)
- 1 tsp vanilla extract
- 1 tsp pumpkin spice mix (homemade: 1/2 tsp cinnamon, 1/4 tsp nutmeg, 1/4 tsp ginger)
- 1/2 tsp baking soda
- 1/4 tsp salt
- 3/4 cup (120g) semi-sweet chocolate chips (substitute: dairy-free chocolate chips for dairy-sensitive diets)
- 1/4 cup (30g) chopped walnuts (optional)
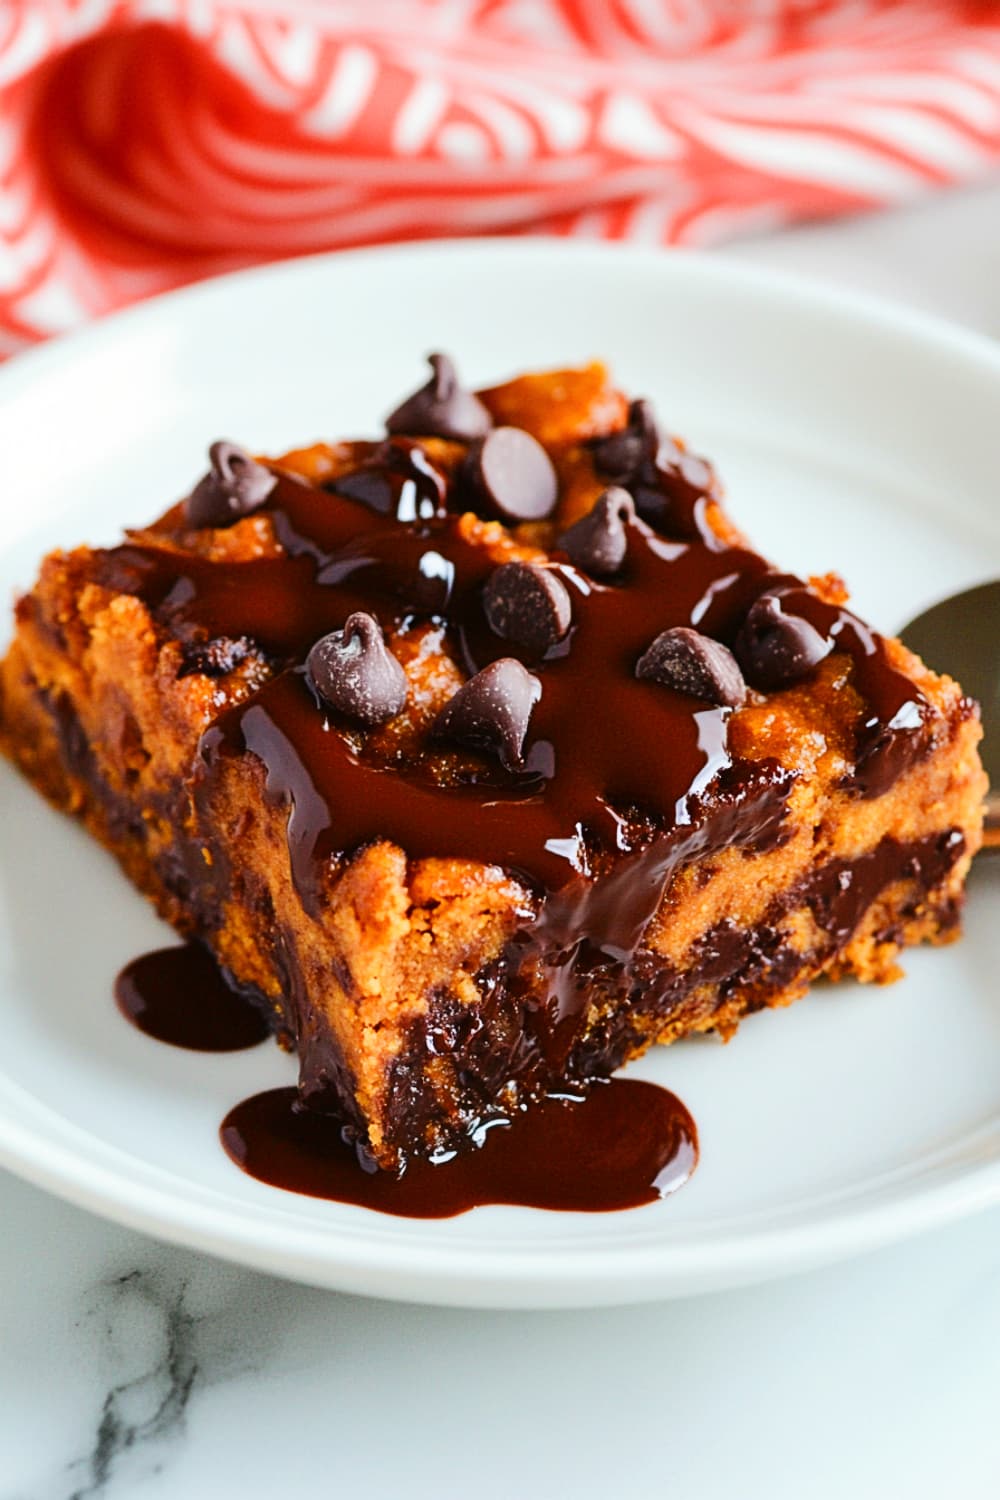
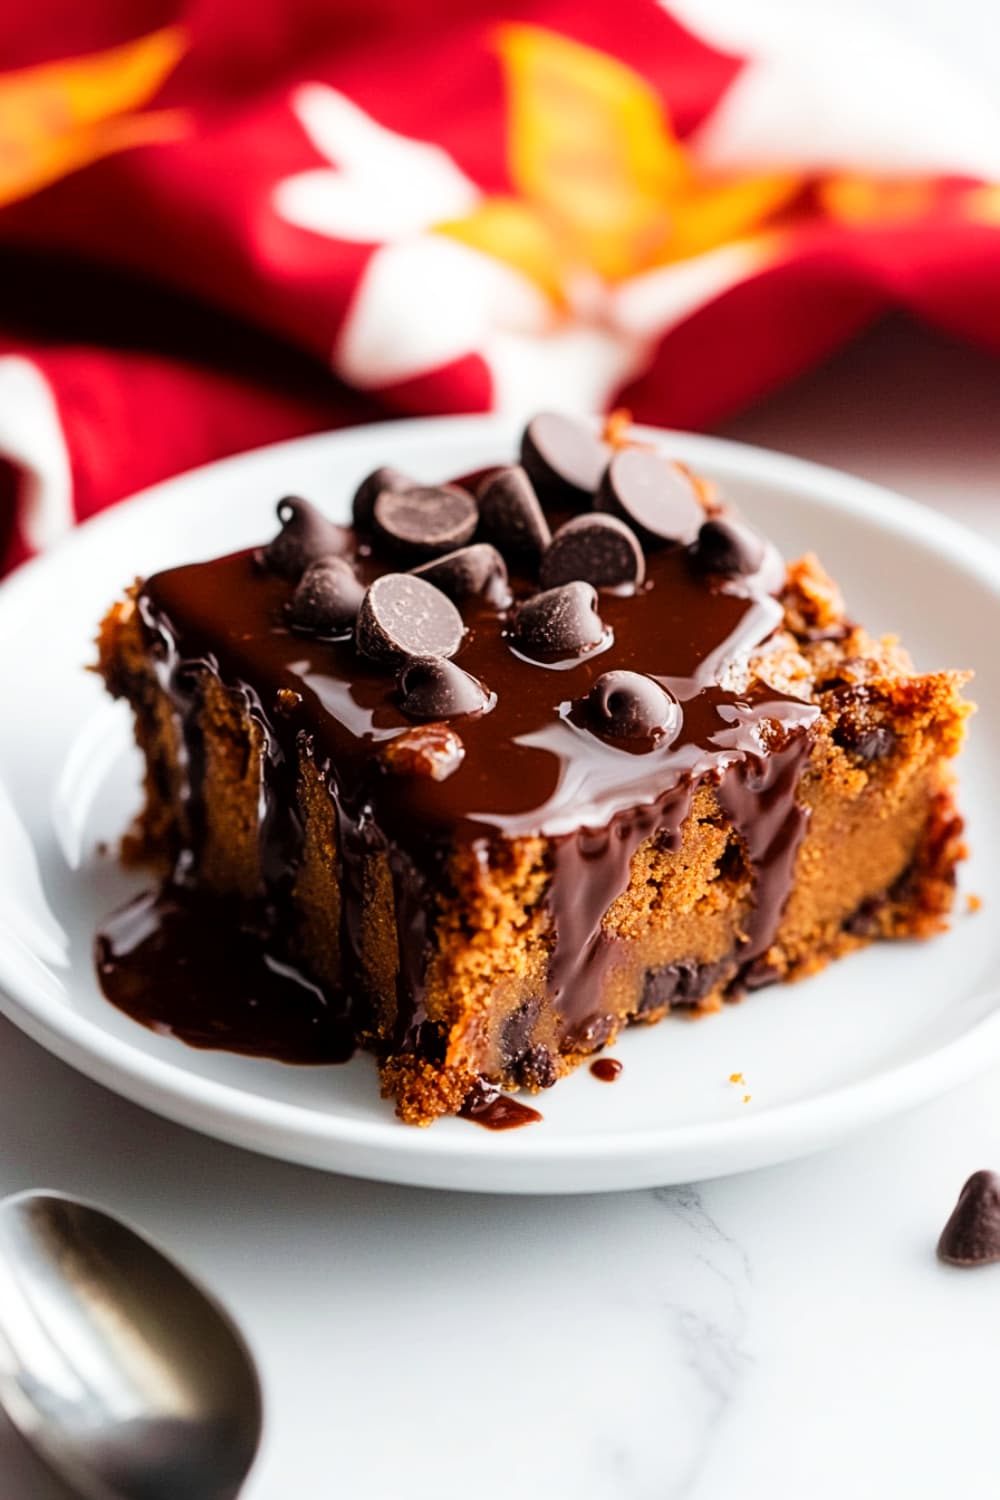
- Choco syrup
Instructions:
- Preheat your oven to 350°F (175°C). Grease or line an 8×8-inch (20×20 cm) baking pan with parchment paper. This ensures even baking and makes it easy to remove the bars after baking.
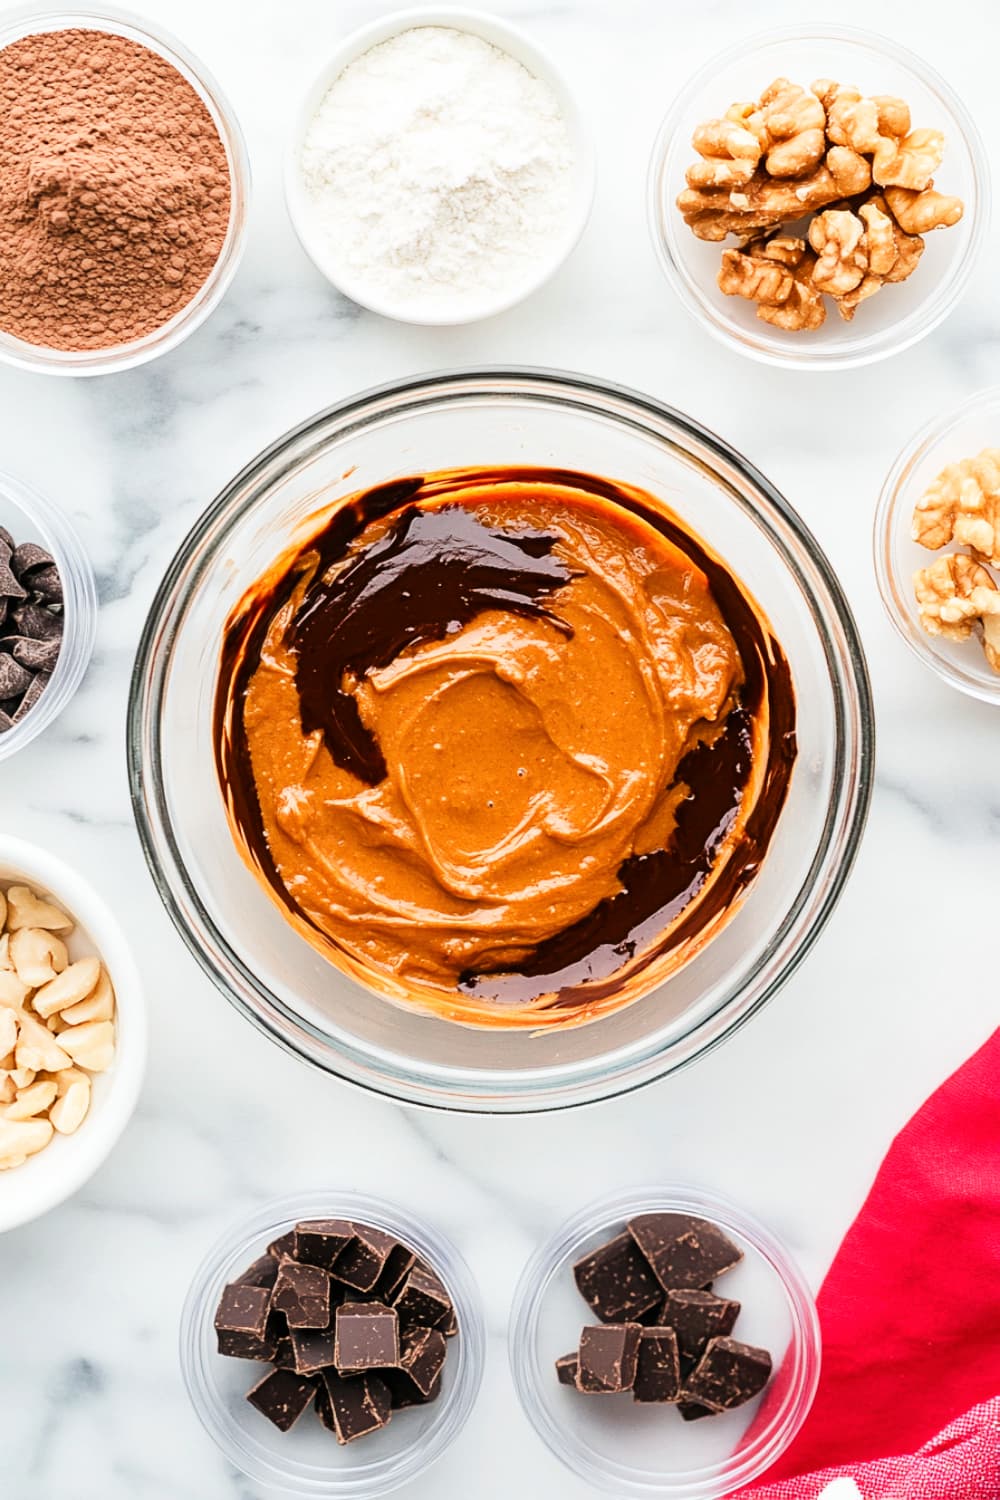
- Mix the wet ingredients: In a medium bowl, whisk together the pumpkin puree, melted butter (or coconut oil), egg (or flax egg), vanilla extract, and brown sugar. The pumpkin adds natural moisture and sweetness, which is why these bars remain soft and delicious.
-
- Tip: Make sure the melted butter cools slightly before mixing so it doesn’t scramble the egg.
- Combine the dry ingredients: In a separate bowl, whisk together the all-purpose flour (or gluten-free blend), pumpkin spice mix, baking soda, and salt. This ensures an even distribution of the leavening agents and spices.
- Blend the dry and wet mixtures: Gradually add the dry ingredients into the wet ingredients, stirring gently with a spatula until just combined. Overmixing can result in denser bars.
-
- Tip: Fold the mixture instead of aggressively stirring. This preserves air bubbles, which helps the bars stay light and fluffy.
- Add chocolate chips and walnuts: Gently fold in the chocolate chips and walnuts. The mix of semi-sweet chocolate with the warm spices gives a great flavor balance.
-
- Tip: Reserve a handful of chocolate chips to sprinkle on top of the batter before baking. It makes the bars visually appealing when they come out of the oven.
- Transfer the batter: Spread the batter evenly into the prepared baking pan, smoothing the top with a spatula to ensure even baking.
- Bake: Place in the oven and bake for 25-30 minutes or until a toothpick inserted into the center comes out clean (or with a few moist crumbs). The edges should be slightly golden but not too dark.
- Cool completely: Let the bars cool in the pan for at least 10 minutes before lifting them out using the parchment paper. This cooling step helps the bars set and become easier to slice.
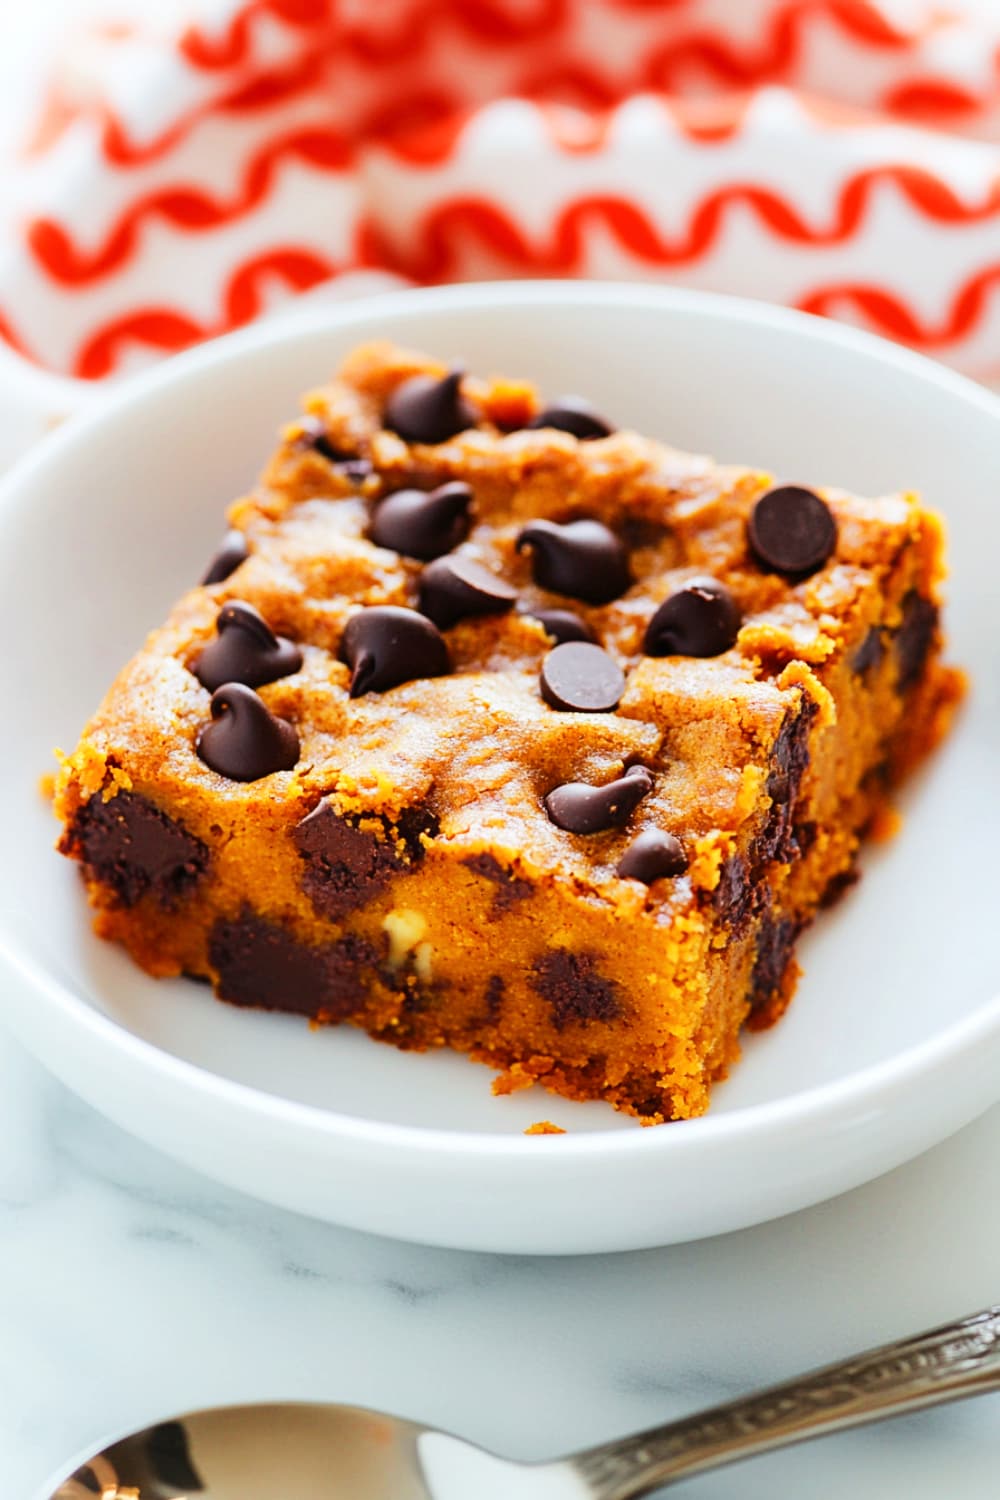
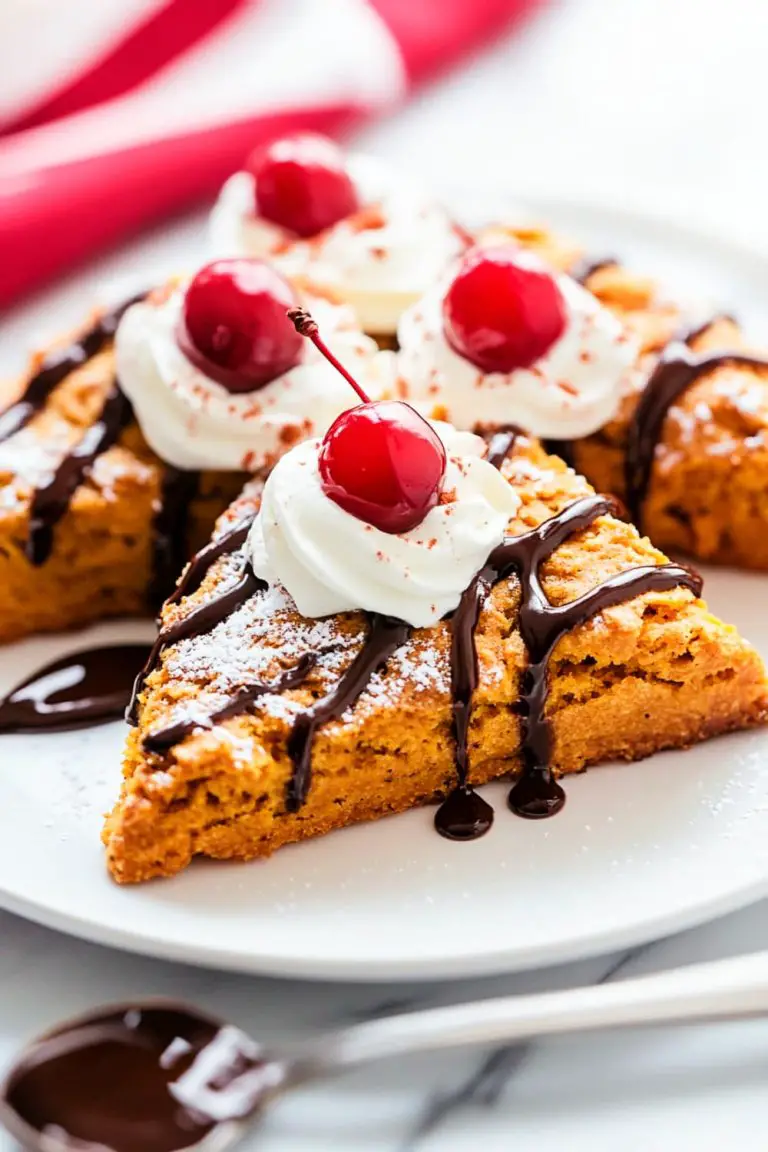
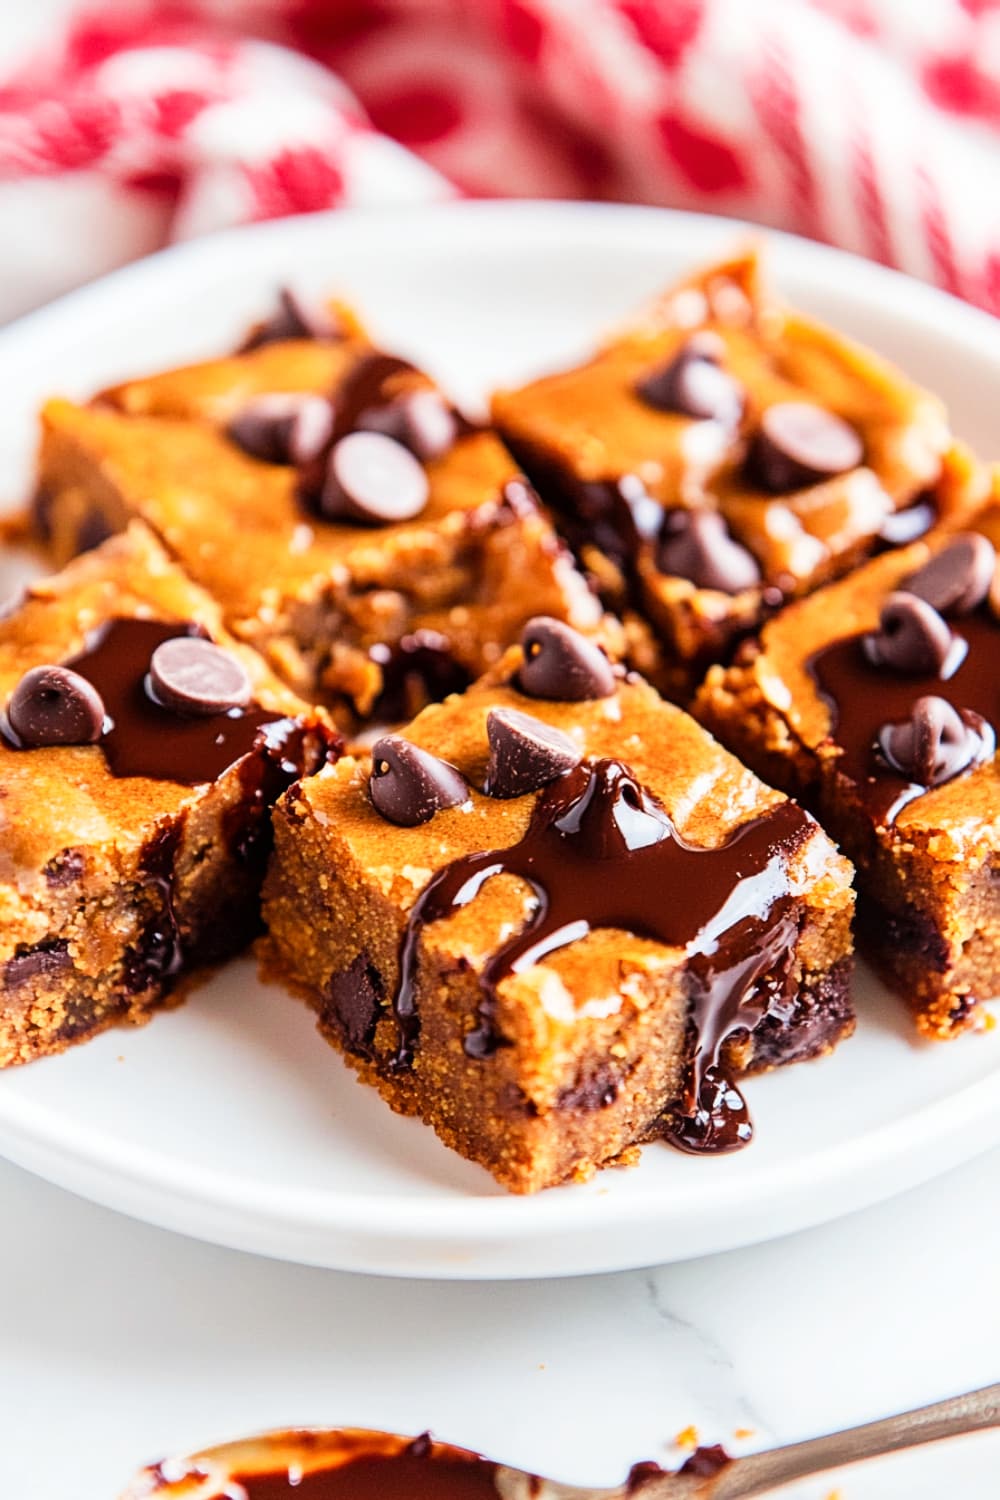
- Slice and enjoy: Once cooled, cut into 12 equal bars. The chocolate will be slightly melty, and the pumpkin will keep the bars moist and flavorful.
Notes to Remember:
- Flour substitute: If using gluten-free flour, add 1/4 tsp of xanthan gum to ensure the bars hold together well.
- Sweetness adjustment: You can reduce the sugar by 1/4 cup if you prefer less sweetness without affecting the texture too much.
- Storage: Store these bars in an airtight container at room temperature for up to 3 days or refrigerate for up to a week.
Here are a few additional clarifications and tips that may help readers make the Pumpkin Chocolate Chip Bars even better:
- Pumpkin Purée Consistency:
- If using homemade pumpkin purée, ensure it’s not too watery. Excess moisture can make the bars too soft or even gummy. If your purée seems wet, blot it with a paper towel or strain it through a fine sieve to remove excess liquid.
- Measuring Flour Correctly:
- When measuring flour, spoon it into the measuring cup and level it off with a knife to avoid packing too much flour, which can lead to dry, dense bars.
- Chocolate Chip Distribution:
- To avoid all the chocolate chips sinking to the bottom, toss them in a teaspoon of flour before folding them into the batter. This trick keeps them evenly distributed throughout the bars.
- Oven Temperature Accuracy:
- Ensure your oven temperature is accurate by using an oven thermometer. If the oven is too hot, the bars may cook too quickly on the edges and leave the center undercooked. Baking at 350°F (175°C) for the right amount of time ensures even baking.
- Cutting the Bars Cleanly:
- To get clean cuts, let the bars cool completely and use a sharp knife dipped in warm water. Wipe the knife clean between each cut for smooth, even slices.
Guide to Common Mistakes to Avoid While Making Pumpkin Chocolate Chip Bars
Ingredient Selection:
-
- Mistake: Using the wrong type of pumpkin puree can throw off the texture. Canned pumpkin pie filling is sweetened and spiced, which will alter the recipe.
- Avoid: Always use pure pumpkin puree (or roast fresh pumpkin and mash it for a homemade alternative).
- Substitution Tip: If you’re making gluten-free Pumpkin Chocolate Chip Bars, use a gluten-free all-purpose flour blend instead of regular flour for the same texture. Check for hidden allergens in chocolate chips, especially for dairy-free versions.
Preparation Pitfalls:
-
- Mistake: Overmixing the batter can lead to dense, tough bars.
- Avoid: Mix the wet and dry ingredients until just combined. This will help the bars stay light and tender.
- Tip: For more moisture, let your batter rest for 10 minutes before baking. This gives the flour time to absorb moisture, creating more tender Pumpkin Chocolate Chip Bars.
Cooking Techniques:
-
- Mistake: Baking at the wrong temperature or overbaking can result in dry bars.
- Avoid: Bake at 350°F (175°C) and keep a close eye in the last few minutes. The edges should be set, but the center can be slightly soft.
- Tip: Test the doneness by inserting a toothpick in the center. If it comes out with a few moist crumbs, your bars are done. Overbaking will cause them to be too firm and dry.
Seasoning and Flavoring:
-
- Mistake: Under-seasoning with pumpkin spice or overwhelming the flavors with too many spices.
- Avoid: Stick to the recommended amount of pumpkin pie spice to achieve the perfect balance.
- Tip: Enhance the flavor with a pinch of salt and a dash of vanilla extract to elevate the sweetness of the chocolate chip bars.
Presentation Tips:
-
- Mistake: Uneven slicing can make the bars look less appealing and messy.
- Avoid: Wait until the bars cool down to room temperature before slicing. This helps the bars set properly and prevents crumbling.
- Tip: For a neat finish, wipe your knife between slices for clean edges on each Pumpkin Chocolate Chip Bar. You can also sprinkle additional chocolate chips on top before baking for extra visual appeal.
Common Problems You May Face with Pumpkin Chocolate Chip Bars and Their Solutions
- Problem: Overmixing the Batter
-
- Solution: When making Pumpkin Chocolate Chip Bars, it’s easy to keep mixing, thinking you’re making the batter smoother. But overmixing activates the gluten in the flour, which can make the bars dense and tough. Mix until the wet and dry ingredients are just combined. It’s okay if you see a few small lumps; they’ll disappear during baking.
- Problem: Using the Wrong Type of Pumpkin
-
- Solution: Be sure to use pure pumpkin puree, not pumpkin pie filling. The pie filling is pre-sweetened and spiced, which will throw off your flavor balance. If you accidentally bought the wrong can, you can always add less sugar and reduce the spices, but it’s better to get the plain puree from the start.
- Problem: Bars are Too Dry or Overbaked
-
- Solution: New cooks often think that firm edges mean baked goods are ready. In the case of Pumpkin Chocolate Chip Bars, you actually want slightly soft edges, as they’ll continue to firm up as they cool. Set a timer, and check for doneness with a toothpick. It should come out with a few moist crumbs, not clean or with raw batter.
- Problem: Uneven Chocolate Chip Distribution
-
- Solution: To avoid all the chocolate chips sinking to the bottom or gathering in one spot, toss them in a little flour before adding them to the batter. This keeps them from sinking and ensures every bite of your Pumpkin Chocolate Chip Bars has a good balance of chocolate.
- Problem: Uneven Slicing of Bars
-
- Solution: If you cut into the bars too soon, they might crumble or fall apart. Wait until they’ve completely cooled, which could take 30 minutes to an hour, depending on your kitchen temperature. For neat edges, use a sharp knife and clean it after each slice.
Pro Tips for Pumpkin Chocolate Chip Bars
- Balance the Flavors: Don’t be afraid to experiment with the sweetness. If you prefer a more robust pumpkin flavor, you can reduce the sugar slightly. Pumpkin Recipes Dessert often taste best when the natural sweetness of pumpkin shines through.
- Texture Matters: For a slightly crunchy top, sprinkle a few extra chocolate chips on the bars halfway through baking. It will give a more appealing look and a richer texture.
- Make It Healthier: Substitute part of the flour with oat flour for a nuttier flavor and added fiber. You can also use coconut sugar or a sugar alternative to cut back on refined sugars, turning these Desserts Pumpkin into a more health-conscious treat.
- Baking Evenly: Ensure you spread the batter evenly across the baking dish. Use an offset spatula to get smooth, level bars that bake evenly.
FAQs for Pumpkin Chocolate Chip Bars
- Can I use fresh pumpkin instead of canned pumpkin?
-
- Yes! You can use fresh pie pumpkin by roasting and pureeing it. Just make sure it has a smooth consistency like canned pumpkin puree. Fresh pumpkin may add a bit more moisture, so reduce any additional liquid slightly.
- How do I store these bars?
-
- Store the bars in an airtight container at room temperature for up to 3 days, or refrigerate for up to a week. You can also freeze them for up to 3 months. Thaw at room temperature before serving.
- Can I make these gluten-free or dairy-free?
-
- Absolutely. Substitute the all-purpose flour with a gluten-free blend and the butter with a dairy-free alternative. Make sure your chocolate chips are also dairy-free to avoid allergens.
- How can I make the bars denser or fluffier?
-
- For denser bars, use a little less baking powder and more pumpkin puree. For fluffier bars, you can add an extra egg and increase the baking powder slightly.
- Can I add other mix-ins besides chocolate chips?
-
- Yes, feel free to get creative! Chopped nuts, dried cranberries, or white chocolate chips can complement the Pumpkin Chocolate Chip Bars beautifully.
Closing Thoughts:
I hope you enjoy making and savoring these Pumpkin Chocolate Chip Bars as much as I do.
They’re a delicious, easy-to-make treat that brings a bit of autumn into every bite. Whether you’re baking for family, friends, or just for yourself, these bars are sure to delight.
I’d love to hear how your batch turns out! If you make any tweaks or try out different variations, please share your experiences in the comments below.
Feel free to ask any questions you might have, or show off your creations on social media—tagging us so we can see your delicious results.
Happy baking, and I can’t wait to hear all about your pumpkin-chocolate adventures!
Pumpkin Chocolate Chip Bars
Ingredients
- 1 cup 120g all-purpose flour (or gluten-free flour)
- 1/2 teaspoon baking soda
- 1/2 teaspoon pumpkin pie spice
- 1/4 teaspoon salt
- 1/2 cup 100g granulated sugar
- 1/4 cup 50g brown sugar
- 1/4 cup 60ml melted coconut oil (or melted butter)
- 1 large egg or flax egg for a vegan option
- 1/2 cup 120g pumpkin purée
- 1 teaspoon vanilla extract
- 1/2 cup 90g semi-sweet chocolate chips (or dairy-free chocolate chips)
- Chocolate syrup
Instructions
- Preheat the oven to 350°F (175°C). Line an 8x8-inch baking dish with parchment paper.
- Whisk together the flour, baking soda, pumpkin pie spice, and salt in a medium bowl.
- In a separate bowl, mix the granulated sugar, brown sugar, and melted coconut oil until smooth. Add the egg, pumpkin purée, and vanilla extract, and mix well.
- Fold the dry ingredients into the wet mixture until just combined. Be careful not to overmix.
- Gently stir in the chocolate chips.
- Spread the batter evenly into the prepared baking dish.
- Bake for 25-30 minutes or until a toothpick inserted in the center comes out clean.
- Let the bars cool in the pan before slicing into squares and serving.
Notes
- For extra moist bars, ensure the pumpkin purée is not too watery.
- Substitute butter and eggs for vegan-friendly or allergen-free options