15 Easter Desserts That Are Almost Too Cute to Eat

Ready to take your Easter desserts to the next level?
Imagine a festive table covered with treats like a creative Dirt Cups Easter platter or a decadent Spring Trifle, all alongside whimsical-themed Bunny Snack Mix for Kids.
Why You’ll Love This Recipe List:
- Foolproof recipes for every skill level.
- Options full of tantalizing flavors, from creamy Pineapple Desserts to luscious Easter Birds Nest cookies.
- Each dessert is a visual feast as much as a flavorful one.
- You might just discover a new favorite that you’ve been missing all this time!
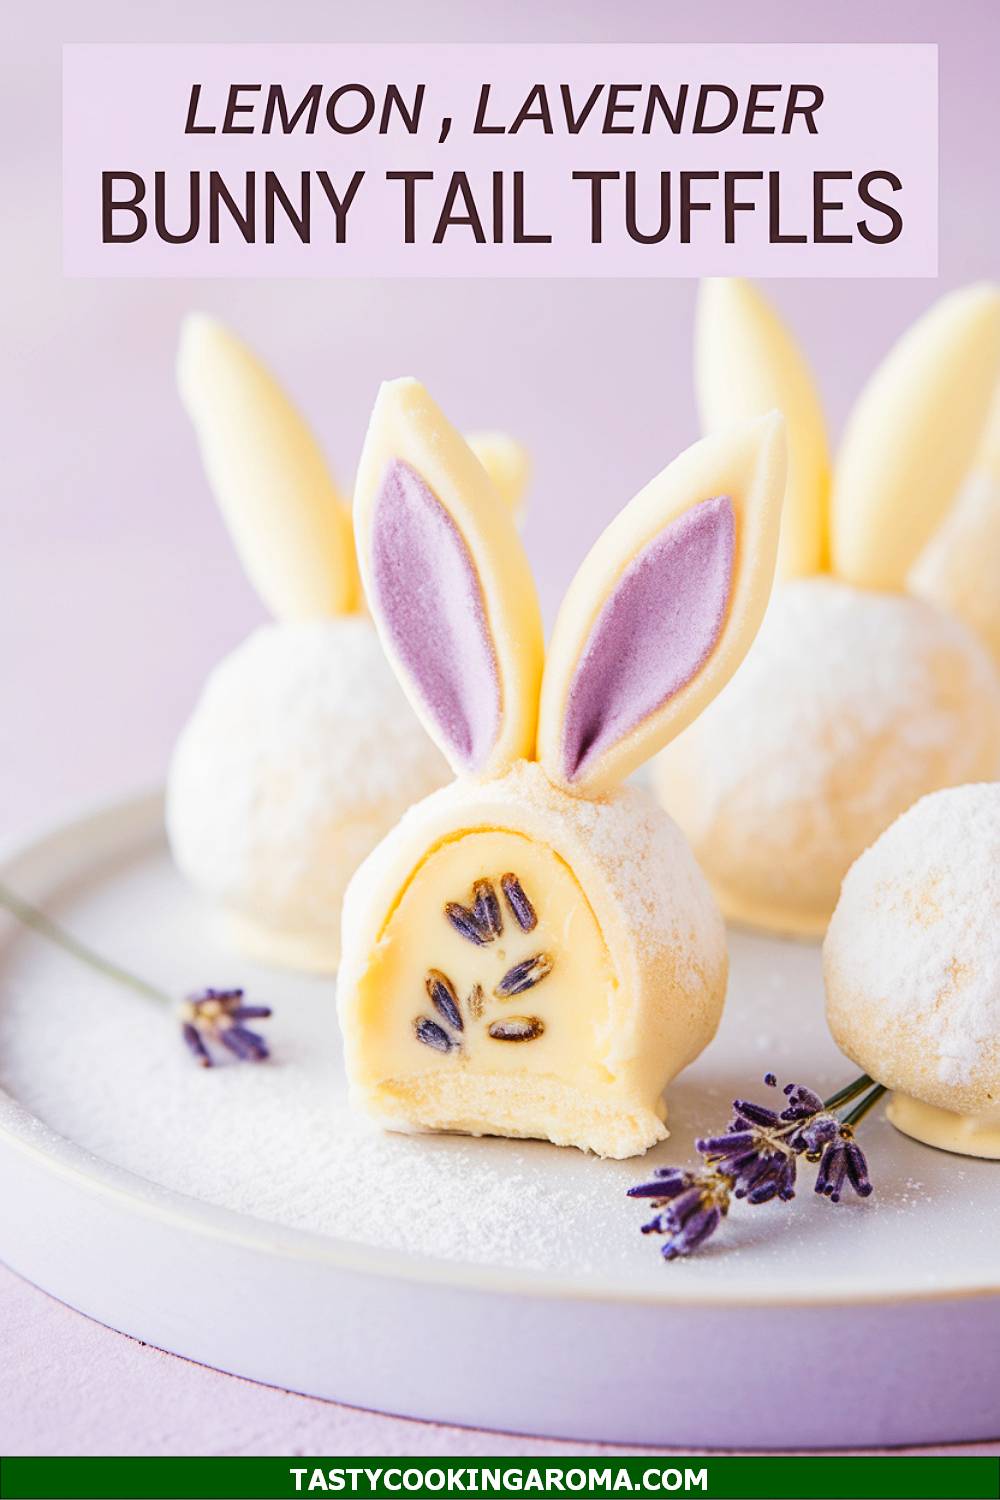
Lemon Lavender Bunny Tail Truffles
These Lemon Lavender Bunny Tail Truffles are the perfect blend of refreshing citrus and delicate floral flavors. They’re fun to make and look absolutely adorable on any Easter dessert table, thanks to their fluffy “bunny tail” coating of powdered sugar or shredded coconut. The creamy texture makes them irresistible, and they’re surprisingly easy to whip up for a last-minute treat. Whether you’re hosting an Easter brunch or just want to surprise your family, these truffles are sure to impress!
Serving Size: 12 truffles
Time Needed: 45 minutes
Ingredients
- 1 cup white chocolate chips
- 1/4 cup heavy cream
- 1/2 teaspoon lemon zest
- 1/4 teaspoon lavender extract
- 1/2 cup powdered sugar or shredded coconut (for coating)
Instructions
- In a microwave-safe bowl, melt the white chocolate chips and heavy cream in 20-second intervals, stirring after each, until smooth and creamy.
- Stir in the lemon zest and lavender extract, mixing well to combine the flavors.
- Refrigerate the mixture for 30 minutes or until firm enough to handle.
- Scoop small portions of the mixture and roll into bite-sized balls. Coat each ball in powdered sugar or shredded coconut to create the “bunny tail” effect.
- Store in the refrigerator until ready to serve.
Quick Pros of the Recipe
- Unique combination of lemon and lavender flavors.
- Eye-catching and festive presentation.
- Simple ingredients and easy to prepare.
- Perfect for make-ahead dessert planning.
Ingredient Substitutions or Customization Ideas: Swap out lavender extract for vanilla if you prefer a more traditional flavor. You can also use white chocolate coating wafers for easier melting.
Cooking Tips and Tricks: Make sure the truffle mixture is fully chilled before rolling into balls to avoid sticking. Use a small cookie scoop for evenly sized truffles.
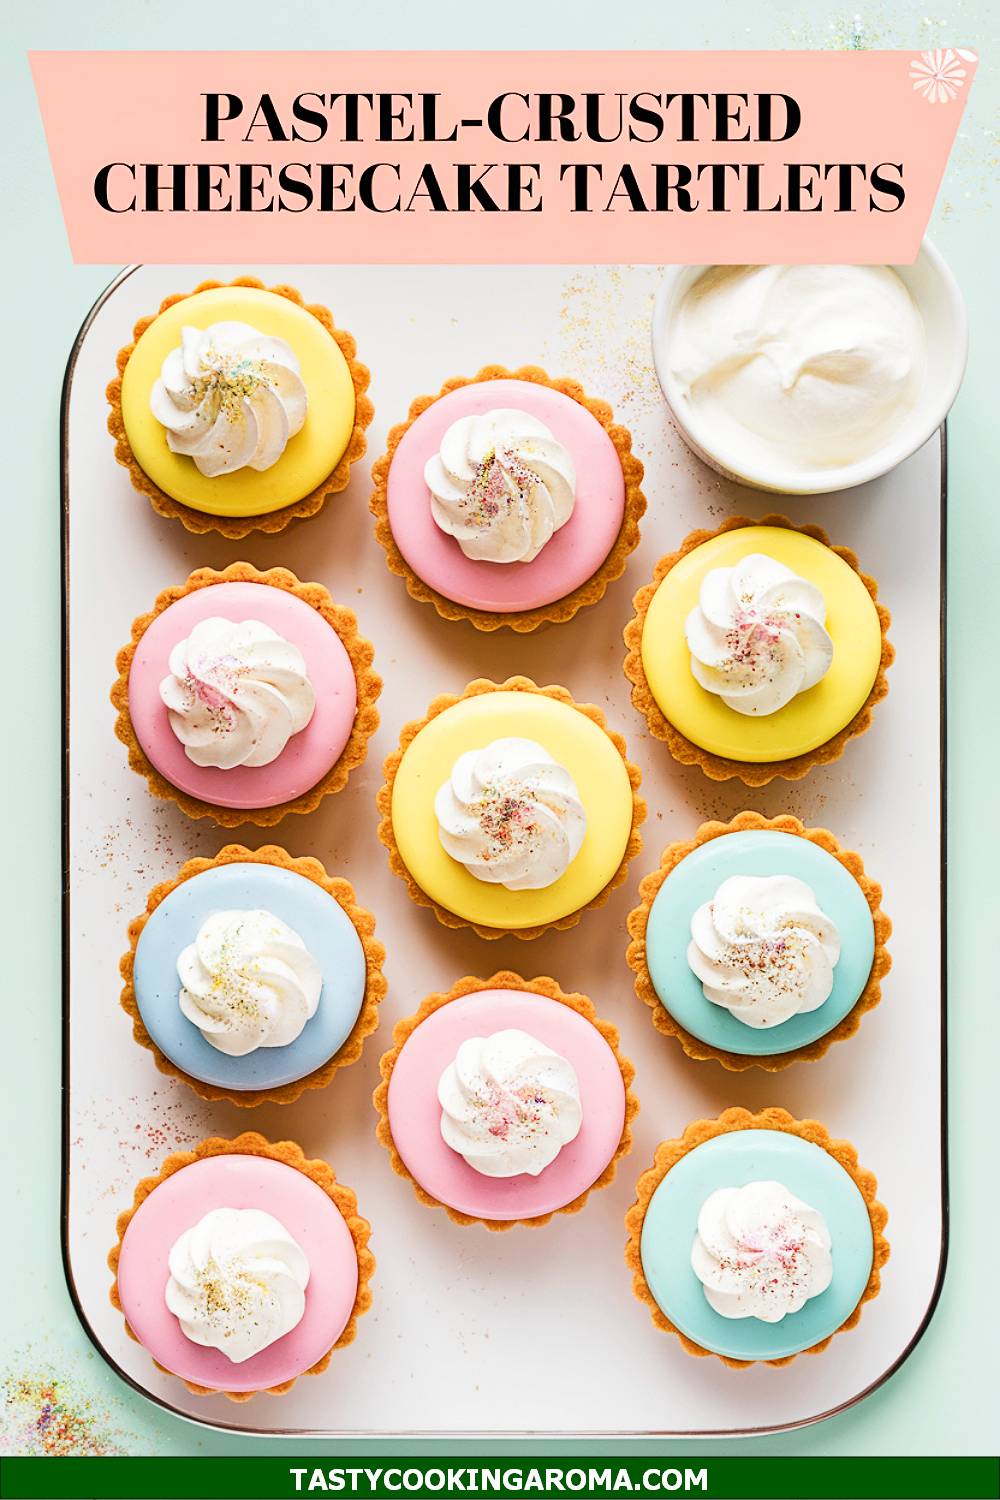
Pastel-Crusted Cheesecake Tartlets
These Pastel-Crusted Cheesecake Tartlets are a bite-sized take on a classic dessert with an Easter twist. The pastel crusts, made with colored cookie crumbs, make them just as delightful to look at as they are to eat. The creamy cheesecake filling pairs beautifully with the buttery, colorful crust. They’re perfect for portion-controlled indulgence and are a hit with both kids and adults alike!
Serving Size: 6 tartlets
Time Needed: 1 hour
Ingredients
- 1 cup graham cracker crumbs, divided into three portions
- Food coloring (pink, blue, yellow)
- 2 tablespoons melted butter
- 8 ounces cream cheese, softened
- 1/4 cup sugar
- 1 teaspoon vanilla extract
- 1 egg
Instructions
- Divide the graham cracker crumbs into three equal portions and mix each with a different food coloring until evenly coated.
- Add a bit of melted butter to each portion and press the crumbs into the bottom and sides of small tartlet pans to form the crusts.
- In a mixing bowl, beat the cream cheese, sugar, and vanilla extract until smooth. Add the egg and mix until combined.
- Pour the cheesecake mixture evenly into the prepared crusts and bake at 325°F (165°C) for 20–25 minutes, or until the centers are just set.
- Let cool completely before removing from the tartlet pans. Chill in the fridge before serving.
Quick Pros of the Recipe
- Visually stunning with colorful pastel crusts.
- Rich and creamy cheesecake filling.
- Perfect for individual servings.
- Great for Easter parties and small gatherings.
Ingredient Substitutions or Customization Ideas: Use Oreo cookie crumbs for a chocolate crust alternative. You can also add a fruit topping like berries or mango slices for extra flavor.
Cooking Tips and Tricks: Make sure the cream cheese is at room temperature for a smooth filling. Use silicone tartlet molds for easier removal.
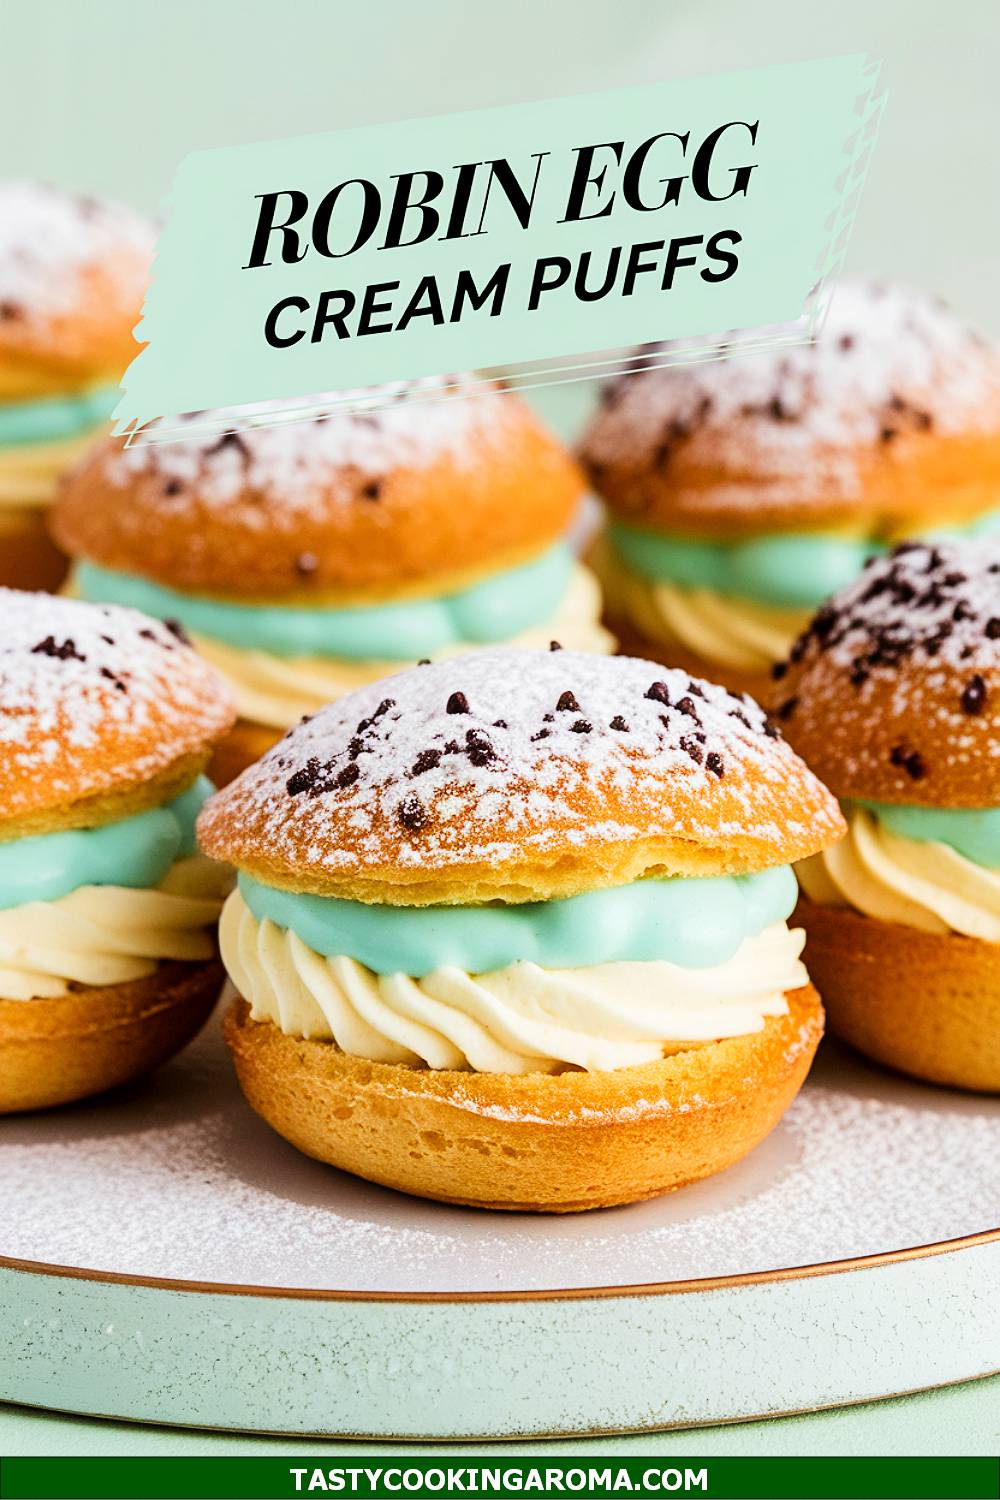
Speckled Robin Egg Cream Puffs
These Speckled Robin Egg Cream Puffs are as elegant as they are delicious. The light and airy choux pastry is filled with a creamy vanilla custard and topped with a speckled pastel glaze for that Easter-themed flair. They’re surprisingly easier to make than they look, and the speckled design adds a fun, artistic touch. These cream puffs are sure to impress your guests with both their taste and their presentation!
Serving Size: 8 cream puffs
Time Needed: 1 hour 30 minutes
Ingredients
- 1/2 cup water
- 1/4 cup unsalted butter
- 1/2 cup all-purpose flour
- 2 large eggs
- 1 cup heavy cream
- 2 tablespoons powdered sugar
- 1 teaspoon vanilla extract
- Pastel-colored glaze (made with powdered sugar, milk, and food coloring)
- Black food coloring (for speckling)
Instructions
- Preheat the oven to 400°F (200°C) and line a baking sheet with parchment paper.
- In a saucepan, bring water and butter to a boil. Reduce heat, add flour, and stir vigorously until the mixture forms a ball.
- Remove from heat and let cool for 5 minutes. Beat in eggs one at a time until the dough is smooth and shiny.
- Pipe small mounds of dough onto the baking sheet and bake for 20–25 minutes, or until puffed and golden. Allow to cool completely.
- Whip heavy cream, powdered sugar, and vanilla extract until stiff peaks form. Fill the cooled puffs with the whipped cream using a piping bag.
- Dip the tops of the cream puffs in pastel-colored glaze and use a small brush to flick black food coloring for a speckled effect. Let the glaze set before serving.
Quick Pros of the Recipe
- Elegant and festive presentation.
- Light and airy texture with creamy filling.
- Customizable colors for the glaze.
- Fun and creative speckling technique.
Ingredient Substitutions or Customization Ideas: Substitute vanilla custard for whipped cream if you prefer a richer filling. Add a hint of almond or lemon extract for a twist on the flavor.
Cooking Tips and Tricks: Make sure the choux pastry dough is cool enough before adding eggs to prevent curdling. Use a small paintbrush or a clean toothbrush for the best speckled glaze effect.
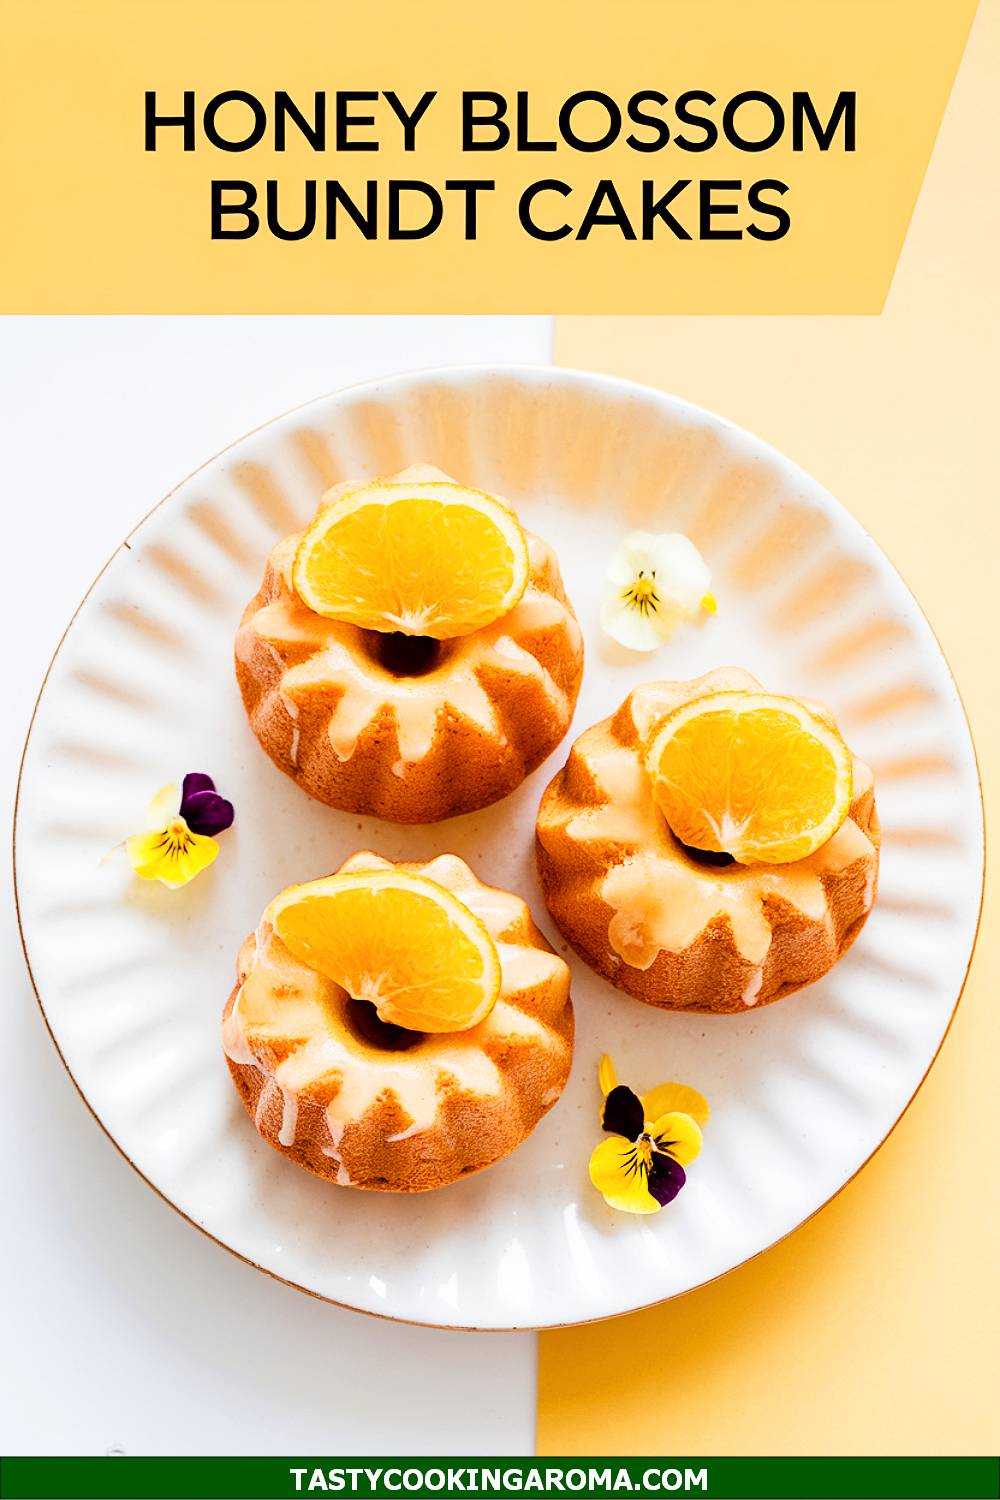
Honey Citrus Blossom Mini Bundt Cakes
These Honey Citrus Blossom Mini Bundt Cakes are a delightful way to bring spring flavors to your Easter table. The blend of honey and zesty citrus gives these cakes a refreshing, sweet-tangy balance that feels light yet indulgent. Their mini bundt shape makes them perfect for individual servings, and they look so elegant with a drizzle of glaze or a sprinkle of powdered sugar. Trust me, they’re as fun to make as they are to eat!
Serving Size: 8 mini bundt cakes
Time Needed: 1 hour
Ingredients
- 2 cups all-purpose flour
- 1 teaspoon baking powder
- 1/2 teaspoon baking soda
- 1/2 teaspoon salt
- 1/2 cup unsalted butter, softened
- 1/2 cup honey
- 1/2 cup granulated sugar
- 2 large eggs
- 1/2 cup fresh orange juice
- 1 tablespoon orange zest
- 1/4 cup milk
- 1 teaspoon vanilla extract
Instructions
- Preheat your oven to 350°F (175°C) and grease your mini bundt cake pan thoroughly with butter or nonstick spray.
- In a medium bowl, whisk together the flour, baking powder, baking soda, and salt. Set aside.
- In a large mixing bowl, cream the butter, honey, and sugar until light and fluffy using a hand or stand mixer.
- Add the eggs one at a time, mixing well after each addition. Stir in the orange juice, orange zest, milk, and vanilla extract.
- Gradually add the dry ingredients to the wet ingredients, mixing until just combined. Be careful not to overmix.
- Divide the batter evenly into the mini bundt cake molds, filling each about 3/4 full.
- Bake for 20–25 minutes, or until a toothpick inserted into the center comes out clean.
- Allow the cakes to cool in the pan for 10 minutes before carefully removing them. Let them cool completely on a wire rack.
Quick Pros of the Recipe
- Perfect balance of sweet and tangy flavors.
- Visually stunning individual servings.
- Great for spring and Easter themes.
- Can be customized with different glazes or toppings.
Ingredient Substitutions or Customization Ideas: You can swap orange juice for lemon juice if you prefer a tarter flavor. For a more floral twist, try adding a teaspoon of lavender extract or a pinch of dried lavender to the batter.
Cooking Tips and Tricks: Make sure to grease your bundt pans well to ensure the cakes come out cleanly. Let the cakes cool slightly in the pan before unmolding to avoid breakage.
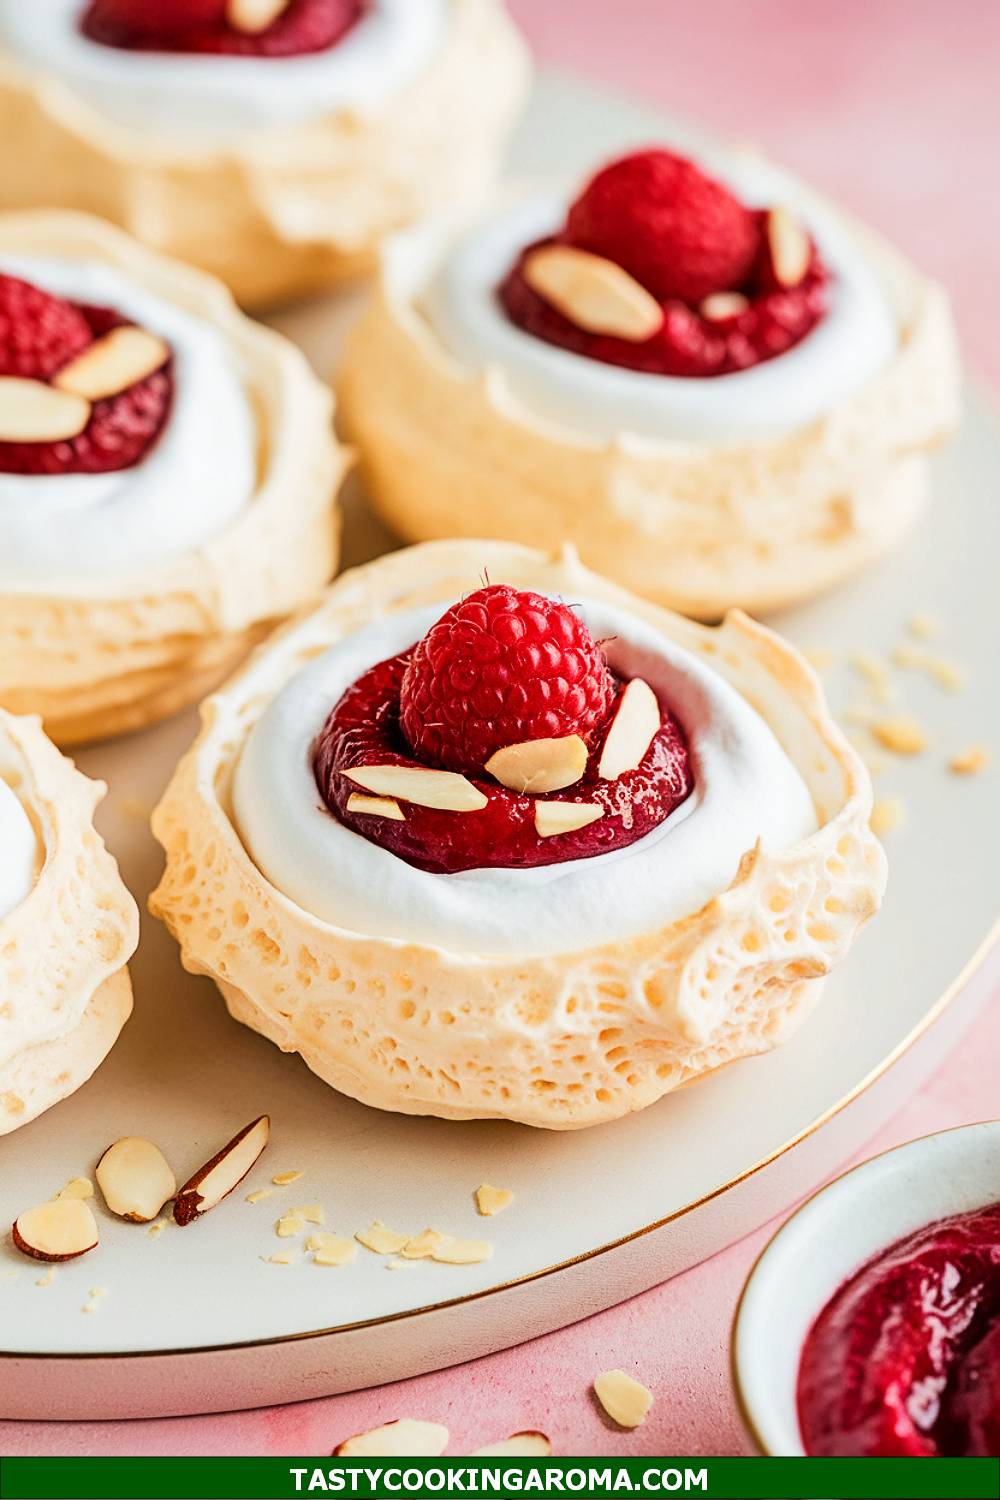
Raspberry Almond Meringue Nests
These Raspberry Almond Meringue Nests are a show-stopping dessert that’s light, airy, and full of flavor. The crispy meringue shells are subtly sweet with a hint of almond, while the raspberry filling adds a tart, juicy contrast. They’re perfect for Easter because they resemble little bird nests—adorable and delicious! Don’t let their elegant appearance fool you; they’re surprisingly simple to make.
Serving Size: 6 nests
Time Needed: 2 hours (includes baking and cooling time)
Ingredients
- 4 large egg whites, at room temperature
- 1 cup granulated sugar
- 1/2 teaspoon almond extract
- 1/4 teaspoon cream of tartar
- 1 cup fresh raspberries
- 1/2 cup whipped cream or mascarpone (optional)
Instructions
- Preheat your oven to 225°F (110°C) and line a baking sheet with parchment paper.
- In a clean, dry mixing bowl, beat the egg whites and cream of tartar on medium speed until soft peaks form.
- Gradually add the sugar, one tablespoon at a time, beating on high speed until stiff, glossy peaks form. Mix in the almond extract.
- Spoon the meringue into a piping bag with a star tip and pipe nest shapes onto the prepared baking sheet, leaving a small well in the center of each nest.
- Bake for 1.5 hours, then turn off the oven and let the meringues cool inside completely to prevent cracking.
- Once cooled, fill each nest with fresh raspberries and a dollop of whipped cream or mascarpone, if desired.
Quick Pros of the Recipe
- Light and airy texture with a crisp bite.
- Beautiful presentation resembling bird nests.
- Can be made ahead of time and assembled before serving.
- Gluten-free and naturally lower in calories.
Ingredient Substitutions or Customization Ideas: Swap raspberries for strawberries, blueberries, or a mix of berries. You can also use lemon curd or chocolate ganache as an alternative filling.
Cooking Tips and Tricks: Make sure your mixing bowl and beaters are completely grease-free to get the best meringue peaks. Pipe the nests evenly for consistent baking, and don’t skip the cooling step in the oven to avoid cracks.
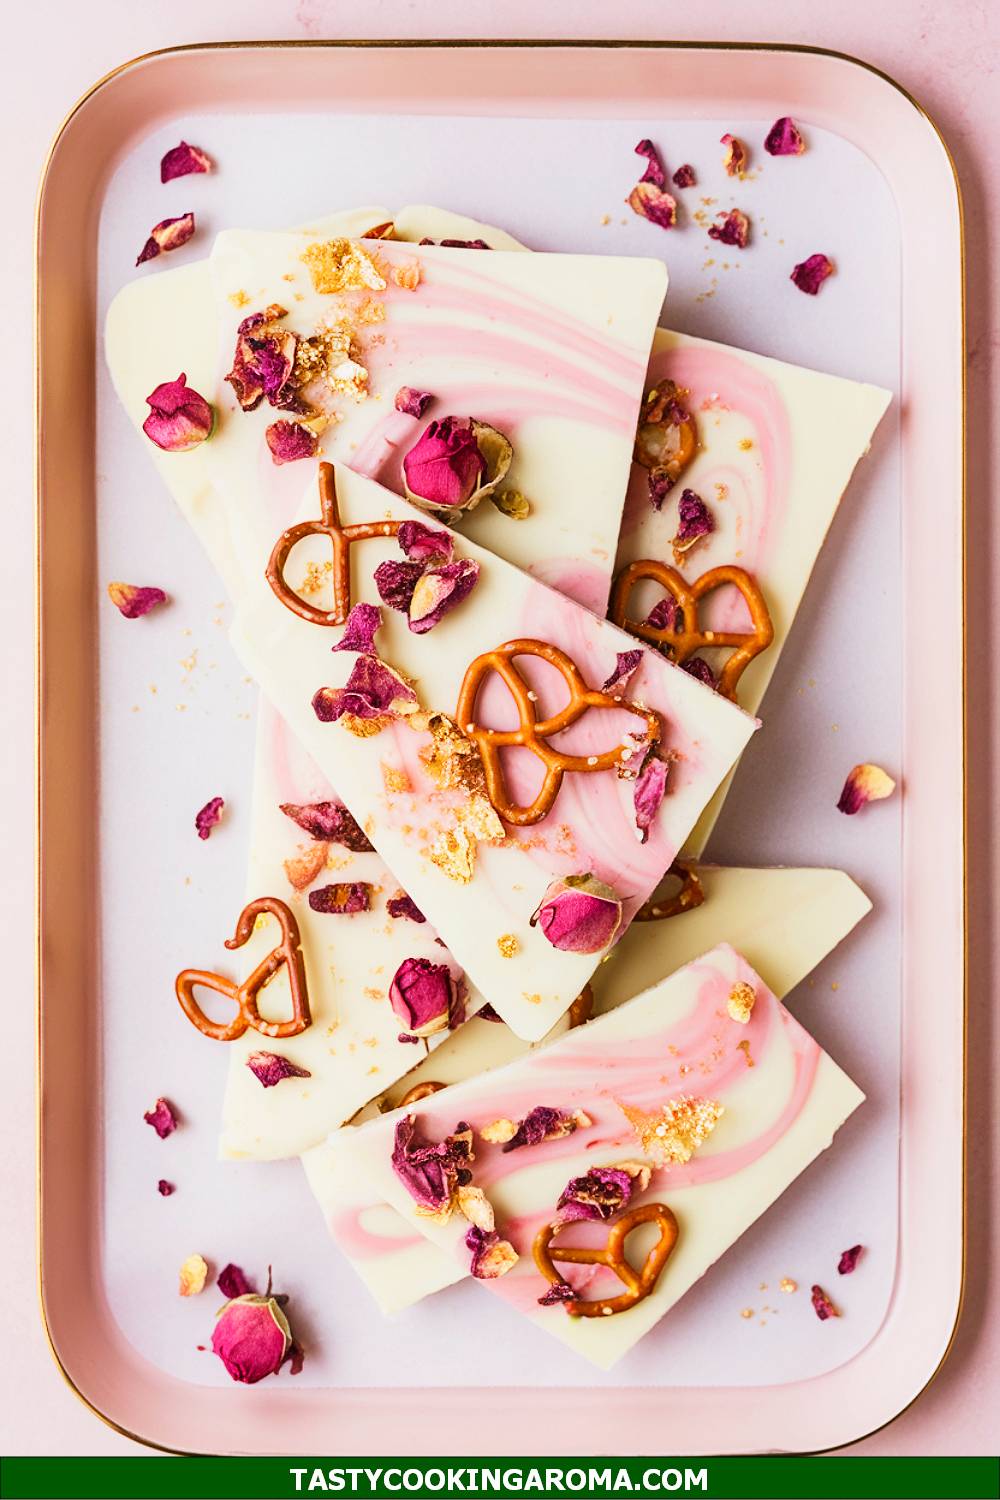
White Chocolate Rose Pretzel Bark
This White Chocolate Rose Pretzel Bark is a sweet and salty treat that’s as pretty as it is delicious. The white chocolate provides a creamy base, while the pretzels add a satisfying crunch, and edible rose petals make it feel extra fancy. It’s the kind of dessert that’s almost too beautiful to eat—but trust me, you’ll want to! Plus, it’s super easy to make, so you can whip it up in no time for your Easter celebrations.
Serving Size: 12 servings
Time Needed: 20 minutes (plus cooling time)
Ingredients
- 12 ounces white chocolate chips or melting wafers
- 1 cup mini pretzels
- 1/4 cup edible dried rose petals
- 1/4 teaspoon sea salt flakes
Instructions
- Line a baking sheet with parchment paper or a silicone mat.
- Melt the white chocolate in a microwave-safe bowl in 30-second intervals, stirring in between until smooth and fully melted.
- Pour the melted white chocolate onto the prepared baking sheet and spread it into an even layer using a spatula.
- Sprinkle the mini pretzels, rose petals, and sea salt flakes evenly over the chocolate while it’s still wet.
- Let the bark set at room temperature or refrigerate it for 20–30 minutes until firm.
- Once hardened, break the bark into pieces and serve or store in an airtight container.
Quick Pros of the Recipe
- Beautiful and elegant appearance with minimal effort.
- Perfect balance of sweet, salty, and floral flavors.
- Quick and easy to prepare with no baking required.
- Great for gifting or serving at parties.
Ingredient Substitutions or Customization Ideas: Use dark or milk chocolate instead of white chocolate for a richer flavor. Swap rose petals for colorful sprinkles or crushed freeze-dried fruits for a kid-friendly version.
Cooking Tips and Tricks: Spread the chocolate quickly to ensure an even layer before it begins to set. Store the bark in a cool, dry place to prevent melting or softening.
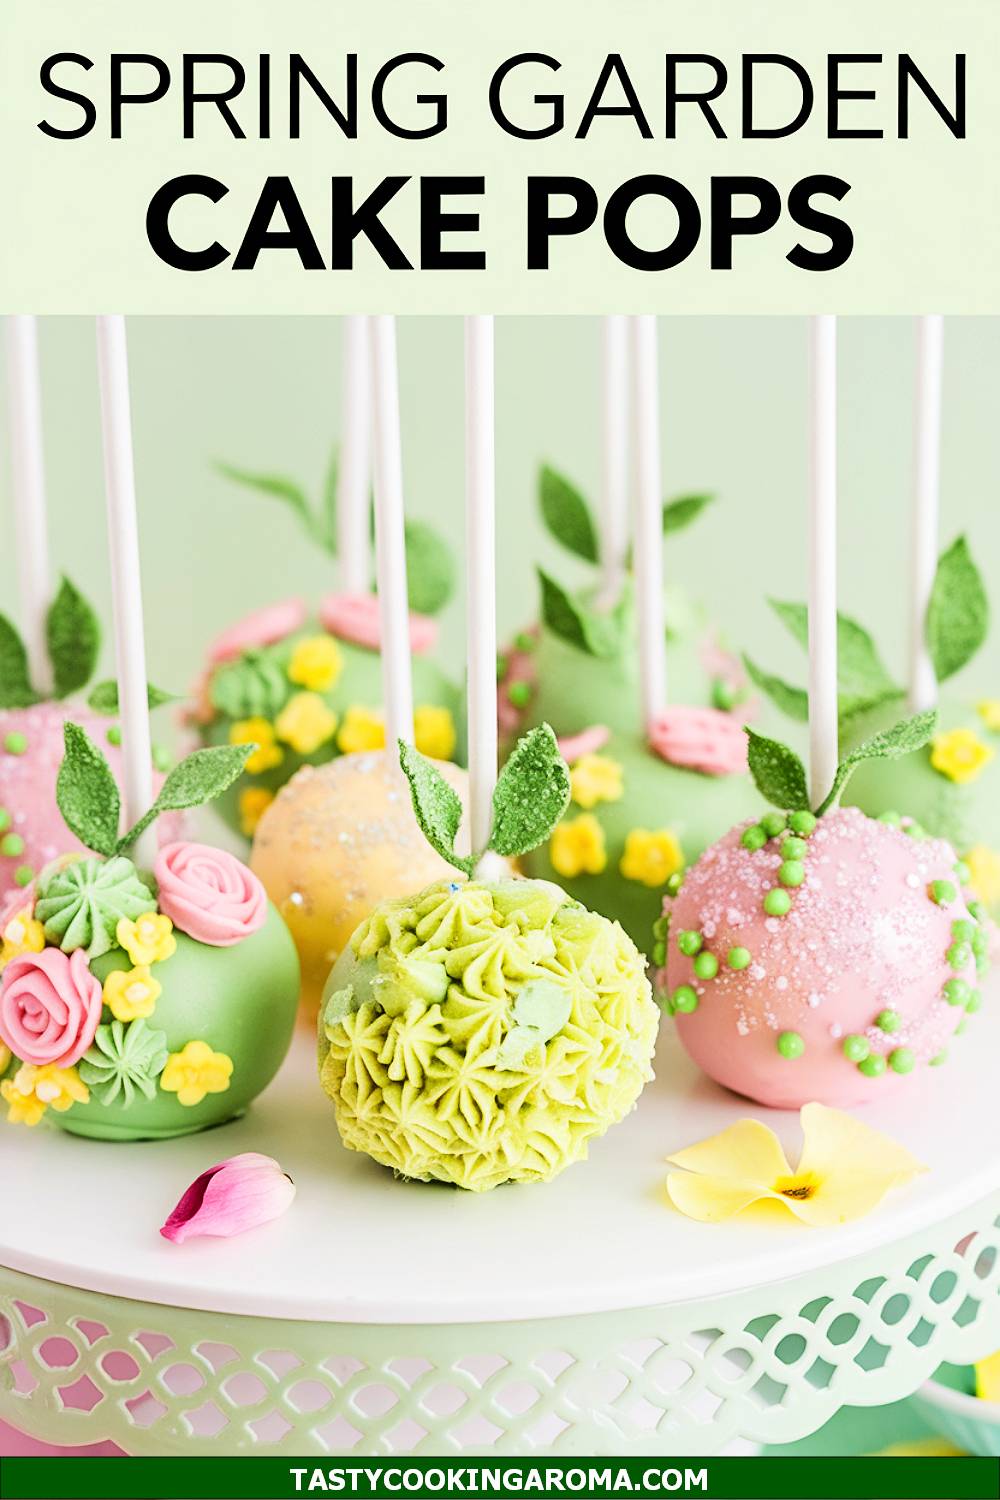
Spring Garden Cake Pops
Spring Garden Cake Pops are such a fun way to bring a pop of color and creativity to your Easter dessert table. These little treats are moist cake bites covered in chocolate or candy coating, decorated to look like tiny flower gardens. They’re perfect for kids and adults alike, and they make a great hands-on project if you’re looking to involve the family in some Easter prep. Plus, they’re easy to customize with your favorite cake flavors and colors!
Serving Size: 12 cake pops
Time Needed: 1 hour
Ingredients
- 1 box of cake mix (any flavor) + ingredients listed on the box
- 1 cup frosting (store-bought or homemade)
- 2 cups candy melts (variety of colors)
- Sprinkles, edible flowers, or small candies for decoration
- Lollipop sticks
Instructions
- Prepare the cake according to the package instructions, then allow it to cool completely.
- Crumble the cake into fine crumbs in a large bowl and mix in the frosting until the mixture holds together when pressed.
- Roll the mixture into small balls (about 1.5 inches) and place them on a baking sheet lined with parchment paper. Chill in the refrigerator for 30 minutes.
- Melt the candy melts according to the package instructions. Dip the tip of each lollipop stick into the melted candy, then insert it halfway into a cake ball.
- Dip each cake ball into the melted candy, making sure it’s fully coated. Gently tap off any excess and immediately decorate with sprinkles or edible flowers.
- Let the cake pops stand in a cake pop stand or a foam block until the coating is set.
Quick Pros of the Recipe
- Perfect for involving kids in Easter dessert prep.
- Customizable with different cake and candy flavors.
- Beautiful and festive presentation for any spring event.
Ingredient Substitutions or Customization Ideas: You can use gluten-free cake mix if needed or swap the candy melts for white chocolate. For decorations, try shredded coconut dyed with food coloring for a grassy effect!
Cooking Tips and Tricks: Make sure the cake balls are chilled well before dipping to avoid crumbling. Use a tall, narrow cup for melting the candy melts to easily coat the cake pops.
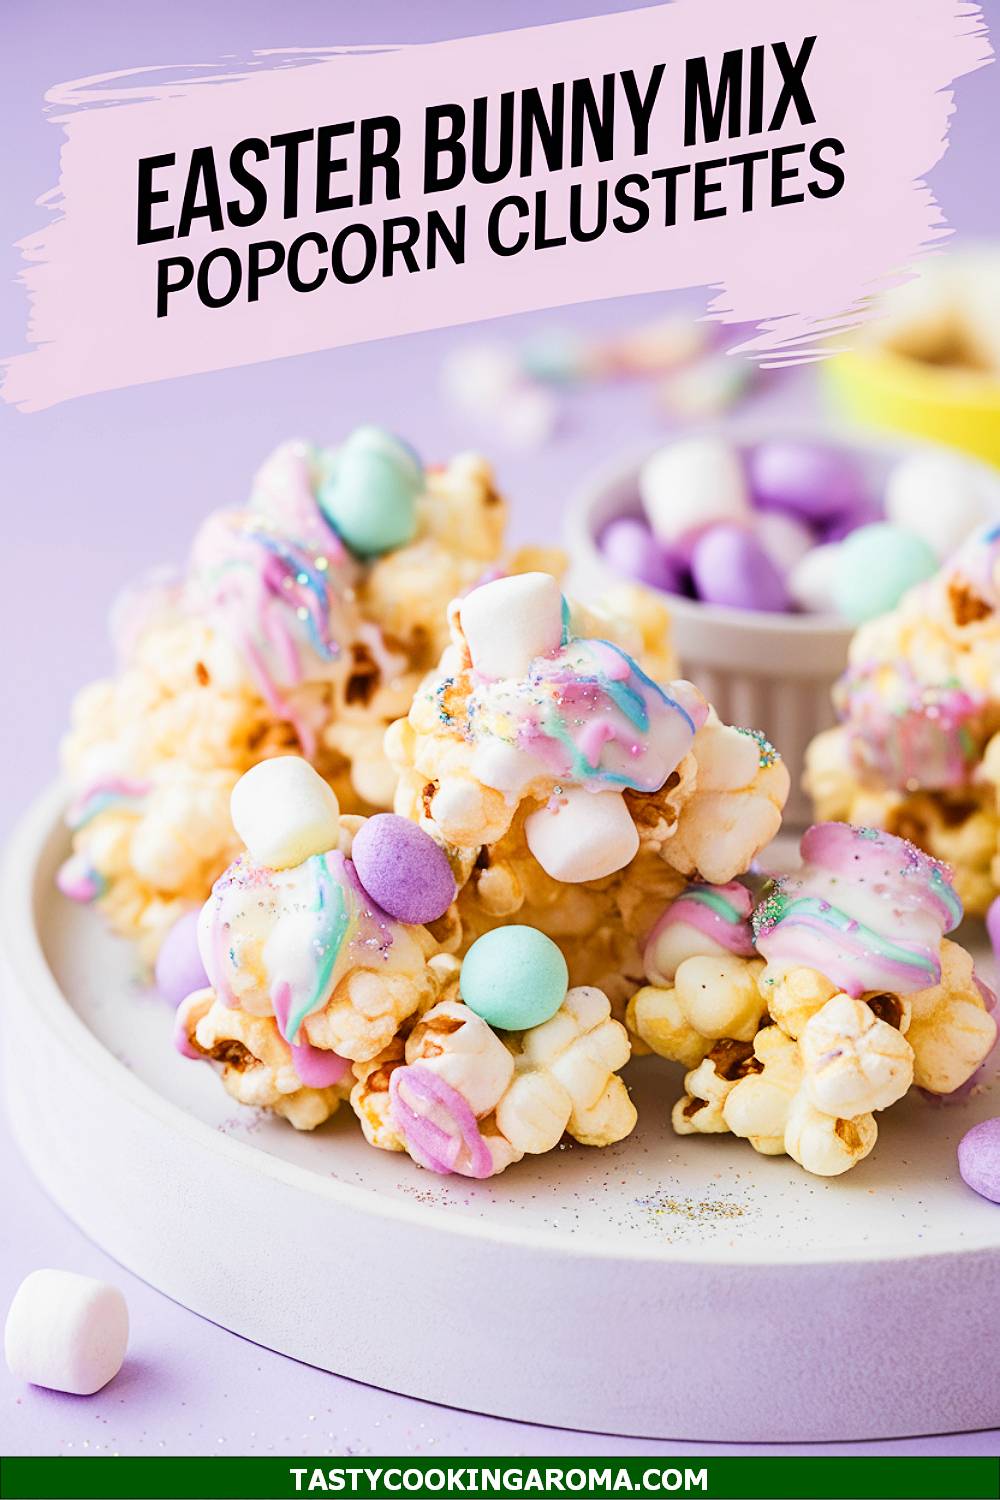
Easter Bunny Mix Popcorn Clusters
If you’re looking for a sweet and salty treat that’s super easy to make, Easter Bunny Mix Popcorn Clusters are a great choice! This snack combines popcorn, candy-coated chocolates, pretzels, and a drizzle of white chocolate for an irresistible crunch. It’s perfect for Easter parties or just snacking while hanging out with family. Plus, the colorful candies make it look as festive as it tastes!
Serving Size: 6 servings
Time Needed: 15 minutes
Ingredients
- 8 cups popped popcorn
- 1 cup mini pretzels
- 1 cup candy-coated chocolates (like M&Ms in pastel colors)
- 1 cup white chocolate chips
- Sprinkles (optional)
Instructions
- Spread the popped popcorn and pretzels on a large baking sheet lined with parchment paper.
- Sprinkle the candy-coated chocolates evenly over the popcorn and pretzels.
- Melt the white chocolate chips in the microwave in 30-second intervals, stirring between each interval until smooth.
- Drizzle the melted white chocolate over the popcorn mixture. Add sprinkles if desired for extra color.
- Let the mixture sit at room temperature until the chocolate hardens, then break it into clusters and serve.
Quick Pros of the Recipe
- Quick and easy to prepare with minimal cleanup.
- Great for satisfying both sweet and salty cravings.
- Perfect for Easter-themed parties or as a giftable treat.
Ingredient Substitutions or Customization Ideas: Swap white chocolate for dark or milk chocolate if you prefer a richer flavor. You can also add nuts or dried fruit for extra texture and flavor.
Cooking Tips and Tricks: Use freshly popped popcorn for the best crunch. If you don’t have a microwave, melt the white chocolate using a double boiler for better control.
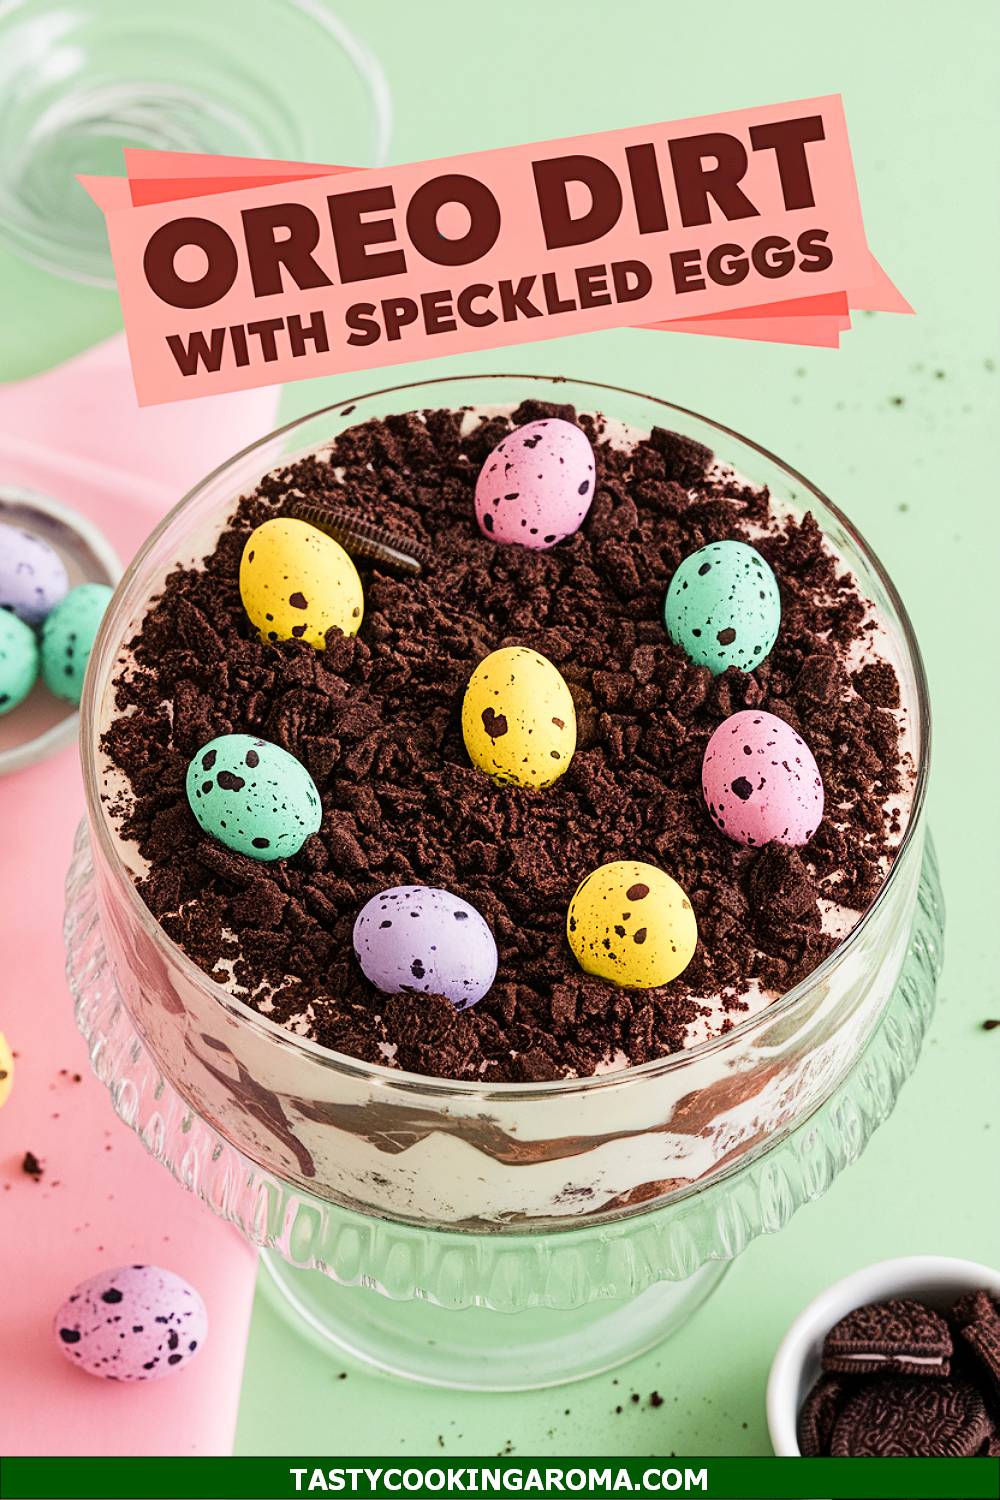
Oreo Dirt Dessert with Speckled Eggs
This Oreo Dirt Dessert with Speckled Eggs is a fun and whimsical nod to spring gardening, but with a sweet twist! Layers of creamy pudding, crushed Oreo cookies, and speckled candy eggs make this dessert both delicious and visually stunning. It’s easy to assemble and can be made ahead, making it perfect for Easter gatherings. Trust me, the combination of crunchy cookies and smooth pudding is a total crowd-pleaser!
Serving Size: 8 servings
Time Needed: 20 minutes (plus chilling time)
Ingredients
- 1 package Oreo cookies (crushed)
- 2 cups cold milk
- 1 package instant chocolate pudding mix
- 1 container whipped topping (like Cool Whip)
- Speckled candy eggs for decoration
Instructions
- In a bowl, whisk together the cold milk and pudding mix until thickened, about 2 minutes. Fold in the whipped topping until fully combined.
- In a serving dish or individual cups, layer crushed Oreo cookies and the pudding mixture, starting and ending with Oreos.
- Top the final layer with speckled candy eggs to resemble a garden bed.
- Chill in the refrigerator for at least 1 hour before serving to let the flavors meld together.
Quick Pros of the Recipe
- Simple to make with no baking required.
- Kid-friendly and visually appealing with the “dirt” and egg theme.
- Can be made ahead for convenience.
Ingredient Substitutions or Customization Ideas: Use vanilla pudding instead of chocolate for a lighter flavor. Add gummy worms for an extra fun touch!
Cooking Tips and Tricks: Crush the Oreos in a resealable bag with a rolling pin for easy cleanup. Use clear cups for individual servings to show off the layers.
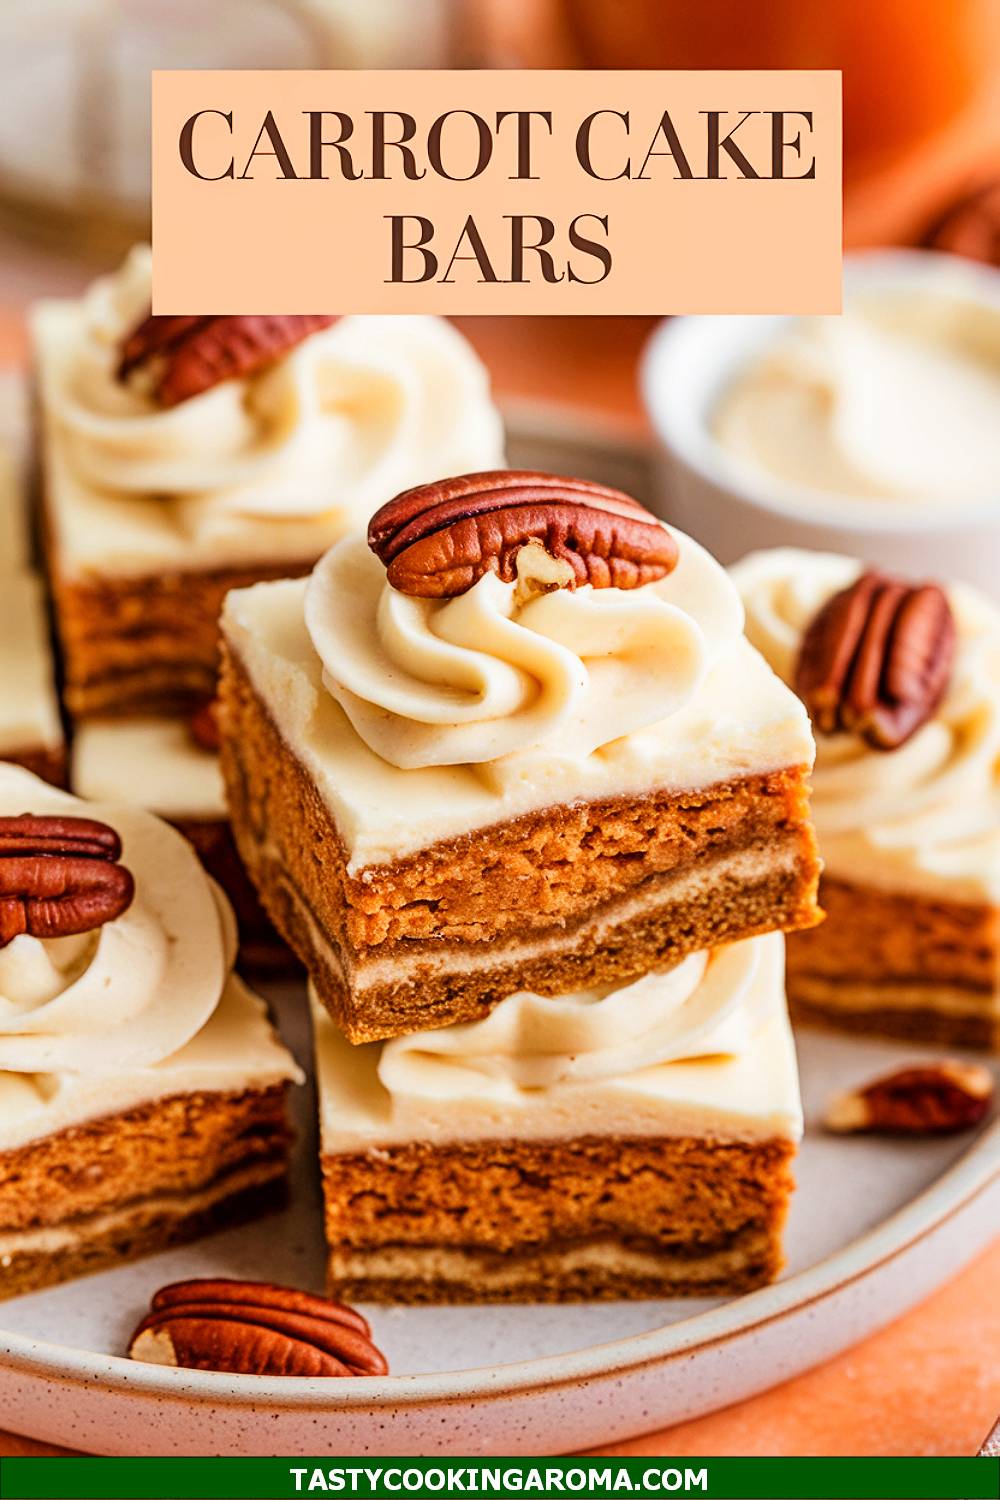
Carrot Cake Bars with Cream Cheese Swirls
These carrot cake bars are a delightful twist on a classic Easter dessert. The moist, spiced carrot cake base is perfectly complemented by luscious cream cheese swirls that add a creamy, tangy element to every bite. They’re easy to make and ideal for serving at Easter gatherings or as a quick April dessert. Plus, the swirled design makes them look as amazing as they taste!
Serving Size: 12 bars
Time Needed: 45 minutes
Ingredients
- 1 cup all-purpose flour
- 1/2 teaspoon baking powder
- 1/2 teaspoon baking soda
- 1/4 teaspoon salt
- 1 teaspoon ground cinnamon
- 1/2 teaspoon ground nutmeg
- 1/2 cup granulated sugar
- 1/2 cup brown sugar, packed
- 1/2 cup vegetable oil
- 2 large eggs
- 1 teaspoon vanilla extract
- 1 cup grated carrots
- 4 ounces cream cheese, softened
- 1/4 cup powdered sugar
Instructions
- Preheat your oven to 350°F (175°C) and grease an 8×8-inch baking pan or line it with parchment paper.
- In a medium bowl, whisk together flour, baking powder, baking soda, salt, cinnamon, and nutmeg.
- In a separate large bowl, mix granulated sugar, brown sugar, vegetable oil, eggs, and vanilla extract until smooth. Gradually add the dry ingredients to the wet mixture, stirring until just combined.
- Fold in the grated carrots and pour the batter into the prepared pan, spreading it evenly.
- In a small bowl, beat the cream cheese and powdered sugar until smooth. Drop spoonfuls of the cream cheese mixture over the batter and use a knife to gently swirl it into the cake.
- Bake for 30–35 minutes or until a toothpick inserted in the center comes out clean. Allow to cool before cutting into bars.
Quick Pros of the Recipe
- Beautiful swirled design makes it visually appealing.
- Moist and spiced carrot cake base pairs perfectly with cream cheese topping.
- Simple ingredients and steps make it beginner-friendly.
Ingredient Substitutions or Customization Ideas: You can substitute the cream cheese swirl with a dollop of whipped cream for a lighter option. Add raisins or chopped walnuts to the batter for extra texture and flavor.
Cooking Tips and Tricks: Make sure your cream cheese is softened to avoid lumps in the swirl mixture. Use a toothpick or skewer to create intricate swirls for a professional look.
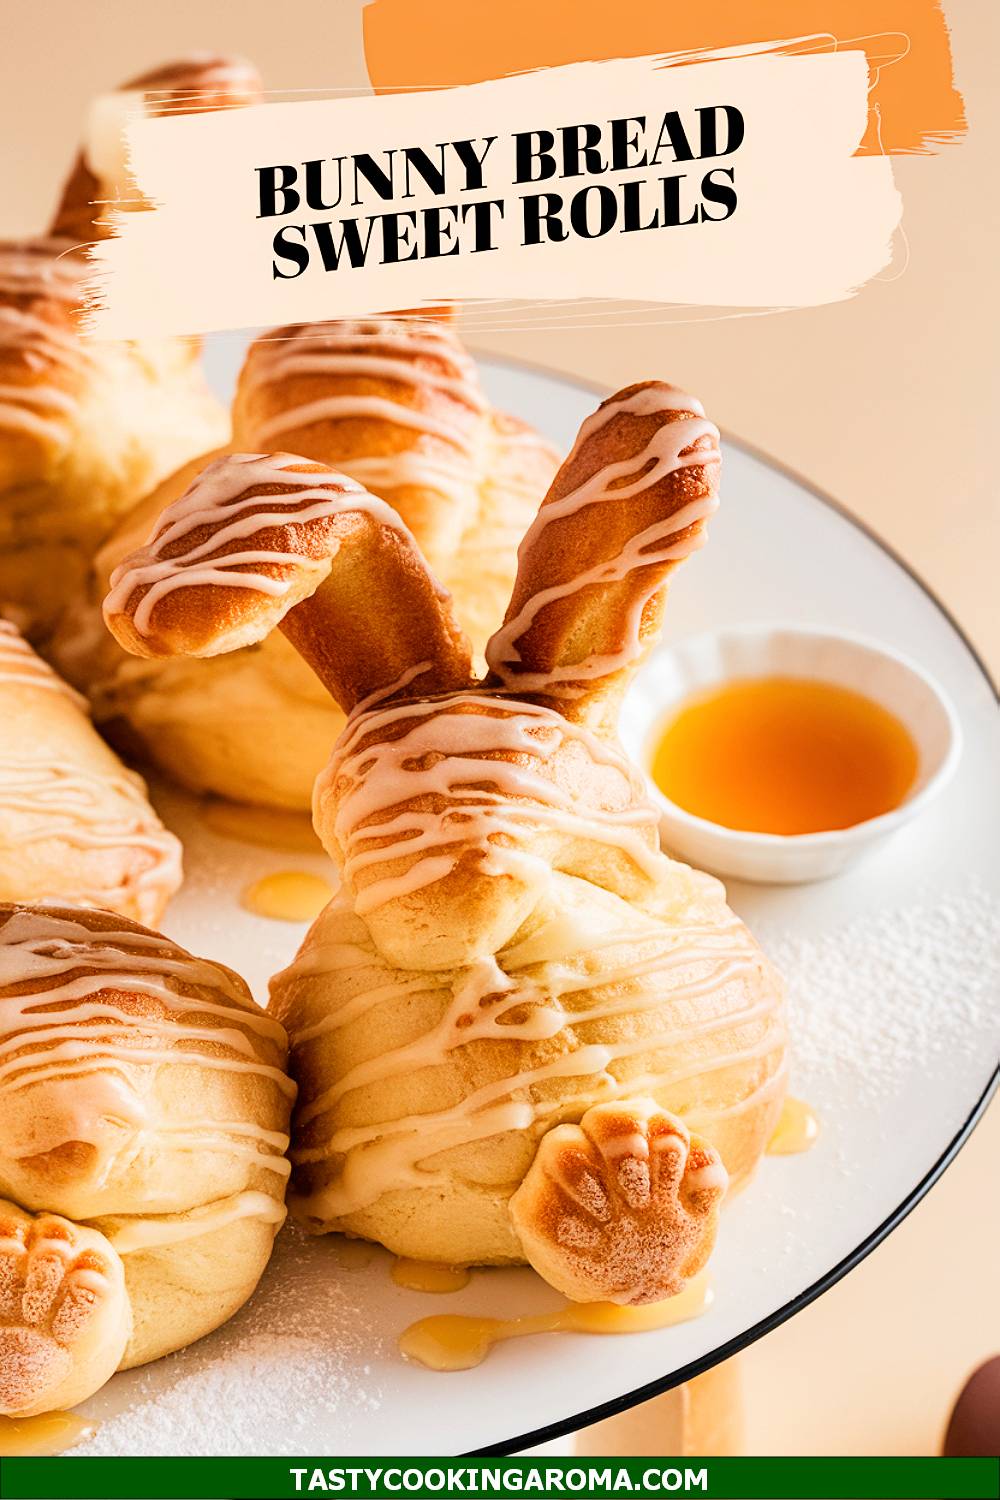
Bunny Bread Sweet Rolls with Honey Glaze
These bunny bread sweet rolls are a cute and festive addition to any Easter brunch table. They’re soft, fluffy, and have just the right amount of sweetness, making them perfect for kids and adults alike. The honey glaze adds a shiny finish and a touch of floral sweetness to these adorable rolls. Shaped like little bunny heads, they’re almost too cute to eat—but trust me, you’ll want to!
Serving Size: 8–10 rolls
Time Needed: 2 hours (including rising time)
Ingredients
- 3 cups all-purpose flour
- 1/4 cup granulated sugar
- 1/2 teaspoon salt
- 1 packet active dry yeast (2 1/4 teaspoons)
- 1/2 cup warm milk (110°F)
- 1/4 cup unsalted butter, melted
- 1 large egg
- 1/4 cup honey
- 1 tablespoon water
Instructions
- In a large bowl, combine flour, sugar, salt, and yeast. Mix well.
- Add the warm milk, melted butter, and egg to the dry ingredients. Stir until the dough comes together, then knead on a floured surface for about 8 minutes until smooth and elastic.
- Place the dough in a greased bowl, cover with a kitchen towel, and let it rise in a warm place for 1 hour or until doubled in size.
- Preheat your oven to 375°F (190°C). Divide the dough into 8–10 pieces and shape each into a bunny head, using small pieces of dough to form the ears.
- Place the shaped rolls on a baking sheet lined with parchment paper. Cover and let rise for another 20 minutes.
- Bake for 15–18 minutes or until golden brown. Brush the warm rolls with a mixture of honey and water to create a glossy glaze.
Quick Pros of the Recipe
- Adorable bunny shapes make it perfect for Easter celebrations.
- Soft and fluffy texture with a hint of sweetness.
- The honey glaze adds a delightful finishing touch.
Ingredient Substitutions or Customization Ideas: For a richer flavor, use buttermilk instead of regular milk. You can also add a sprinkle of cinnamon or nutmeg to the dough for a warm, spiced flavor.
Cooking Tips and Tricks: Make sure the milk is warm but not hot to avoid killing the yeast. Use kitchen scissors to shape the bunny ears for more precision.
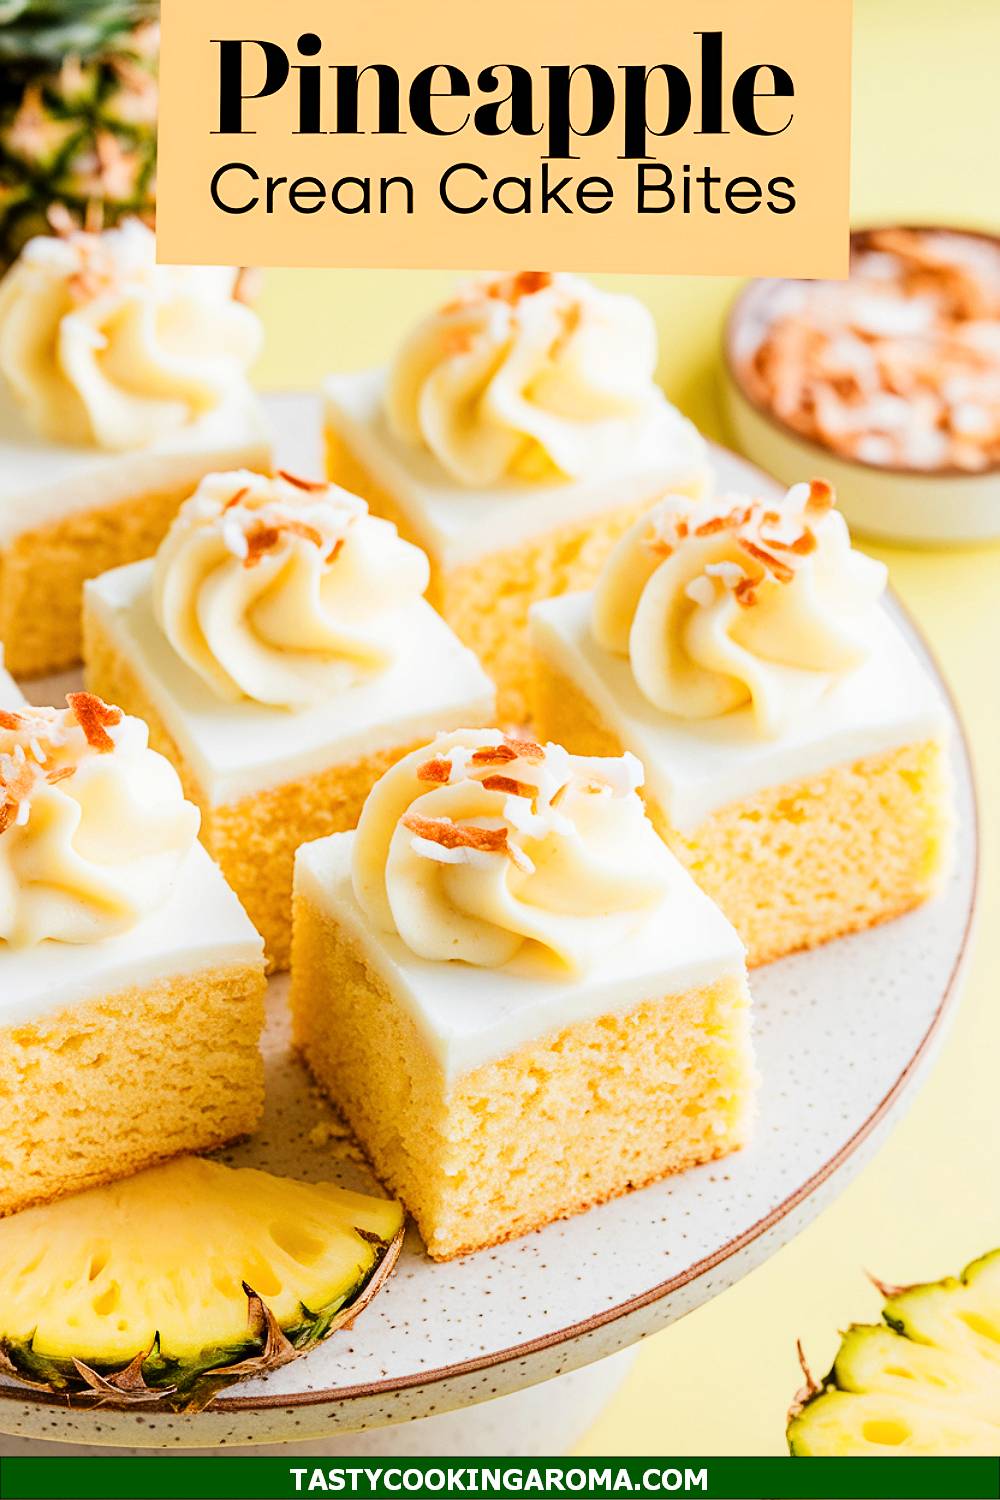
Pineapple Cream Cake Bites
These pineapple cream cake bites are a tropical treat that’s perfect for spring and Easter gatherings. Each bite-sized piece combines soft pineapple-infused cake with a creamy topping that’s light and refreshing. They’re easy to make and serve, making them a great option for dessert platters or as a quick grab-and-go treat. The bright, fruity flavor is a refreshing change from heavier desserts!
Serving Size: 16 bites
Time Needed: 40 minutes
Ingredients
- 1 box yellow cake mix
- 1/2 cup crushed pineapple, drained
- 1/2 cup water
- 1/3 cup vegetable oil
- 3 large eggs
- 1 cup heavy whipping cream
- 2 tablespoons powdered sugar
- 1/4 cup shredded coconut (optional, for garnish)
Instructions
- Preheat your oven to 350°F (175°C) and grease a 9×13-inch baking pan or line it with parchment paper.
- In a large bowl, combine the cake mix, crushed pineapple, water, vegetable oil, and eggs. Mix until smooth and pour the batter into the prepared pan.
- Bake for 25–30 minutes or until a toothpick inserted in the center comes out clean. Allow the cake to cool completely.
- In a separate bowl, whip the heavy cream and powdered sugar until stiff peaks form. Spread the whipped cream over the cooled cake and sprinkle with shredded coconut, if desired.
- Cut the cake into bite-sized squares and serve chilled.
Quick Pros of the Recipe
- Bright, tropical flavor from the pineapple.
- Light and creamy topping balances the sweetness.
- Easy to prepare and perfect for sharing.
Ingredient Substitutions or Customization Ideas: Swap the yellow cake mix for white or angel food cake mix for a lighter flavor. Add a splash of coconut extract to the whipped cream for an extra tropical touch.
Cooking Tips and Tricks: Make sure the cake is fully cooled before adding the whipped cream to prevent it from melting. Use a serrated knife to cut clean, even squares for serving.
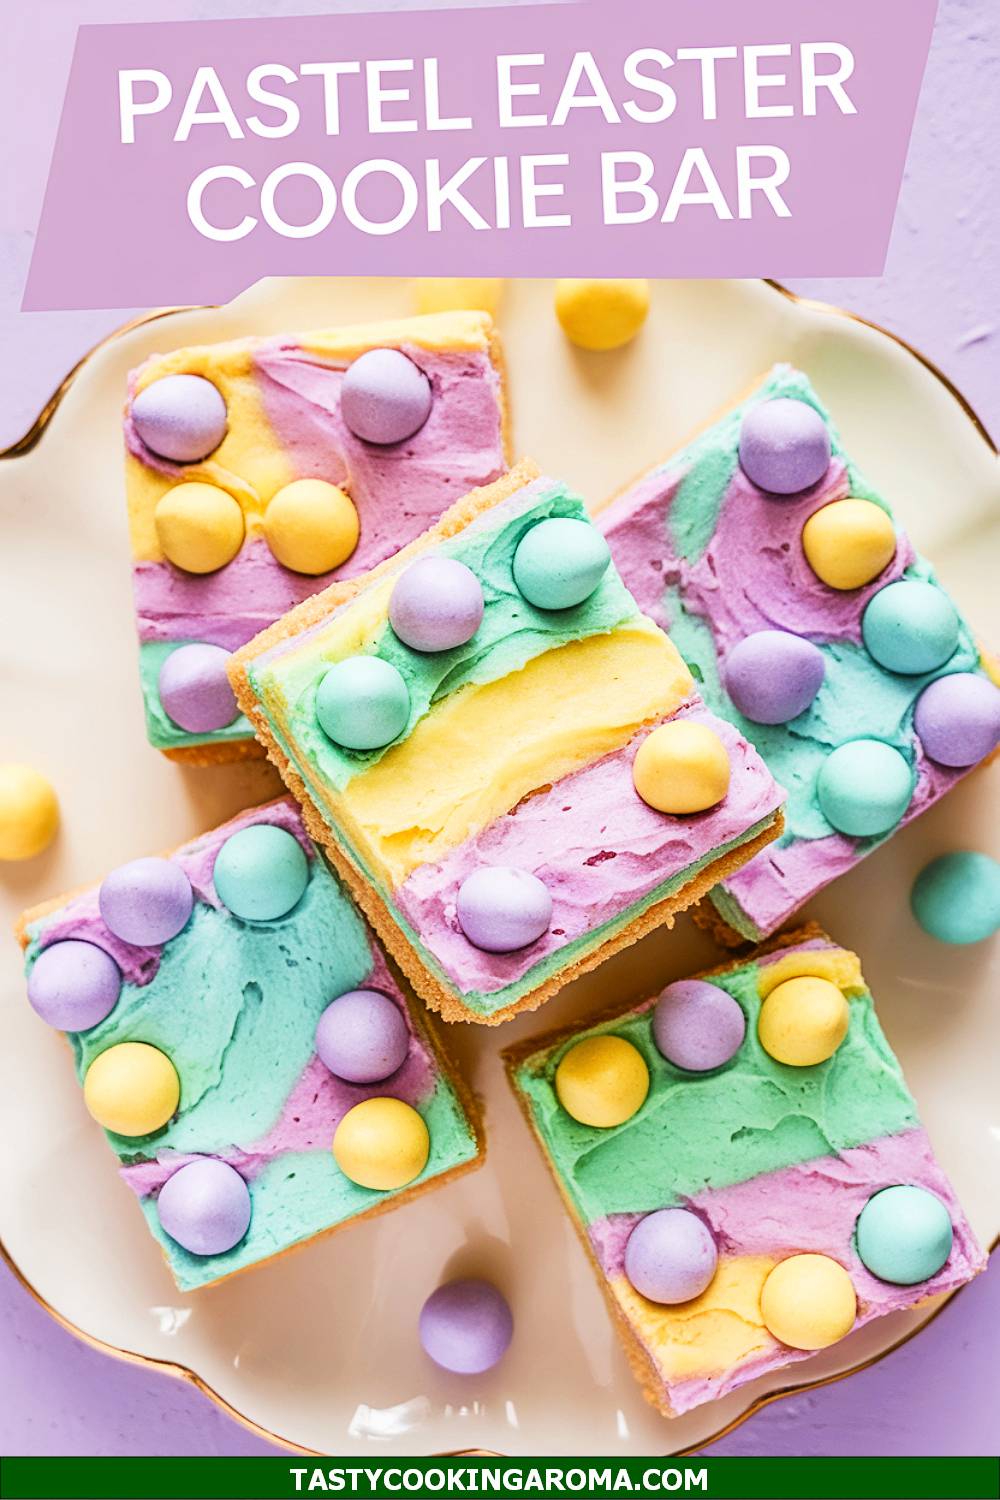
Pastel Easter Cookie Bar Layers
These Pastel Easter Cookie Bar Layers are a delightful combination of soft cookie dough and vibrant, pastel-hued frosting. Each bite is sweet, colorful, and perfect for springtime celebrations or Easter parties. The playful layers make them as fun to look at as they are to eat!
Serving Size: 12 servings
Time Needed: 1 hour
Ingredients
- 2 ½ cups all-purpose flour
- 1 tsp baking powder
- ½ tsp salt
- ¾ cup unsalted butter, softened
- 1 cup granulated sugar
- 1 large egg
- 2 tsp vanilla extract
- 1 cup pastel-colored candy or sprinkles
- 1 ½ cups powdered sugar (for frosting)
- 2–3 tbsp milk (for frosting)
- Food coloring (pastel pink, yellow, and green)
Instructions
- Preheat your oven to 350°F (175°C) and line a 9×13-inch baking pan with parchment paper.
- Whisk together flour, baking powder, and salt in a medium bowl. Set aside.
- Cream butter and sugar until light and fluffy. Mix in the egg and vanilla extract.
- Gradually add the dry ingredients, mixing until just combined. Stir in pastel candy or sprinkles.
- Press the dough evenly into the prepared pan and bake for 18–20 minutes. Let cool completely.
- Divide powdered sugar frosting into three portions, tint each with a different pastel color, and spread in layers over the cooled cookie bars. Slice and serve.
Quick Pros of the Recipe
- Easy to customize with your favorite pastel colors.
- Perfect for Easter celebrations or spring parties.
- Soft, chewy texture with a vibrant, festive look.
Ingredient Substitutions or Customization Ideas: Swap pastel candies for mini chocolate eggs or jellybeans. Add almond extract for a subtle flavor twist.
Cooking Tips and Tricks: Use a sharp knife to achieve clean slices. Chill the bars slightly before cutting to keep the frosting layers neat.
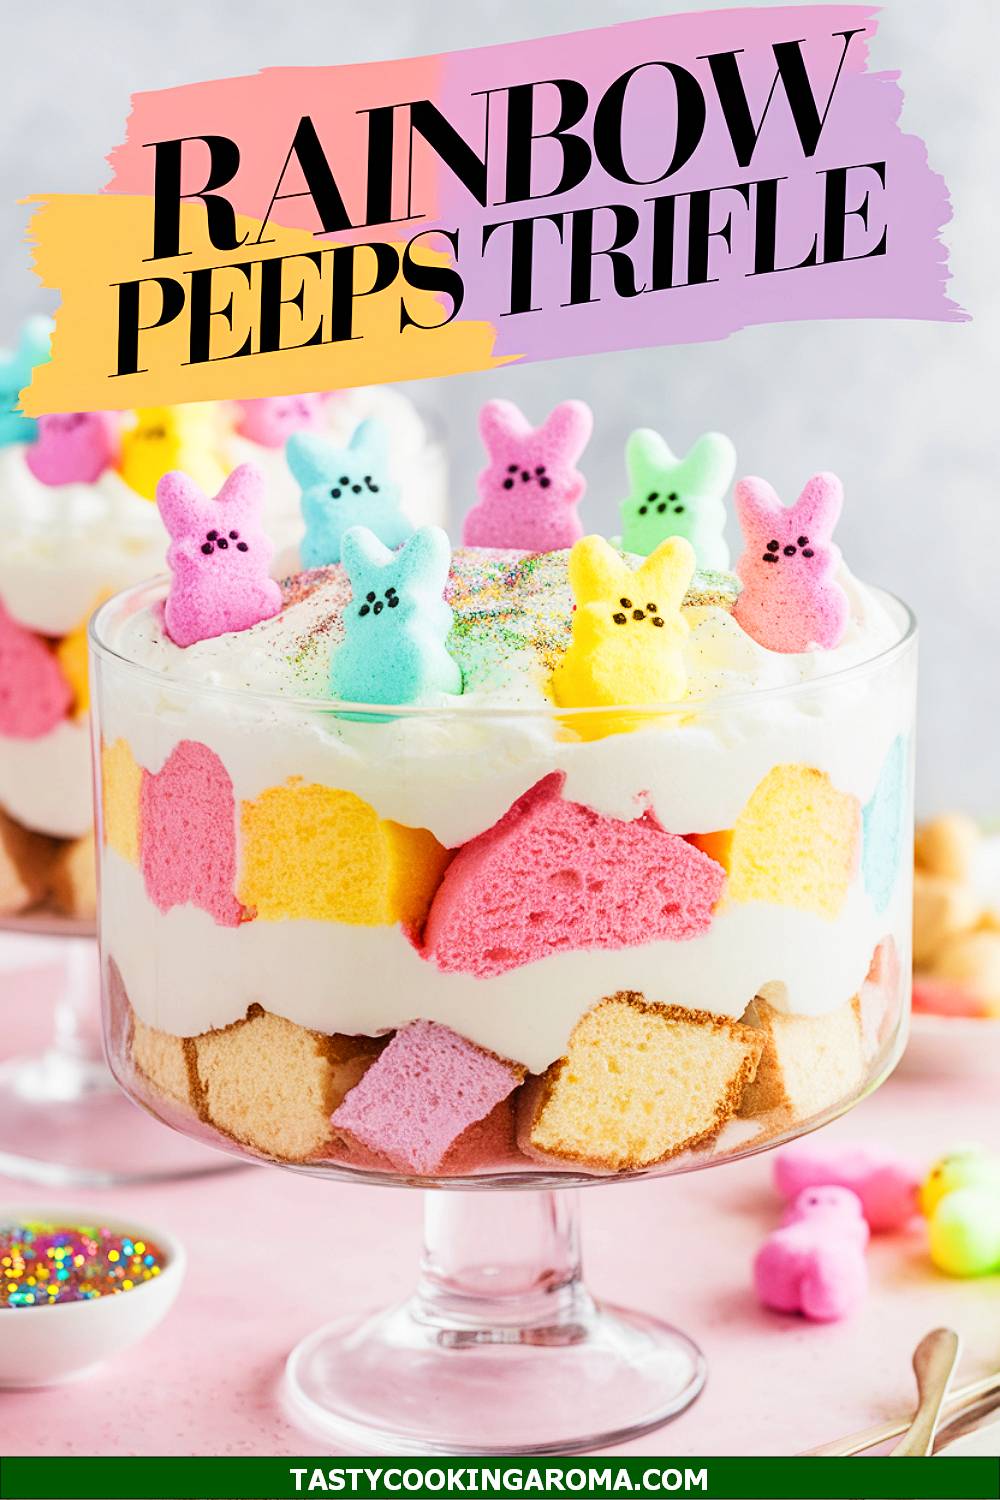
Peeps Trifle with Rainbow Layers
This Peeps Trifle with Rainbow Layers is a show-stopping dessert perfect for Easter festivities. Bright, colorful layers of cake, whipped cream, and marshmallow Peeps come together in a stunning display that’s almost too pretty to eat. Kids and adults alike will adore this sweet treat!
Serving Size: 8–10 servings
Time Needed: 1 hour 15 minutes
Ingredients
- 1 box white or yellow cake mix (prepared according to package instructions)
- Gel food coloring (red, orange, yellow, green, blue, purple)
- 3 cups whipped cream or whipped topping
- 1 bag marshmallow Peeps (assorted colors)
- 1 cup pastel sprinkles (optional)
Instructions
- Prepare the cake mix according to package instructions, then divide the batter into six bowls. Tint each bowl a different color of the rainbow.
- Bake the colored batter in separate 6-inch round pans or as thin layers on a baking sheet. Let cool completely.
- Cut cake layers into squares or circles to fit your trifle dish.
- Layer the trifle dish with alternating colors of cake, whipped cream, and Peeps, repeating until the dish is full. Sprinkle with pastel sprinkles for extra flair.
- Chill for 1–2 hours before serving.
Quick Pros of the Recipe
- Vibrant, rainbow-colored dessert perfect for spring.
- Easy to assemble with store-bought cake mix.
- Crowd-pleaser for kids and adults alike.
Ingredient Substitutions or Customization Ideas: Use pudding or custard instead of whipped cream for a richer dessert. Substitute Peeps with gummy candies or pastel marshmallows.
Cooking Tips and Tricks: Use clear bowls to showcase the layers. Press gently to avoid crushing the cake and Peeps during assembly.
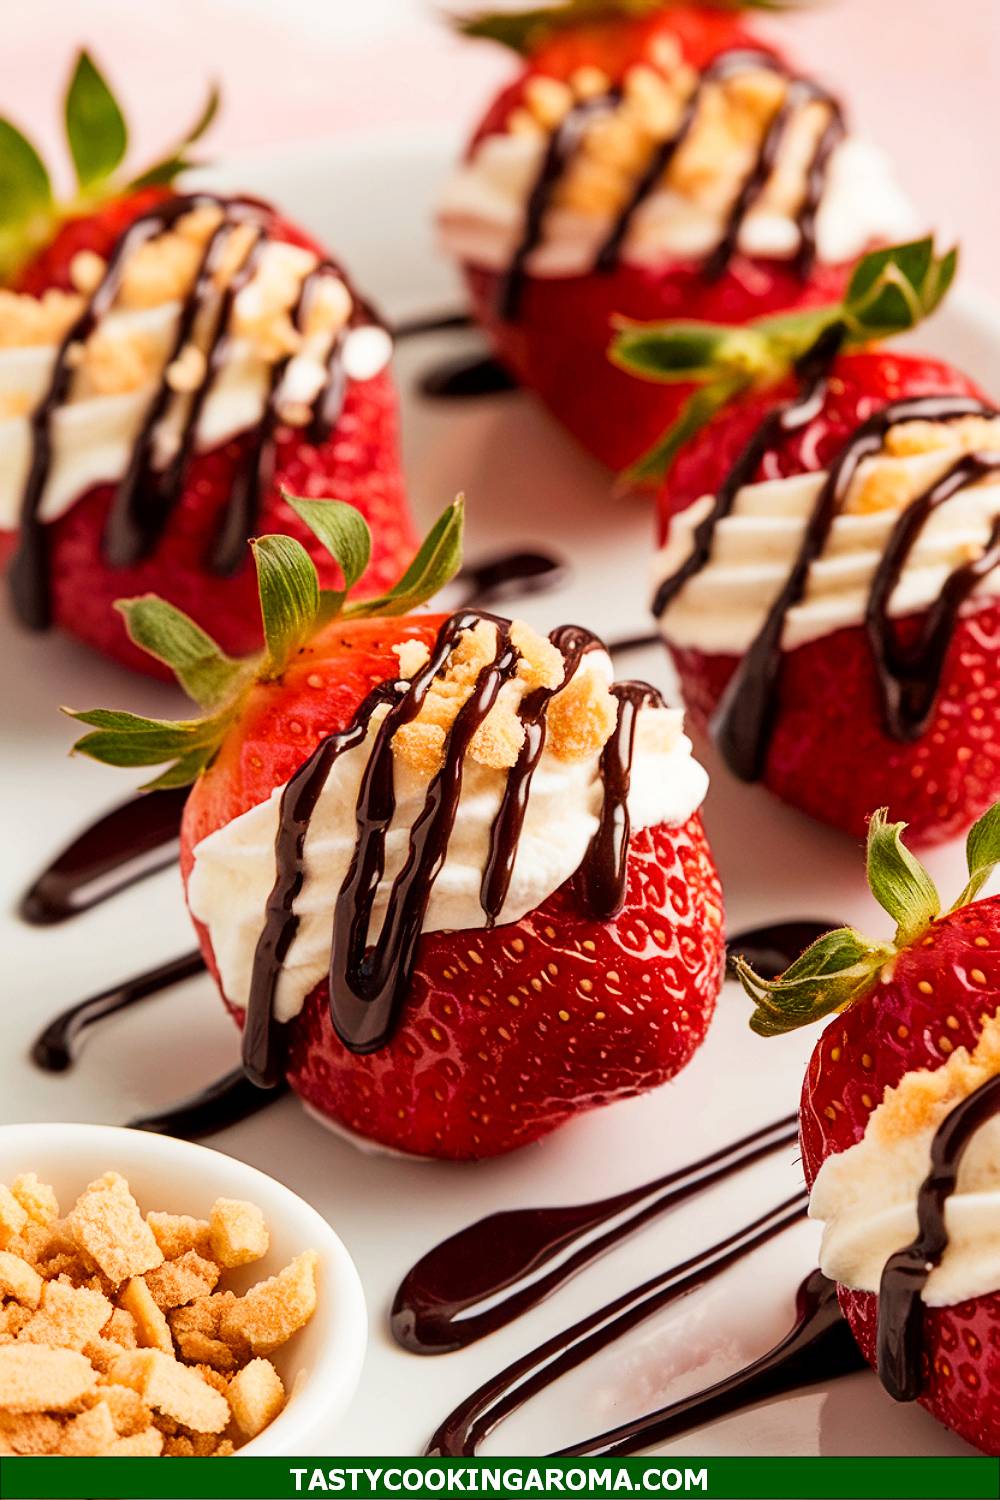
Deviled Strawberries with Cheesecake Filling
These Deviled Strawberries with Cheesecake Filling are a fresh, elegant twist on a classic dessert. Juicy strawberries are filled with a creamy cheesecake mixture, making them an irresistible treat for Easter brunch or spring gatherings. They’re easy to make and a guaranteed hit!
Serving Size: 12 servings
Time Needed: 30 minutes
Ingredients
- 1 lb fresh strawberries
- 8 oz cream cheese, softened
- ¼ cup powdered sugar
- 1 tsp vanilla extract
- 2 tbsp graham cracker crumbs (for garnish)
- Sprinkles or crushed candy for decoration (optional)
Instructions
- Wash and hull the strawberries, cutting a small piece off the bottom so they stand upright.
- In a bowl, beat cream cheese, powdered sugar, and vanilla extract until smooth.
- Fill a piping bag with the cheesecake mixture and pipe it into each strawberry.
- Sprinkle graham cracker crumbs or sprinkles on top for garnish. Chill until ready to serve.
Quick Pros of the Recipe
- A fresh and creamy dessert that’s easy to make.
- Perfect for brunch, parties, or a light treat.
- Naturally portioned for easy serving.
Ingredient Substitutions or Customization Ideas: Add lemon zest to the filling for a tangy kick. Substitute graham cracker crumbs with chocolate shavings for a richer flavor.
Cooking Tips and Tricks: Use large strawberries for easier filling. Chill the cheesecake mixture before piping for a firmer consistency.
FAQ
How can I make these recipes healthier?
Many of these delectable desserts can be made lighter by swapping out ingredients. For example, you can use Greek yogurt instead of heavy cream in the Pineapple Cream Cake Bites or opt for reduced-sugar chocolate in the White Chocolate Rose Pretzel Bark. To reduce sugar, try natural sweeteners like honey or maple syrup in recipes such as the Honey Citrus Blossom Mini Bundt Cakes.
Can I make these desserts ahead of time?
Yes, many of these recipes can be prepared in advance! Recipes like the Oreo Dirt Dessert with Speckled Eggs and Deviled Strawberries with Cheesecake Filling can be premade and stored in the refrigerator for up to two days. Other desserts like the Spring Garden Cake Pops and Bunny Bread Sweet Rolls with Honey Glaze can also be assembled in advance and stored in airtight containers.
Can I adjust these recipes for dietary restrictions?
Most of these recipes can be adjusted to accommodate dietary restrictions. For gluten-free options, substitute all-purpose flour with almond or gluten-free flour in items like the Carrot Cake Bars with Cream Cheese Swirls. Vegan substitutions, such as dairy-free cream cheese and plant-based milk, work wonderfully in recipes like the Deviled Strawberries with Cheesecake Filling or Pastel-Crusted Cheesecake Tartlets. Make sure to choose allergy-friendly substitute chocolates and candies for recipes containing toppings!
What if I don’t have all the ingredients mentioned?
No problem! There’s flexibility in these recipes. For example, if you don’t have lavender for the Lemon Lavender Bunny Tail Truffles, you can simply omit it or replace it with another floral essence like rose or orange blossom. Similarly, swap fruits like strawberries for raspberries in recipes such as the Raspberry Almond Meringue Nests, depending on availability.
How do I decorate these desserts for an Easter theme?
It’s easier than you think! Use pastel-colored candies, mini chocolate eggs, and edible glitter to adorn desserts such as Easter Birds Nest or Cake Cups. Edible flowers or piped frosting designs shaped like bunny ears, chicks, or flowers can add whimsical touches to items like the Spring Garden Cake Pops or Carrot Cupcake Recipe.
Conclusion

“`
