Chicken Pakora Step By Step Recipe

Chicken Pakora is a celebrated Indian cuisine recipe cherished across the globe for its crispy exterior and tender, flavorful chicken inside. Did you know that pakoras were traditionally a monsoon snack, serving as a warm comfort during rainy days?
In just 30 minutes, and with simple, aromatic ingredients, you can create an authentic Indian cuisine masterpiece right in your kitchen.
Why You’ll Love This Recipe:
- Crispy Delight: The perfect crunch of the batter with tender, flavorful chicken inside makes every bite satisfying.
- Quick and Easy: Ready in about 30 minutes, these pakoras are a quick fix for sudden cravings or unexpected guests.
- Versatile Snack: Ideal for any occasion, from casual snacking to festive gatherings, and can be customized with various fillings.
- Flavor Explosion: The combination of spices marinated with chicken then fried, offers an explosion of flavors that’s hard to resist.
Preparing Indian Chicken Pakora involves marinating bite-sized chicken pieces in a blend of spices and chickpea flour, then deep-frying them to achieve that iconic golden crunch.
- It serves as a perfect snack for gatherings, a starter for your meals, or a side dish to complement your main courses.
- You can easily adapt it to include your favorite veggies, swap chicken for alternative proteins like paneer or fish, or even add a twist with cheese, making it a perfect fit for different dietary preferences or meal times.
In this guide, you’ll learn
- How to make Yummy Chicken Pakora in your kitchen
- Healthy Vegan Alternatives For The Items Used In the Recipe
- Common Mistakes To Avoid, Pro Tips To Enhance The Taste Of the Dish
- FAQs (Reader Questions Answered) and much more stuff!
So, grab your apron, and let’s dive in!
How to Make Crispy Chicken Pakora At Home As A Beginner
Preparation Time: 20 minutes
Cooking Time: 20 minutes
Total Time: 40 minutes
Serves: 4
Ingredients:
For the Marinade:
-
- Boneless chicken breasts: 1 lb (cut into bite-sized pieces)
- Greek yogurt (or dairy-free alternative): 2 tablespoons
- Ginger paste: 1 teaspoon
- Garlic paste: 1 teaspoon
- Cumin Seeds: 1 teaspoon
- Turmeric powder: 1/2 teaspoon
- Chili powder: 1 teaspoon (adjust to taste)
- Garam masala: 1 teaspoon
- Salt: 1/2 teaspoon
For the Batter:
-
- Chickpea flour (Besan): 1 cup (for a gluten-free option)
- Rice flour: 2 tablespoons (for extra crispiness)
- Carom seeds (Ajwain): 1/2 teaspoon (for digestion)
- Baking soda: 1/4 teaspoon
- Water: As needed to form a thick batter
- Salt: To taste
Other:
-
- Fresh cilantro: 2 tablespoons (chopped, for garnish)
- Vegetable oil: For deep frying
Instructions:
Marinate the Chicken:
- In a large bowl, combine Greek yogurt, ginger paste, garlic paste, turmeric powder, chili powder, garam masala, and salt. Mix well.
- Add the chicken pieces to the marinade, ensuring each piece is well-coated.
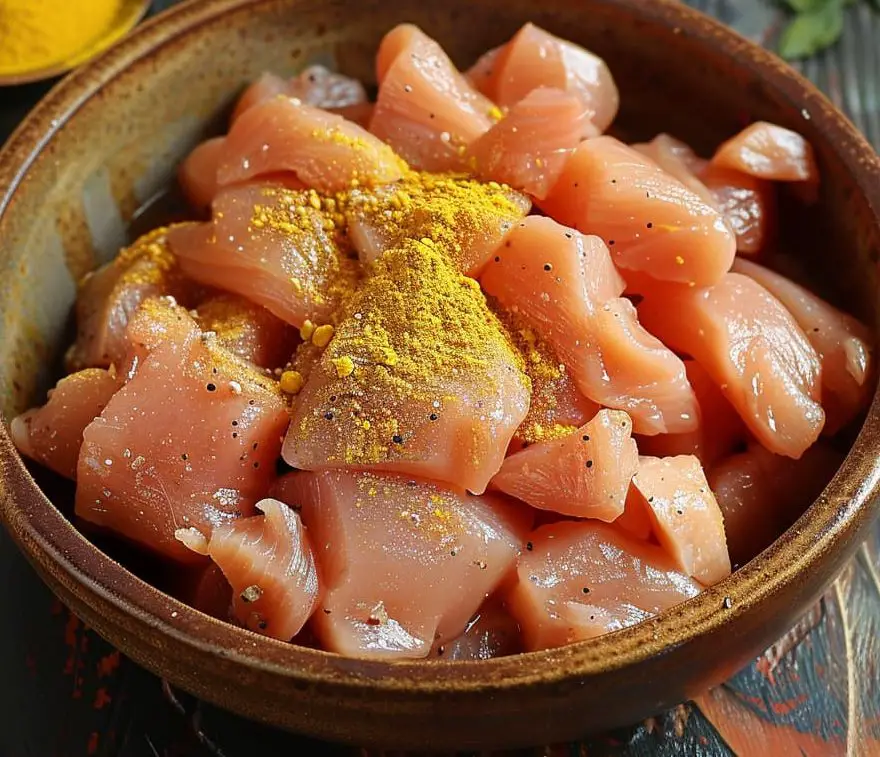
- Let it marinate for at least 15 minutes or better flavor, and refrigerate for up to 2 hours.
- The marinade should be thick enough to cling to the chicken pieces without dripping off. If it feels too runny, a little more yogurt can help thicken it. This ensures that the spices fully coat the chicken, infusing it with flavor.
- After marination, I further chop them into smaller pieces but you can do that pre-marination as well.
Prepare the Batter:
- In another bowl, mix chickpea flour, rice flour, carom seeds, baking soda, and salt.
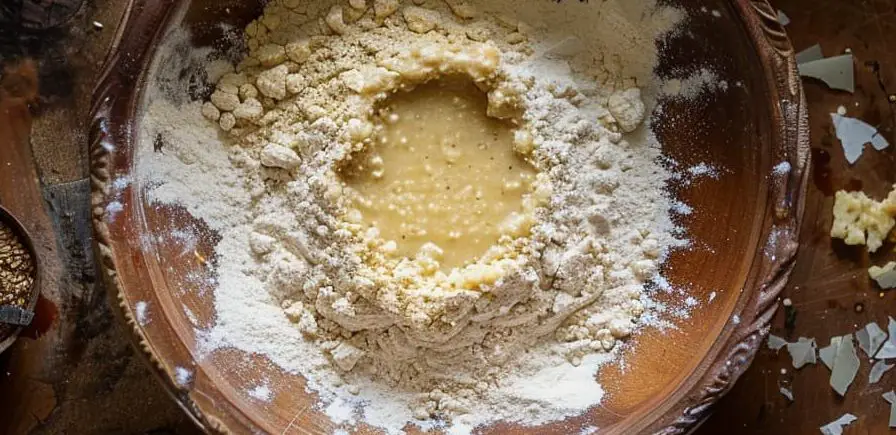
- Gradually add water, whisking continuously, until a thick batter forms. The consistency should be such that it coats the back of a spoon.
- The key to a crispy pakora lies in the consistency of the batter. It should be thick, akin to pancake batter, allowing it to adhere to the chicken without sliding off.
- If the batter is too thin, your pakoras might not achieve that desirable crispiness; too thick, they might end up doughy inside.
Heat the Oil:
- In a deep frying pan or kadai, heat the oil over medium heat.
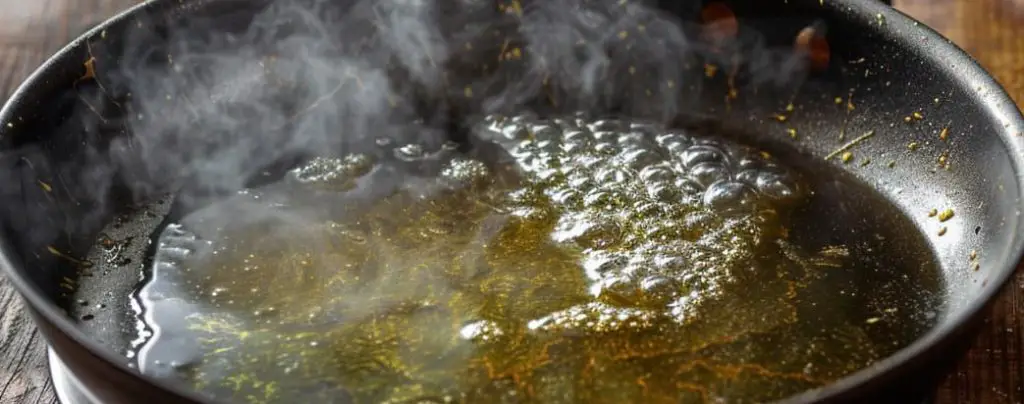 To test if the oil is ready, drop a small amount of batter into the oil; if it sizzles and rises to the surface, the oil is hot enough.
Fry the Pakoras:
- Dip each marinated chicken piece into the batter, ensuring it’s completely coated.
- Carefully place the battered chicken pieces in the hot oil. Avoid the temptation to overcrowd the pan.
- Cooking in batches ensures that the oil temperature remains stable, which is crucial for achieving an even golden color and crisp texture.
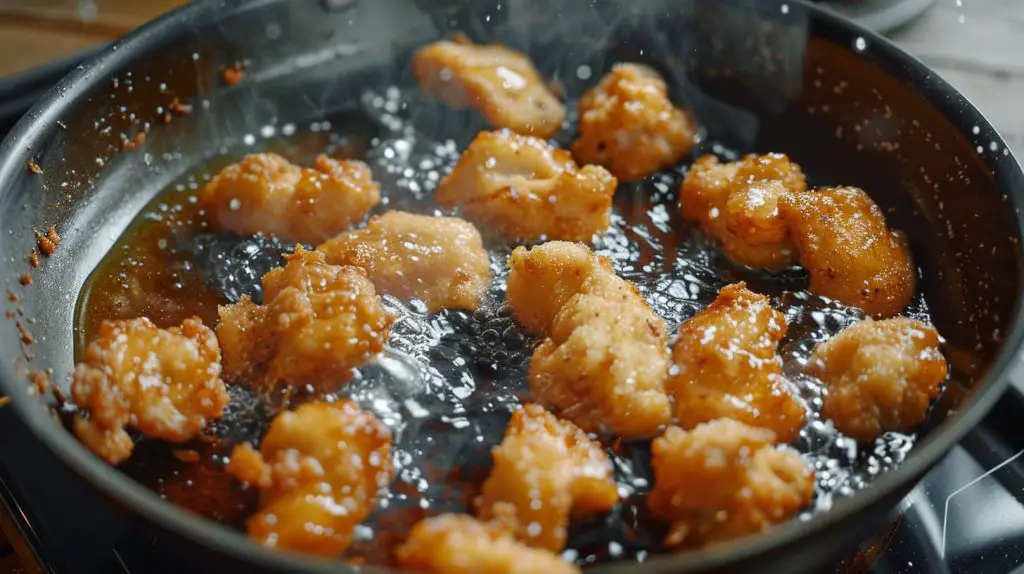
- Overcrowding can lower the oil’s temperature, leading to soggy pakoras.
- Fry until golden brown and crispy, about 4-5 minutes per side. Use a slotted spoon to remove the pakoras from the oil and drain on paper towels.
Draining Excess Oil
- After frying, let the pakoras rest on a wire rack over a sheet of paper towels.
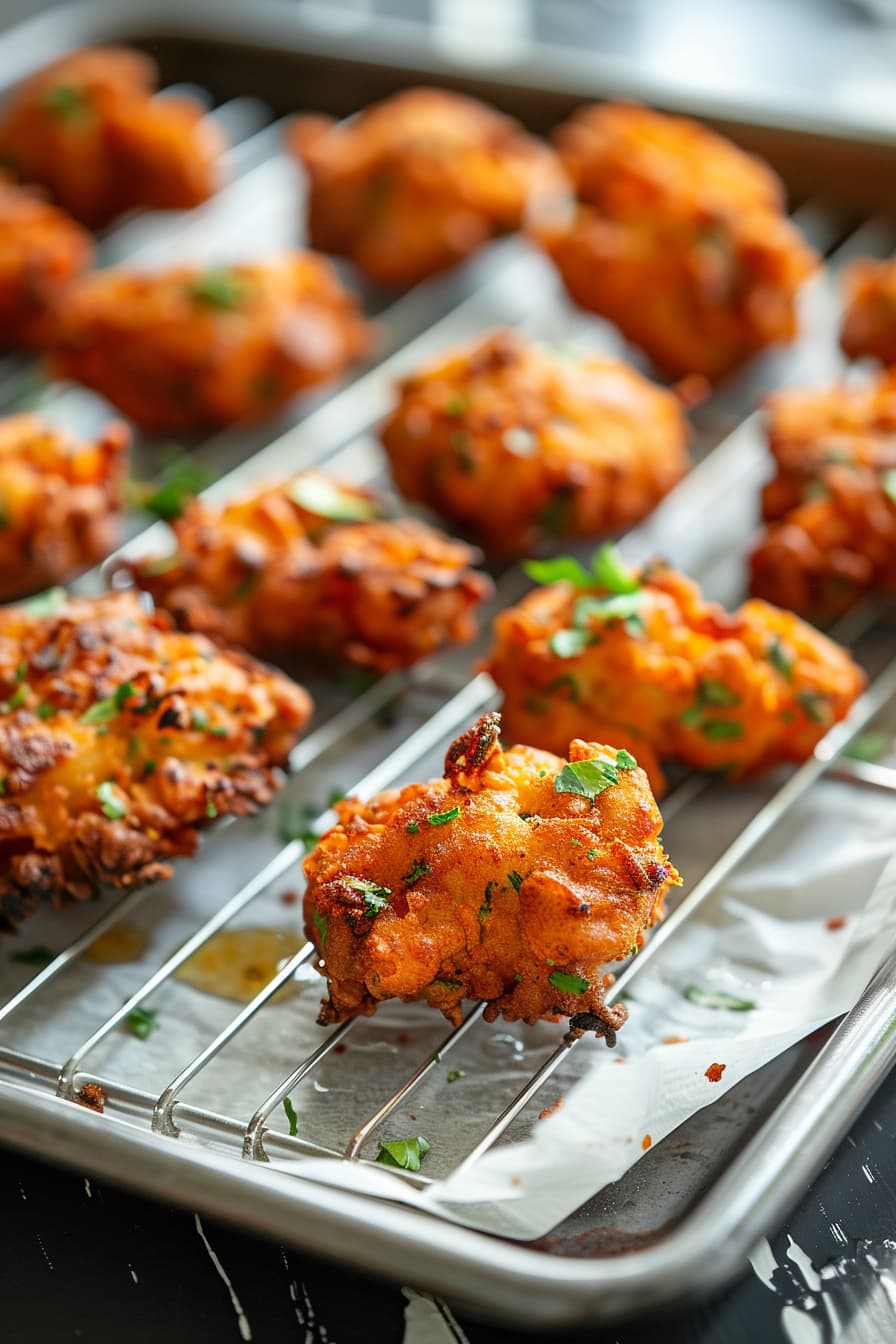
- This setup allows excess oil to drip off while preventing the pakoras from becoming soggy, which can happen if they’re left to cool on a flat surface.
Serve:
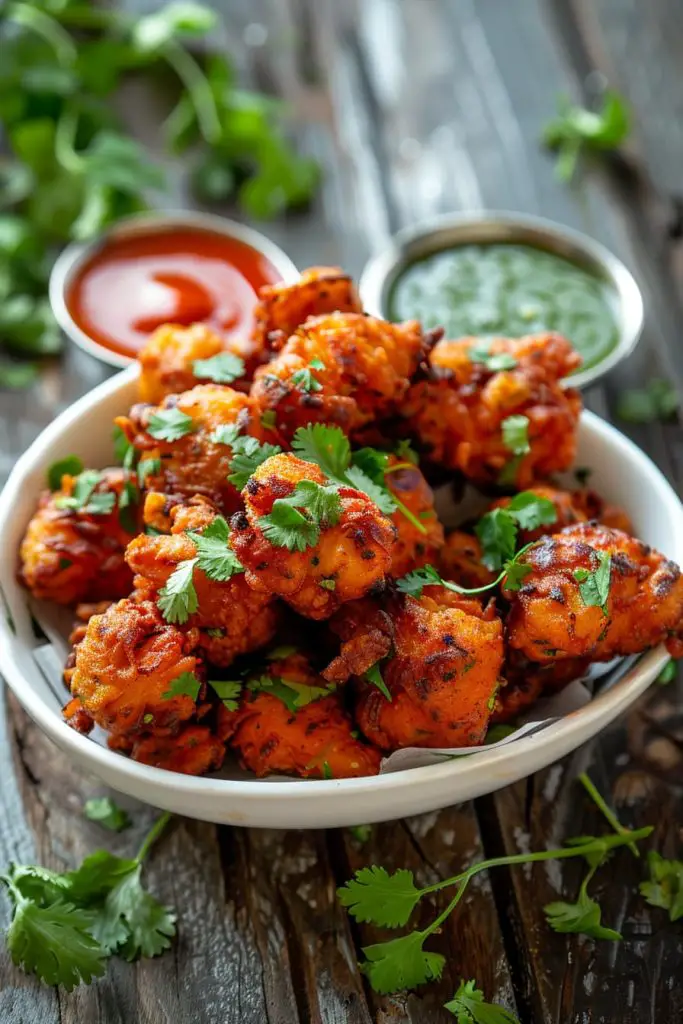
- Garnish with chopped cilantro and serve hot with your favorite sauce, mint chutney, or tamarind chutney.
Healthy Vegan Alternatives For the Recipe
- Instead of chicken, you can use: Firm tofu, cut into cubes or strips. Chickpeas (cooked or canned) or lentils for added texture and protein.
-
- Cornmeal or breadcrumbs can also be used for added crunch.
Mistakes To Avoid While Making Chicken Pakora
Ingredient Selection:
- Common Error: Using large chicken pieces. Larger pieces won’t cook evenly and may remain raw inside.
- Avoidance: Cut chicken into small, bite-sized pieces to ensure they cook thoroughly and quickly.
- Common Error: Substituting chickpea flour (Besan) with all-purpose flour. The unique flavor and texture of pakoras come from chickpea flour.
- Avoidance: Stick to chickpea flour for authentic taste and texture. It’s also gluten-free, catering to those with dietary restrictions.
Preparation Pitfalls:
- Common Error: Over-marinating the chicken. While marinating is essential, too long can make the chicken too soft and affect the final texture.
- Avoidance: Marinate the chicken for 1-2 hours. This is enough time for the flavors to infuse without compromising the texture.
- Common Error: Skipping the resting time for the batter. A rested batter leads to better-coated pakoras.
- Avoidance: Let the batter sit for at least 10-15 minutes after mixing. This allows the ingredients to hydrate and mix well.
Cooking Techniques:
- Common Error: Frying at the wrong temperature. Too hot, and the outside burns before the inside cooks; too cool, and the pakoras absorb too much oil, becoming greasy.
- Avoidance: Maintain a medium-high heat (about 350°F or 175°C) for frying. Test the oil temperature by dropping a small amount of batter into it; it should sizzle and rise to the surface.
- Common Error: Crowding the pan. Overcrowding lowers the oil temperature and can lead to soggy pakoras.
- Avoidance: Fry in batches. Give each pakora enough space to cook evenly and become crispy.
Seasoning and Flavoring:
- Common Error: Under or over-seasoning the batter. The right balance of spices is crucial for flavor.
- Avoidance: Taste the batter before adding the chicken (you can fry a tiny bit to taste). Adjust the seasoning as needed, keeping in mind that the spices will be more pronounced once the pakoras are fried.
Presentation Tips:
- Common Error: Letting the pakoras sit too long before serving, can make them lose their crispiness.
- Avoidance: Serve the pakoras hot and fresh. If necessary, keep them in a warm oven (not too hot to avoid further cooking) on a wire rack to maintain crispiness until serving.
- Common Error: Overloading the serving plate. Overcrowded plates can make the pakoras steam and become soggy.
- Avoidance: Use a platter with enough space, possibly in layers separated by parchment paper, to keep them crispy. Garnish with fresh cilantro or slices of onion for a visually appealing presentation.
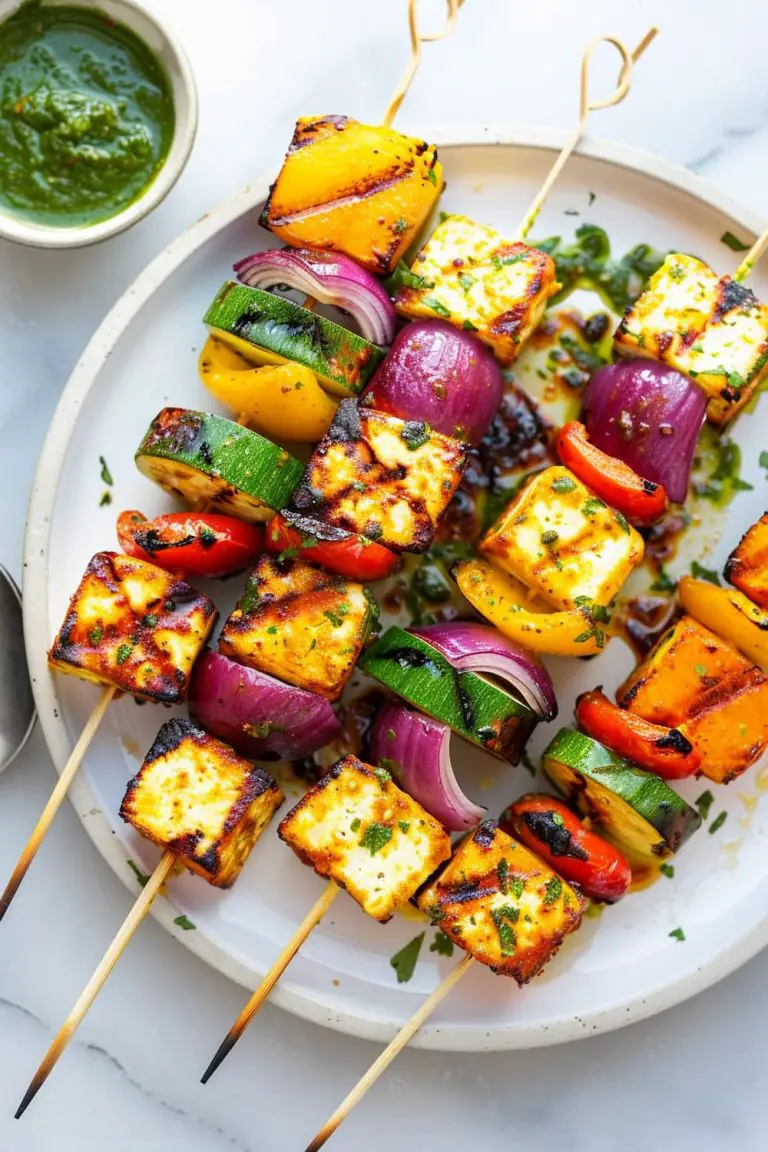
Pairing Suggestions for Chicken Pakora
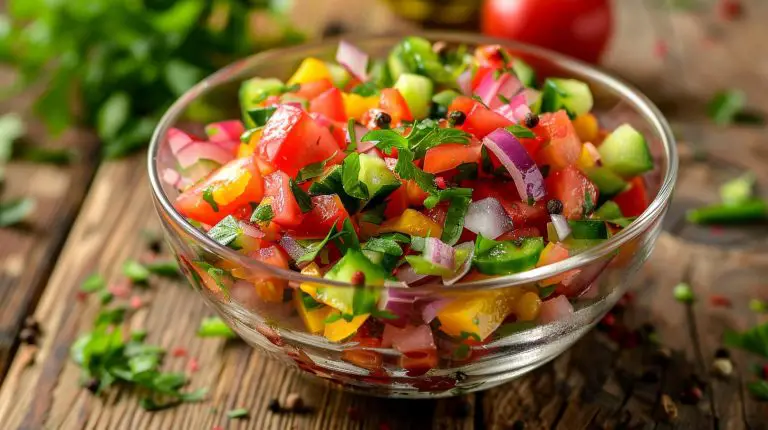
- Side Dishes: Fresh cucumber raita or a tangy kachumber salad (diced cucumber, tomato, onion with lemon juice) pairs well with the richness of the pakoras, offering a refreshing contrast.
- Main Courses: Serve alongside a creamy dal makhani or palak paneer for a fuller meal. These dishes provide a smooth, rich base that contrasts well with the crispy, spiced pakoras.
- Dips: Mint-coriander chutney and sweet tamarind chutney are classic accompaniments that enhance the flavors of chicken pakoras with their sweet and tangy notes.
Seasonal Variation for Chicken Pakora
- Spring: Incorporate fresh herbs like cilantro, mint, or dill into the batter to reflect the freshness of the season. Pair with a light, herby green salad.
- Summer: Add grated zucchini or chopped spinach to the batter for a summer twist. Serve with a side of refreshing mango salsa or a cool yogurt dip to balance the heat.
- Fall: Mix in some grated pumpkin or sweet potato into the batter for a fall version, introducing a subtle sweetness and seasonal flair. Pair with a warm spiced apple chutney.
- Winter: Incorporate warming spices like garam masala, cloves, or cinnamon into the marinade to add a comforting warmth suited for colder months. Serve with a hearty vegetable soup or stew.
Always Keep In Mind, that the inclusion of newer veggies or spices can end up impacting the overall taste of the dish, so you may need to adjust your other spices or salt portions to counter that.
Common Problems You May Face
- Chicken Not Cooking Through
- Issue: The outside of the pakora is perfect, but the inside remains uncooked.
- Solution: Cut the chicken into smaller, even pieces to ensure quick and even cooking. Also, make sure the oil is at the right temperature before frying – too hot, the outside will cook too quickly, leaving the inside raw.
- Batter Doesn’t Stick
- Issue: The batter slides off the chicken when you try to fry it.
- Solution: Ensure the chicken pieces are dry before marinating them. After marinating, let excess marinade drip off before dipping into the batter. The batter should be thick enough to coat the chicken well.
- Pakoras Are Too Oily
- Issue: After frying, the pakoras are greasy rather than crispy.
- Solution: Make sure the oil is hot enough (a piece of batter should sizzle and come to the surface quickly), and don’t overcrowd the pan. After frying, place the pakoras on a wire rack over a sheet pan to drain excess oil.
- Flavor Is Bland
- Issue: The pakoras taste bland, lacking the vibrant flavors you expected.
- Solution: Don’t skimp on the spices in the marinade, and make sure to season both the marinade and the batter adequately with salt. Taste the batter before adding chicken to ensure it’s flavorful.
- Pakoras Are Not Crispy
- Issue: The texture is soft or soggy instead of the desired crispy.
- Solution: Adding a small amount of rice flour or cornstarch to the chickpea batter can enhance crispiness. Also, frying at the correct temperature and not overcrowding the pan is key to achieving a crispy texture.
- Unsure About Oil Temperature
- Issue: Difficulty in determining if the oil is hot enough for frying.
Solution: Use a cooking thermometer to check that the oil is around 350°F (175°C). If you don’t have one, drop a small amount of batter into the oil; it should bubble and rise to the surface if the oil is hot enough
Tips for Perfecting Chicken Pakora
- Marinade Mastery: For deep flavors, marinate the chicken pieces overnight in the refrigerator. The longer marination time allows the spices to penetrate deeply, resulting in more flavorful pakoras.
- Batter Consistency: The key to the perfect batter is consistency. It should be thick enough to cling to the chicken without dripping off. If it’s too thin, add a bit more chickpea flour; if too thick, a splash of water.
- Temperature Control: Maintaining the right oil temperature (around 350°F or 175°C) is crucial. Use a cooking thermometer for accuracy. Consistent temperature ensures the pakoras are crispy on the outside and fully cooked inside without absorbing excess oil.
- Adding Aeration: A small pinch of baking soda in the batter can introduce aeration, making the pakoras lighter and crispier.
- Presentation: Serve on a platter lined with lettuce leaves for an appealing presentation, garnished with slices of red onion, lemon wedges, and a sprinkle of chaat masala for an extra flavor boost.
FAQs about Chicken Pakora (Reader Questions Answered)
Q: Can I make Chicken Pakora in an air fryer for a healthier version?
A: Yes, you can use an air fryer. Preheat it to 375°F (190°C), spray the pakoras lightly with oil, and cook for about 15-20 minutes, turning halfway through, until golden and crispy.
Q: What can I use instead of chickpea flour?
A: Chickpea flour is preferred for its taste and binding properties, but you can use a mix of all-purpose flour and cornstarch as a substitute. Note that the texture and flavor might slightly differ.
Q: How long can I store leftover Chicken Pakoras?
A: Store them in an airtight container in the refrigerator for up to 2 days. Reheat in an oven or air fryer to retain crispiness before serving.
Q: Can I prepare the batter in advance?
A: It’s best to make the batter fresh. However, you can mix the dry ingredients in advance and add water just before you’re ready to fry.
Q: Is there a vegan version of this dish?
A: For a vegan version, substitute chicken with cauliflower, potato, or paneer (for vegetarians), and use plant-based yogurt for the marinade.
Q: Can I bake Chicken Pakoras instead of frying them for a healthier option?
A: Yes, you can bake them at 400°F (200°C) for 20-25 minutes or until golden and crispy, turning halfway through. Lightly brush them with oil to help achieve a crispy texture.
Q: What’s the best way to ensure my pakoras are crispy?
A: Ensure the oil is hot enough before frying, and don’t overcrowd the pan. Adding a little rice flour to the batter can also help achieve a crispier texture.
Q: Can I freeze Chicken Pakoras?
A: Yes, you can freeze them after frying. Let them cool completely, then store in a freezer-safe bag or container. Reheat in an oven or air fryer to maintain crispiness.
Q: What dipping sauces go well with Chicken Pakoras?
A: Mint-coriander chutney, tamarind chutney, or a spicy yogurt dip complements the flavors of Chicken Pakoras beautifully.
Q: Can I use another type of meat for this recipe?
A: Absolutely. While chicken is traditional, you can substitute it with fish, shrimp, or even lamb, adjusting the cooking time accordingly.

Chicken Pakora Step By Step Recipe
Ingredients
For the Marinade:
- Boneless chicken breasts: 1 lb cut into bite-sized pieces
- Greek yogurt or dairy-free alternative: 2 tablespoons
- Ginger paste: 1 teaspoon
- Garlic paste: 1 teaspoon
- Cumin Seeds: 1 teaspoon
- Turmeric powder: 1/2 teaspoon
- Chili powder: 1 teaspoon adjust to taste
- Garam masala: 1 teaspoon
- Salt: 1/2 teaspoon
For the Batter:
- Chickpea flour Besan: 1 cup (for a gluten-free option)
- Rice flour: 2 tablespoons for extra crispiness
- Carom seeds Ajwain: 1/2 teaspoon (for digestion)
- Baking soda: 1/4 teaspoon
- Water: As needed to form a thick batter
- Salt: To taste
Other:
- Fresh cilantro: 2 tablespoons chopped, for garnish
- Vegetable oil: For deep frying
Instructions
Marinate the Chicken:
- In a large bowl, combine Greek yogurt, ginger paste, garlic paste, turmeric powder, chili powder, garam masala, and salt. Mix well.
- Add the chicken pieces to the marinade, ensuring each piece is well-coated.
- Let it marinate for at least 15 minutes or better flavor, and refrigerate for up to 2 hours.
- The marinade should be thick enough to cling to the chicken pieces without dripping off. If it feels too runny, a little more yogurt can help thicken it. This ensures that the spices fully coat the chicken, infusing it with flavor.
- After marination, I further chop them into smaller pieces but you can do that pre-marination as well.
Prepare the Batter:
- In another bowl, mix chickpea flour, rice flour, carom seeds, baking soda, and salt.
- Gradually add water, whisking continuously, until a thick batter forms. The consistency should be such that it coats the back of a spoon.
- The key to a crispy pakora lies in the consistency of the batter. It should be thick, akin to pancake batter, allowing it to adhere to the chicken without sliding off.
- If the batter is too thin, your pakoras might not achieve that desirable crispiness; too thick, they might end up doughy inside.
Heat the Oil:
- In a deep frying pan or kadai, heat the oil over medium heat.
- To test if the oil is ready, drop a small amount of batter into the oil; if it sizzles and rises to the surface, the oil is hot enough.
Fry the Pakoras:
- Dip each marinated chicken piece into the batter, ensuring it's completely coated.
- Carefully place the battered chicken pieces in the hot oil. Avoid the temptation to overcrowd the pan.
- Cooking in batches ensures that the oil temperature remains stable, which is crucial for achieving an even golden color and crisp texture.
- Overcrowding can lower the oil's temperature, leading to soggy pakoras.
- Fry until golden brown and crispy, about 4-5 minutes per side. Use a slotted spoon to remove the pakoras from the oil and drain on paper towels.
Draining Excess Oil
- After frying, let the pakoras rest on a wire rack over a sheet of paper towels.
- This setup allows excess oil to drip off while preventing the pakoras from becoming soggy, which can happen if they're left to cool on a flat surface.
Serve:
- Garnish with chopped cilantro and serve hot with your favorite sauce, mint chutney, or tamarind chutney.