12 Stunning Blue Vintage Cake Recipes That Will Transport You Back in Time
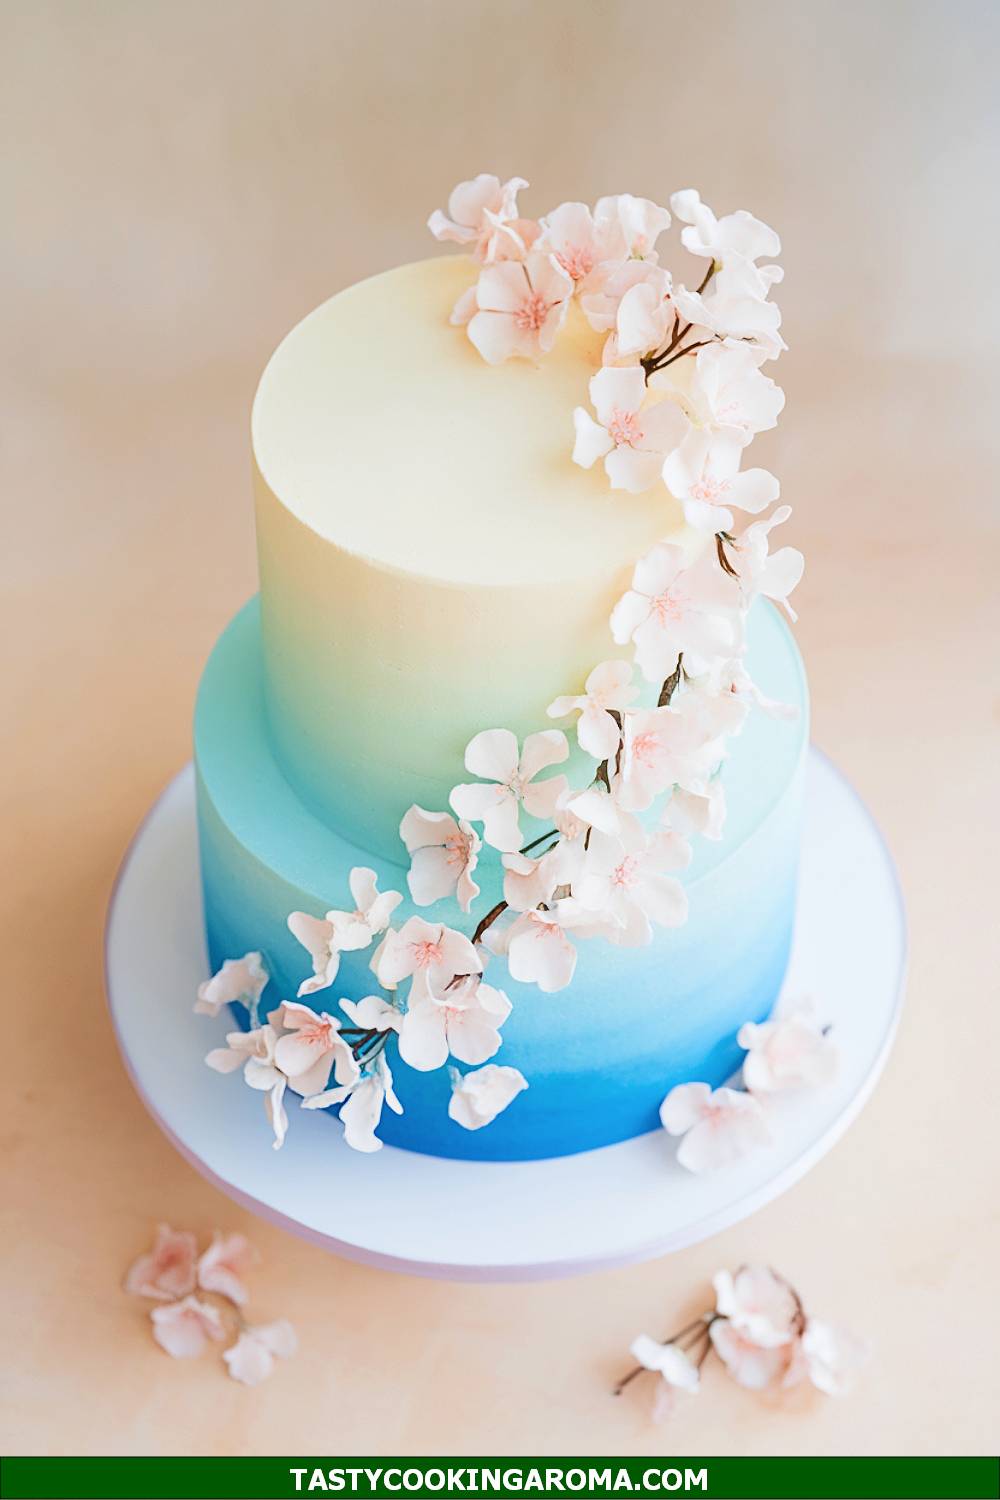
Looking for trendy yet effortlessly pretty cake ideas that fit any occasion?
Whether you’re celebrating with a Blue Bridal Shower Cake, creating a charming Ice Blue Cake for a wedding, or whipping up a sweet Pastel Blue Cake Aesthetic for someone special’s birthday, this article has you covered.
From chic Tiered Cakes Birthday styles to minimalist Simple Cake Designs, we’ll walk you through the magic of modern-meets-vintage baking with elegance and ease.
Why You’ll Love This Recipe List:
- Quick, easy-to-follow techniques perfect for beginners or busy bakers.
- Ideas for healthier, delicious cakes that look as good as they taste.
- Say goodbye to boring cakes—these creations, including the stunning Vintage Themed Cake, are flavor-packed and full of personality.
- You don’t want to miss learning Cake Side Decorations and piping tricks that elevate your baking game!
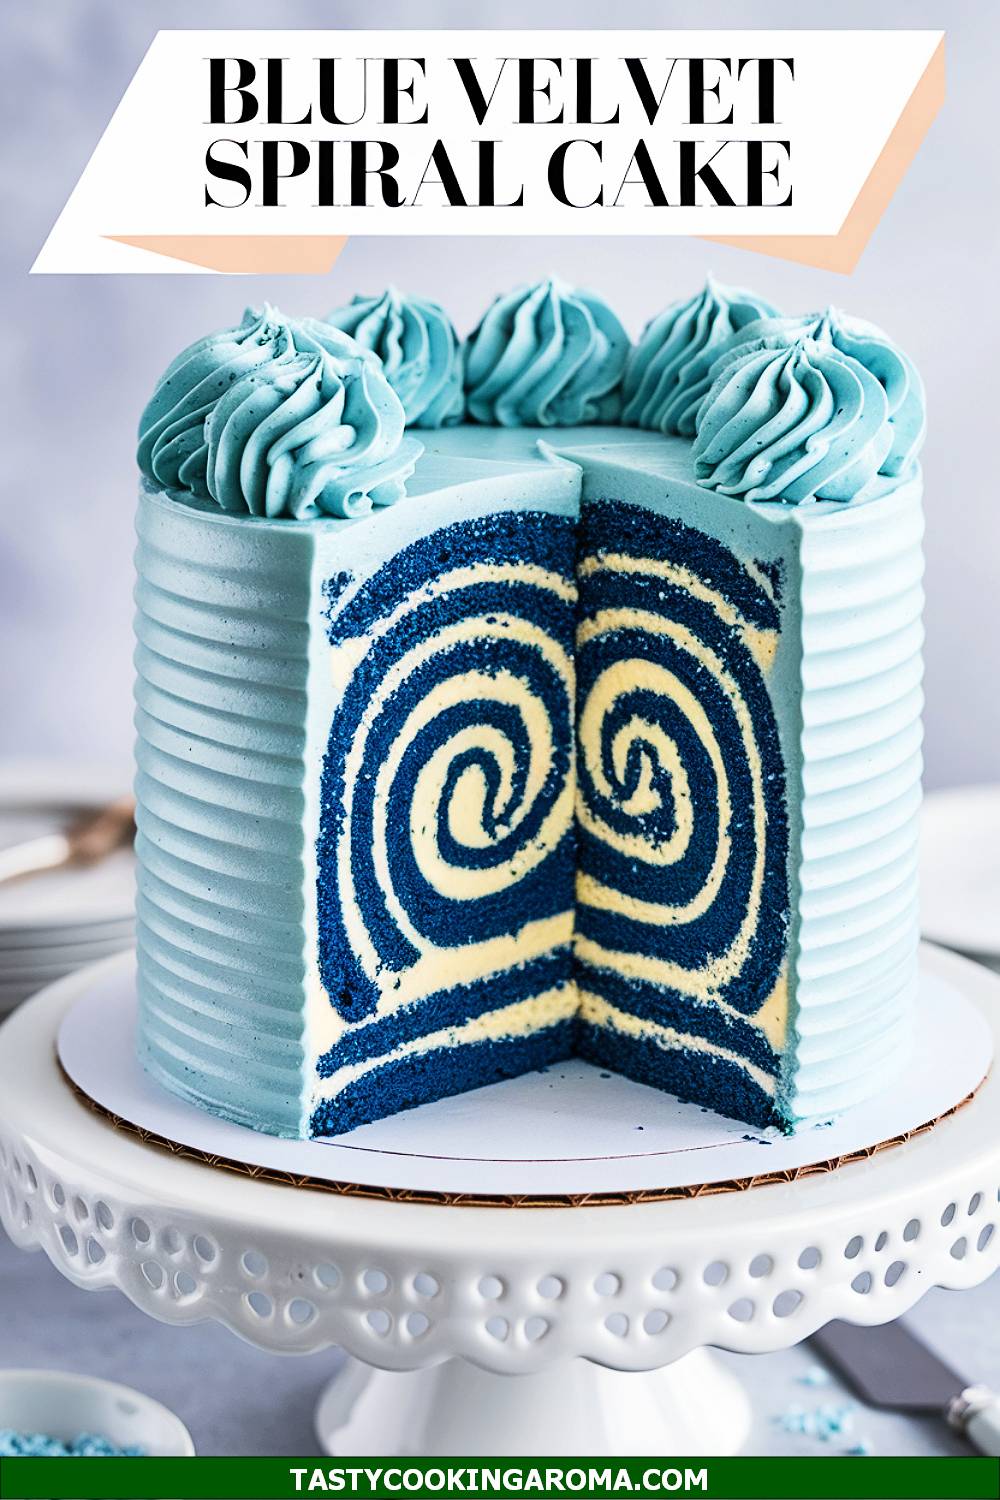
Frosted Blue Velvet Spiral Cake
This cake is a showstopper with its vibrant blue velvet layers and dreamy spiral frosting design. The soft, moist texture of the cake pairs beautifully with the creamy buttercream, making every bite melt in your mouth. It’s perfect for a vintage-themed birthday or even as a centerpiece dessert for a small gathering. The spiral piping technique looks intricate but is surprisingly beginner-friendly, so don’t be afraid to give it a try!
Serving Size: 8 servings
Time Needed: 1 hour 30 minutes
Ingredients
- 2 ½ cups all-purpose flour
- 1 ½ cups granulated sugar
- 1 cup buttermilk
- ½ cup unsalted butter, softened
- 2 large eggs
- 2 tbsp cocoa powder
- 1 tsp vanilla extract
- 1 tsp baking soda
- 1 tsp white vinegar
- Blue gel food coloring
- 4 cups buttercream frosting
Instructions
- Preheat your oven to 350°F (175°C) and grease two 8-inch round cake pans. Line the bottoms with parchment paper for easy removal.
- In a large bowl, cream the butter and sugar together until light and fluffy. Add the eggs, one at a time, followed by the vanilla extract.
- In a separate bowl, sift together the flour, cocoa powder, and baking soda. Gradually add the dry ingredients to the wet ingredients, alternating with the buttermilk.
- Mix the white vinegar and blue gel food coloring, then fold it into the batter until the color is evenly distributed.
- Divide the batter between the prepared pans and bake for 25–30 minutes or until a toothpick inserted into the center comes out clean. Let the cakes cool completely.
- Frost the cooled cakes with buttercream, using a piping bag fitted with a star tip to create spirals on the top and sides. Chill the cake for 15 minutes to set the frosting before serving.
Quick Pros of the Recipe
- Beautiful spiral piping design adds a vintage touch.
- Moist and tender blue velvet cake layers.
- Beginner-friendly piping technique.
- Perfect for birthdays or vintage-themed parties.
Ingredient Substitutions or Customization Ideas: Swap buttermilk with a mix of milk and lemon juice if you don’t have it on hand. You can also use cream cheese frosting instead of buttercream for a tangier flavor.
Cooking Tips and Tricks: Use gel food coloring instead of liquid to achieve a vibrant blue without altering the cake’s texture. Chill your piping bag for 10 minutes before decorating to keep the buttercream firm and easy to work with.
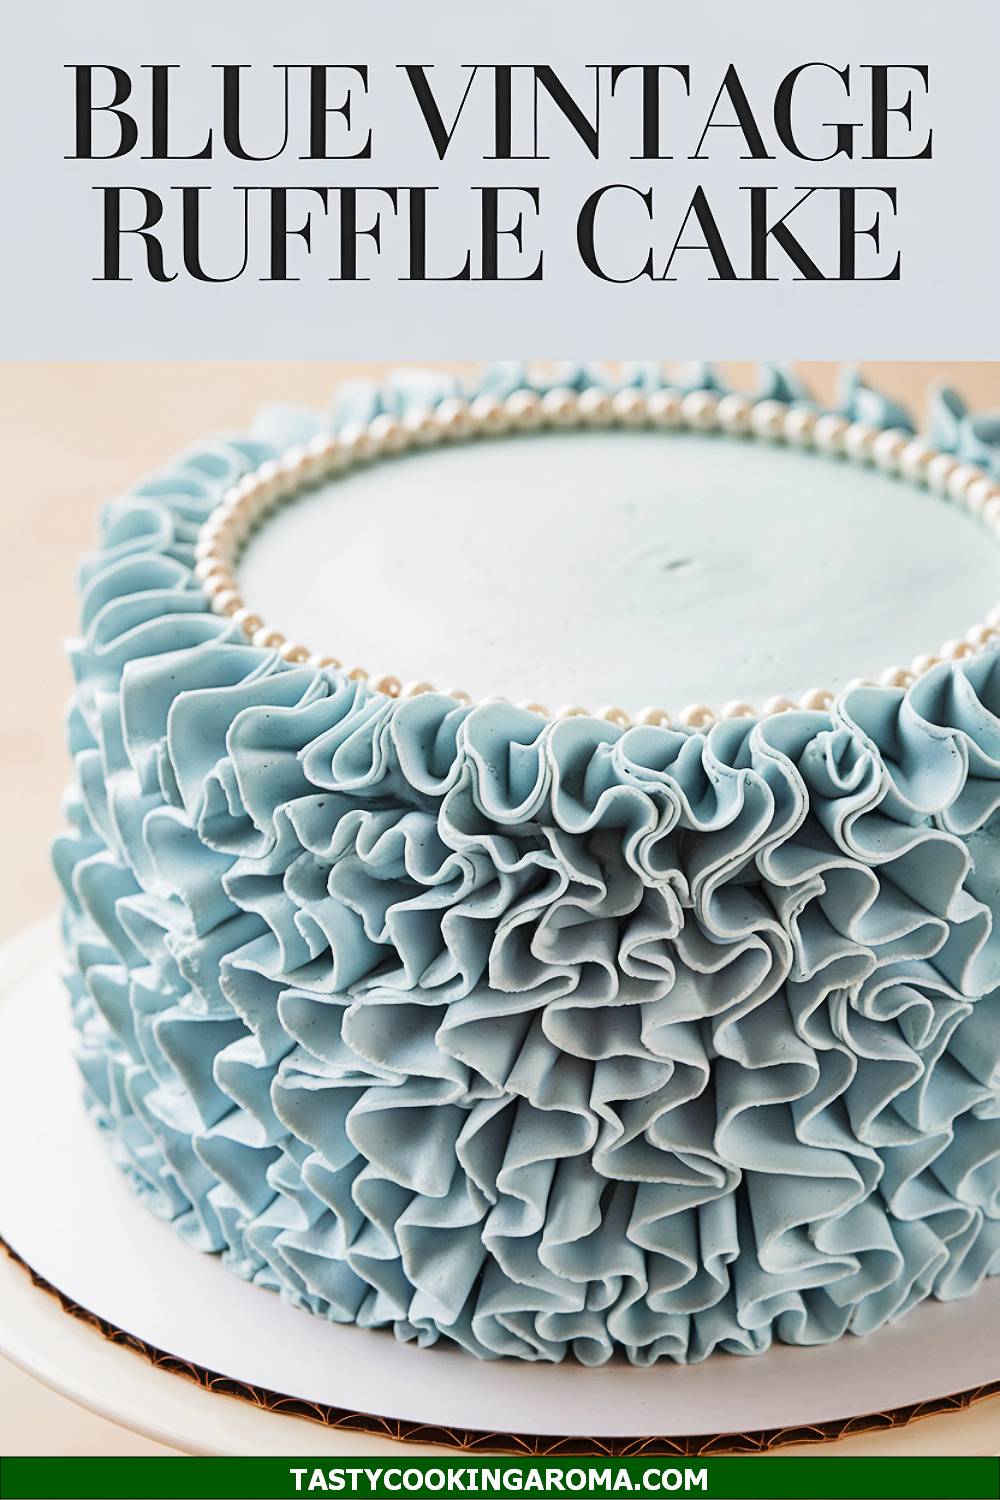
Light Blue Vintage Ruffle Cake
This cake is the definition of elegance with its cascading ruffle piping in soft light blue hues. The layers are light and fluffy, and the buttercream is rich yet not overly sweet, making it a delightful balance. It’s a great choice for a bridal shower or a “Mom To Be” cake design, especially with its vintage-inspired look. Don’t let the ruffles intimidate you—just a steady hand and a petal piping tip will do the trick!
Serving Size: 10 servings
Time Needed: 2 hours
Ingredients
- 3 cups all-purpose flour
- 2 cups granulated sugar
- 1 cup whole milk
- ¾ cup unsalted butter, softened
- 4 large eggs
- 2 tsp vanilla extract
- 1 tbsp baking powder
- Pinch of salt
- 4–5 cups light blue buttercream frosting
Instructions
- Preheat your oven to 350°F (175°C) and prepare three 8-inch round cake pans by greasing and lining them with parchment paper.
- In a large mixing bowl, cream together the butter and sugar until fluffy. Add the eggs one at a time, followed by the vanilla extract.
- In a separate bowl, combine the flour, baking powder, and salt. Gradually add this dry mixture to the wet ingredients, alternating with the milk, until the batter is smooth.
- Divide the batter evenly among the prepared pans and bake for 20–25 minutes, or until a toothpick inserted into the center comes out clean. Let the cakes cool completely.
- Layer the cakes with a thin layer of buttercream in between. Using a petal piping tip, create ruffles around the sides and top of the cake, starting at the bottom and working your way up.
Quick Pros of the Recipe
- Stunning ruffle design perfect for special occasions.
- Soft and fluffy cake layers with a balanced sweetness.
- Customizable with different frosting colors.
- Great for practicing piping techniques.
Ingredient Substitutions or Customization Ideas: Substitute the vanilla extract with almond or rose extract for a unique flavor twist. You can also opt for a pastel pink or lavender frosting for a different aesthetic.
Cooking Tips and Tricks: Chill the cake layers before frosting to prevent crumbs from mixing into the buttercream. Use a turntable while piping the ruffles for smoother and more even designs.
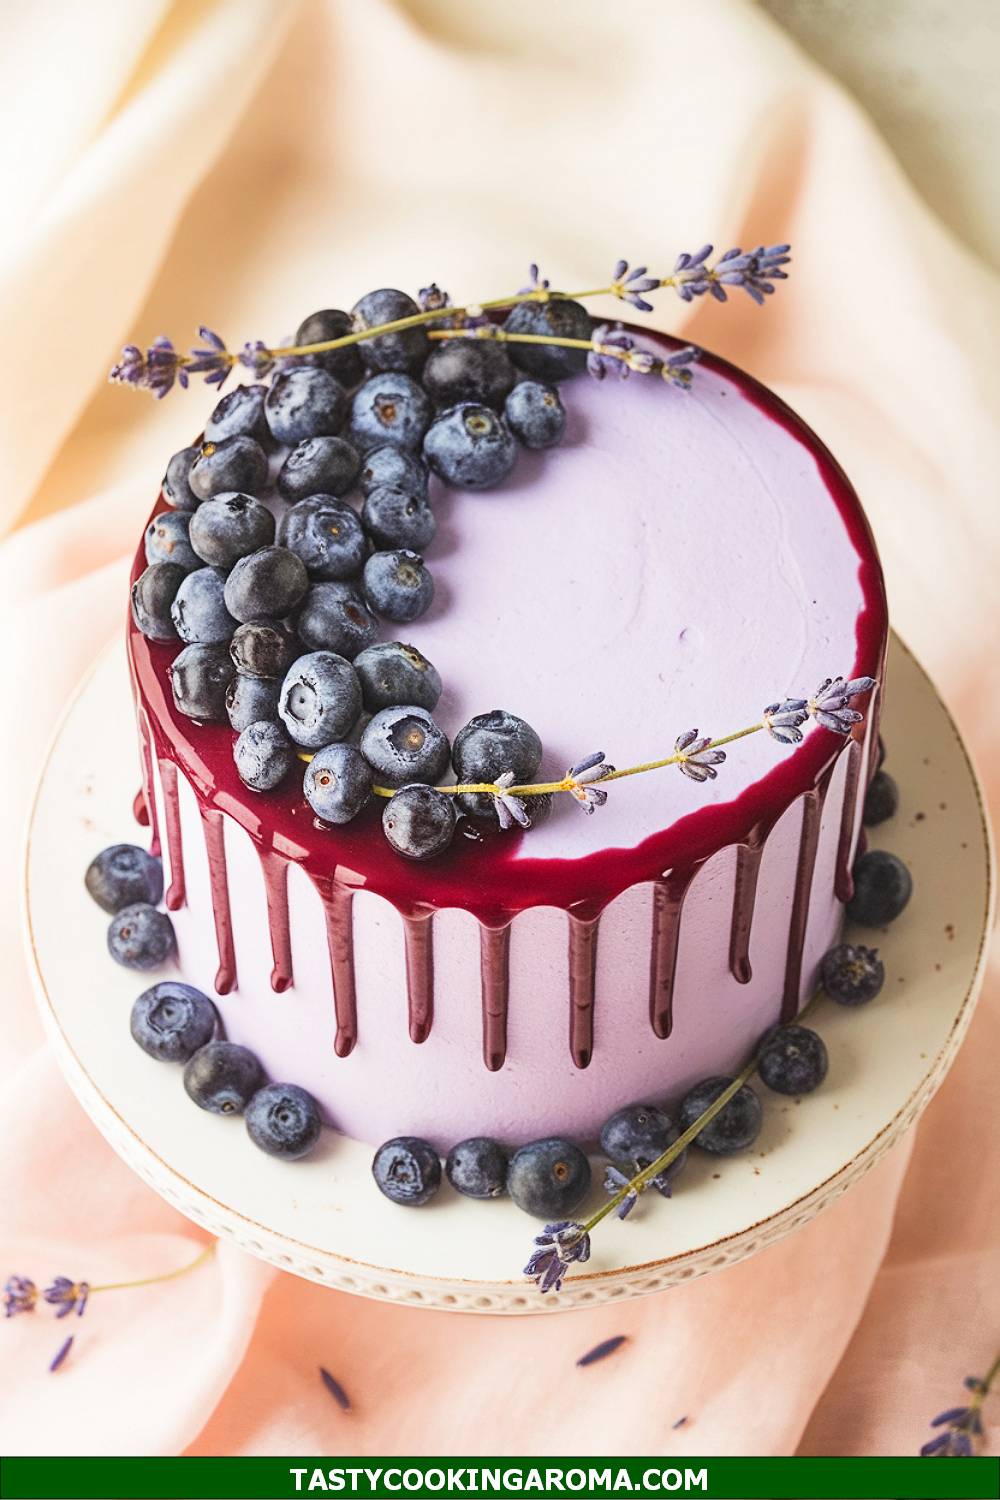
Cottagecore Blueberry Lavender Drip Cake
This cake is a dreamy blend of flavors and aesthetics, inspired by the cottagecore trend. The combination of fresh blueberries and lavender-infused buttercream creates a unique, delicate taste that’s both floral and fruity. The light blue drip design adds a whimsical touch, making it perfect for a baby shower or a pastel-themed birthday. Plus, the recipe is surprisingly easy to follow, even for beginners looking to try their hand at trendy cake decorating!
Serving Size: 8–10 servings
Time Needed: 2 hours 15 minutes
Ingredients
- 2 ½ cups all-purpose flour
- 1 ¾ cups granulated sugar
- 1 cup whole milk
- ½ cup unsalted butter, softened
- 2 large eggs
- 1 tsp vanilla extract
- 1 tbsp baking powder
- Pinch of salt
- ½ cup fresh blueberries
- 1 tsp dried culinary lavender
- 4 cups buttercream frosting
- Blue drip icing (made with white chocolate and blue gel food coloring)
Instructions
- Preheat your oven to 350°F (175°C) and grease three 6-inch round cake pans. Line the bottoms with parchment paper.
- Cream together the butter and sugar in a large mixing bowl. Add the eggs, one at a time, followed by the vanilla extract.
- In another bowl, mix the flour, baking powder, and salt. Gradually add this to the wet ingredients, alternating with the milk, until the batter is smooth. Fold in the fresh blueberries.
- Divide the batter equally among the prepared pans and bake for 20–25 minutes. Allow the cakes to cool completely.
- Infuse the buttercream with lavender by steeping the dried culinary lavender in 2 tablespoons of hot milk for 10 minutes. Strain and mix the lavender milk into the buttercream.
- Frost the cake layers with the lavender buttercream and smooth the sides. Drizzle the blue drip icing around the edges and let it cascade. Decorate with fresh blueberries and a sprinkle of dried lavender on top.
Quick Pros of the Recipe
- Unique flavor combination of blueberries and lavender.
- Elegant drip design adds a cottagecore charm.
- Perfect for pastel-themed events.
- Beginner-friendly with detailed steps.
Ingredient Substitutions or Customization Ideas: Replace blueberries with raspberries for a tart twist or omit the lavender for a more traditional flavor. Use a different drip color (like pastel pink or yellow) to match the theme of your event.
Cooking Tips and Tricks: Make sure your drip icing is slightly warm but not hot to achieve the perfect consistency. Use a spoon or squeeze bottle for better control while creating the drips.
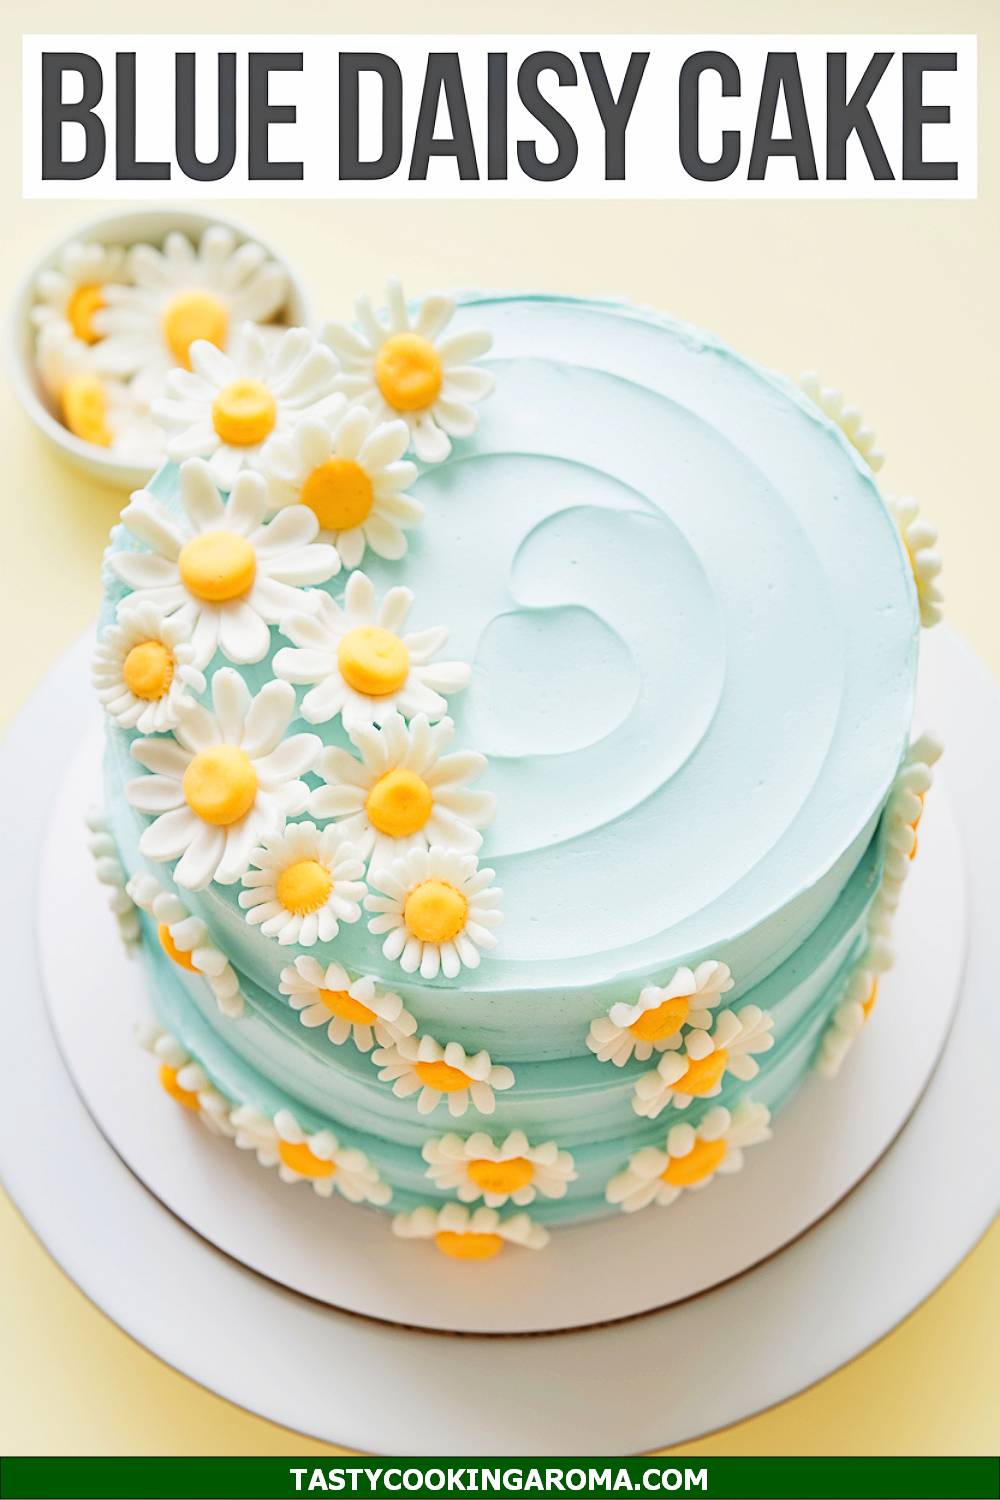
Baby Blue Layered Daisy Cake
This Baby Blue Layered Daisy Cake is the perfect mix of charm and simplicity. Its soft baby blue hue, combined with delicate daisy decorations, makes it a delightful centerpiece for any celebration, whether it’s a birthday or a baby shower. The layers are moist and fluffy, with just the right amount of sweetness, making it as delicious as it is pretty. Plus, the daisy design is beginner-friendly, so you don’t need to be a pro to create something stunning and memorable!
Serving Size: 8 servings
Time Needed: 1 hour 15 minutes
Ingredients
- 2 ½ cups all-purpose flour
- 2 ½ teaspoons baking powder
- ½ teaspoon salt
- 1 cup unsalted butter, softened
- 1 ¾ cups granulated sugar
- 4 large eggs
- 1 teaspoon vanilla extract
- 1 cup whole milk
- Light blue food coloring
- Buttercream frosting (store-bought or homemade)
- White fondant or daisy-shaped icing decorations
Instructions
- Preheat your oven to 350°F (175°C) and prepare two 8-inch round cake pans by greasing and lining the bottoms with parchment paper.
- In a medium bowl, whisk together the flour, baking powder, and salt. Set aside.
- In a large mixing bowl, cream the butter and sugar until light and fluffy. Add the eggs one at a time, mixing well after each addition, and then stir in the vanilla extract.
- Gradually add the dry ingredients to the wet ingredients, alternating with the milk, and mix until just combined. Add a few drops of light blue food coloring and gently mix until the batter is evenly tinted.
- Divide the batter evenly between the prepared pans and bake for 25–30 minutes, or until a toothpick inserted in the center comes out clean. Allow the cakes to cool completely before removing them from the pans.
- Level the cake layers if needed, then spread a layer of buttercream frosting between them. Frost the entire cake with a smooth layer of buttercream, then decorate with white fondant daisies or daisy-shaped icing decorations.
Quick Pros of the Recipe
- Perfect for beginners with its simple daisy design.
- Moist, fluffy cake layers with a light sweetness.
- Versatile for various occasions like baby showers or birthdays.
- Customizable with different frosting or floral decorations.
Ingredient Substitutions or Customization Ideas: Swap whole milk with almond or oat milk for a dairy-free version. Use edible flowers instead of fondant daisies for a fresh, natural look.
Cooking Tips and Tricks: Chill the cake layers in the fridge for 15 minutes before frosting to prevent crumbs from mixing into the buttercream. Use a piping bag with a small round tip for precise daisy designs if you’re creating them with icing.
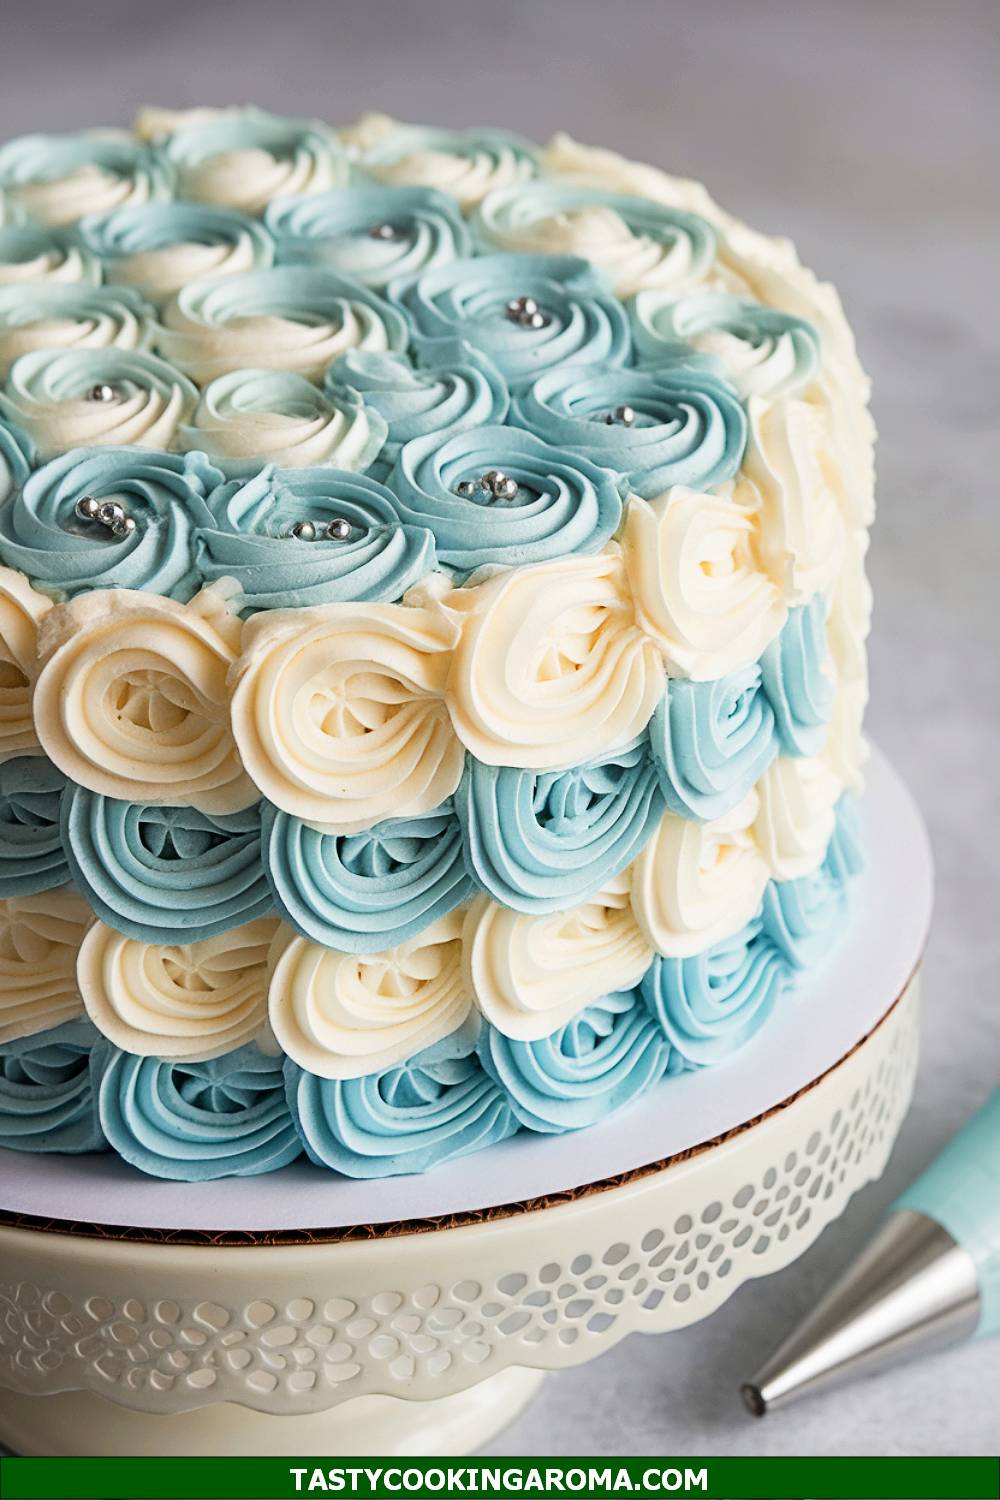
Antique Icing Rosette Cake
The Antique Icing Rosette Cake is a true vintage beauty, perfect for weddings, bridal showers, or any elegant gathering. Its intricate rosette piping, done with a soft blue buttercream, gives it an old-fashioned charm that’s both timeless and trendy. The flavor is equally impressive, with a balance of rich buttercream and tender cake layers. While it may look fancy, the rosettes are surprisingly easy to pipe, making this cake a great option for decorators of all skill levels.
Serving Size: 10 servings
Time Needed: 1 hour 30 minutes
Ingredients
- 3 cups all-purpose flour
- 2 teaspoons baking powder
- ½ teaspoon salt
- 1 cup unsalted butter, softened
- 2 cups granulated sugar
- 5 large eggs
- 1 teaspoon almond extract
- 1 cup buttermilk
- Light blue gel food coloring
- Buttercream frosting (lightly tinted blue)
Instructions
- Preheat your oven to 350°F (175°C) and grease three 8-inch round cake pans. Line the bottoms with parchment paper for easy removal.
- In a medium bowl, whisk together the flour, baking powder, and salt. Set aside.
- In a large mixing bowl, cream the butter and sugar until fluffy. Add the eggs one at a time, mixing well after each addition, then stir in the almond extract.
- Alternate adding the dry ingredients and buttermilk to the wet mixture, starting and ending with the dry. Mix until just combined, then add light blue food coloring and stir gently.
- Divide the batter evenly among the prepared pans and bake for 25–28 minutes, or until a toothpick inserted in the center comes out clean. Cool completely before frosting.
- Frost the cake with a crumb coat, then use a star piping tip to create rosettes all over the surface. Start piping from the bottom and work upward for an even design.
Quick Pros of the Recipe
- Beautiful vintage-inspired rosette design.
- Rich almond flavor pairs perfectly with buttercream.
- Impressive yet beginner-friendly piping technique.
- Perfect for elegant events like weddings or bridal showers.
Ingredient Substitutions or Customization Ideas: Substitute almond extract with vanilla or lemon extract for a different flavor profile. Use two layers instead of three for a simpler version.
Cooking Tips and Tricks: Practice piping rosettes on parchment paper before decorating the cake. Chill the crumb-coated cake for 20 minutes to make piping easier and more stable.
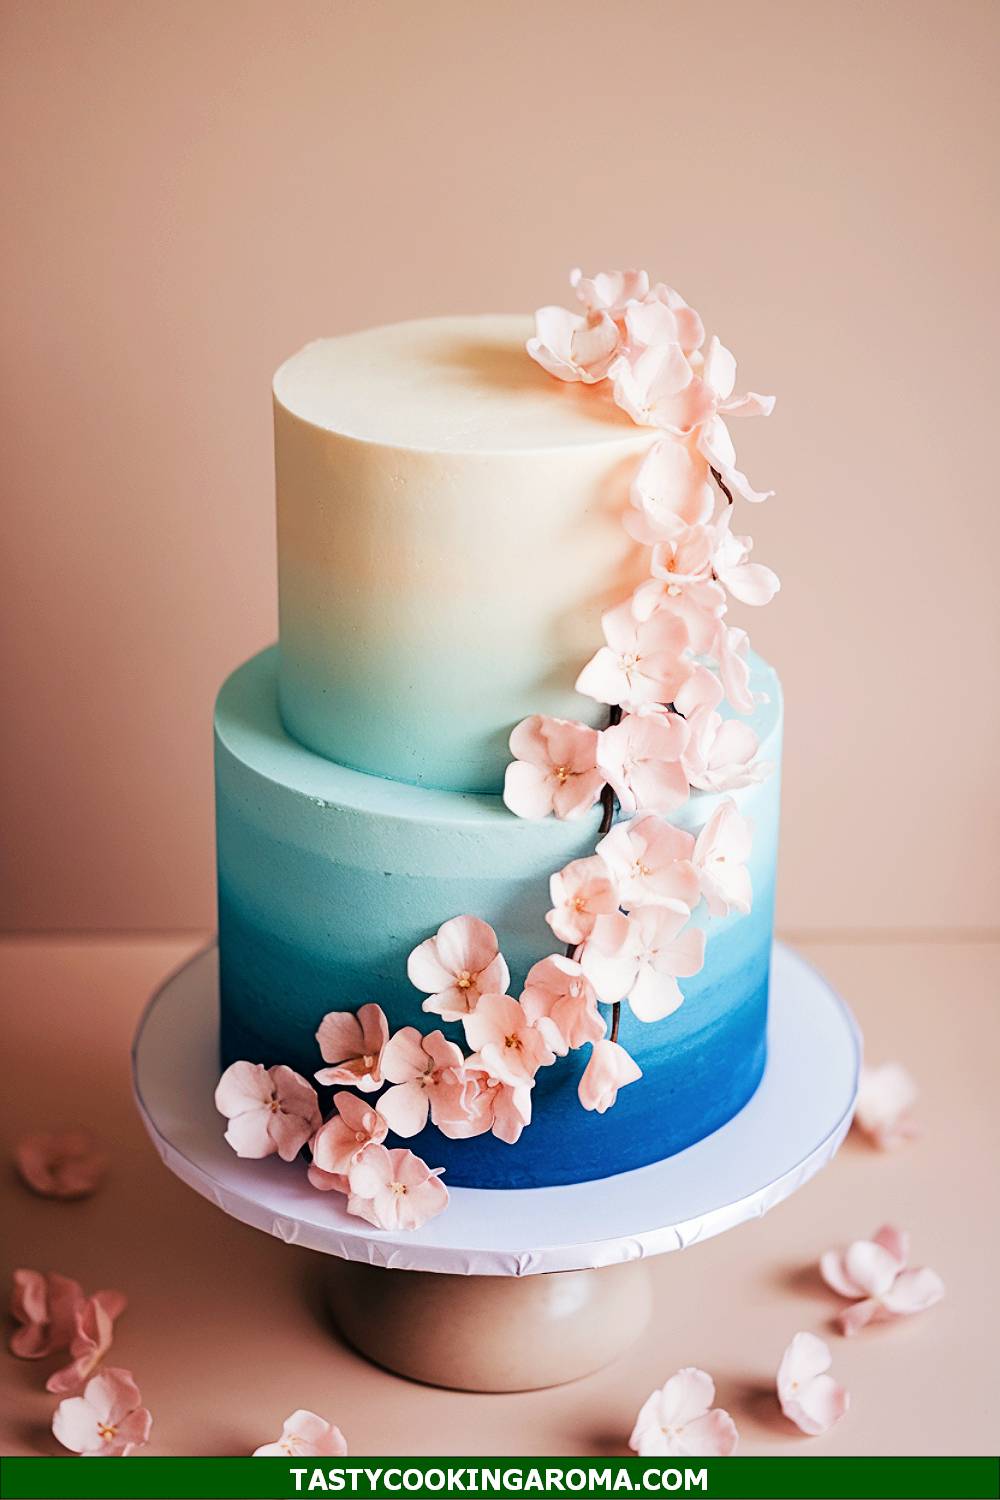
Pastel Blue Ombre Tiered Blossom Cake
The Pastel Blue Ombre Tiered Blossom Cake is a showstopper that’s as fun to make as it is to eat. With its gradient blue layers and delicate blossom decorations, it’s ideal for weddings, birthdays, or any celebration where you want to impress your guests. The ombre effect is surprisingly easy to achieve with a little patience, and the blossoms add a whimsical, floral touch. Plus, the tiered design allows you to serve a larger crowd, making it both practical and stunning!
Serving Size: 12 servings
Time Needed: 2 hours
Ingredients
- 4 cups all-purpose flour
- 2 teaspoons baking powder
- 1 teaspoon salt
- 1 ½ cups unsalted butter, softened
- 3 cups granulated sugar
- 6 large eggs
- 1 teaspoon vanilla extract
- 1 ½ cups whole milk
- Light blue and white gel food coloring
- Buttercream frosting (white and blue)
- Edible sugar blossoms or fondant flowers
Instructions
- Preheat your oven to 350°F (175°C) and grease three 6-inch round cake pans and three 8-inch round cake pans. Line the bottoms with parchment paper.
- In a medium bowl, whisk together the flour, baking powder, and salt. Set aside.
- In a large mixing bowl, cream the butter and sugar until fluffy. Add the eggs one at a time, mixing well, then stir in the vanilla extract.
- Alternate adding the dry ingredients and milk to the wet mixture, starting and ending with the dry. Divide the batter evenly into three bowls and tint each one a different shade of blue to create the ombre effect.
- Pour the batter into the prepared pans (one shade per pan size) and bake for 25–30 minutes, or until a toothpick comes out clean. Cool completely.
- Stack the cakes, starting with the darkest blue at the bottom and working upward. Frost between layers and coat the entire cake with white buttercream. Add edible blossoms or fondant flowers for decoration.
Quick Pros of the Recipe
- Gorgeous ombre effect with minimal effort.
- Large tiered design perfect for serving a crowd.
- Delicate floral decorations add a whimsical touch.
- Customizable for different color schemes or themes.
Ingredient Substitutions or Customization Ideas: Replace edible blossoms with fresh flowers (ensure they’re food-safe). Use pink or purple food coloring for a different ombre effect.
Cooking Tips and Tricks: Use a cake leveler to ensure even layers for stacking. Chill the cake before adding flowers to prevent the buttercream from smudging.
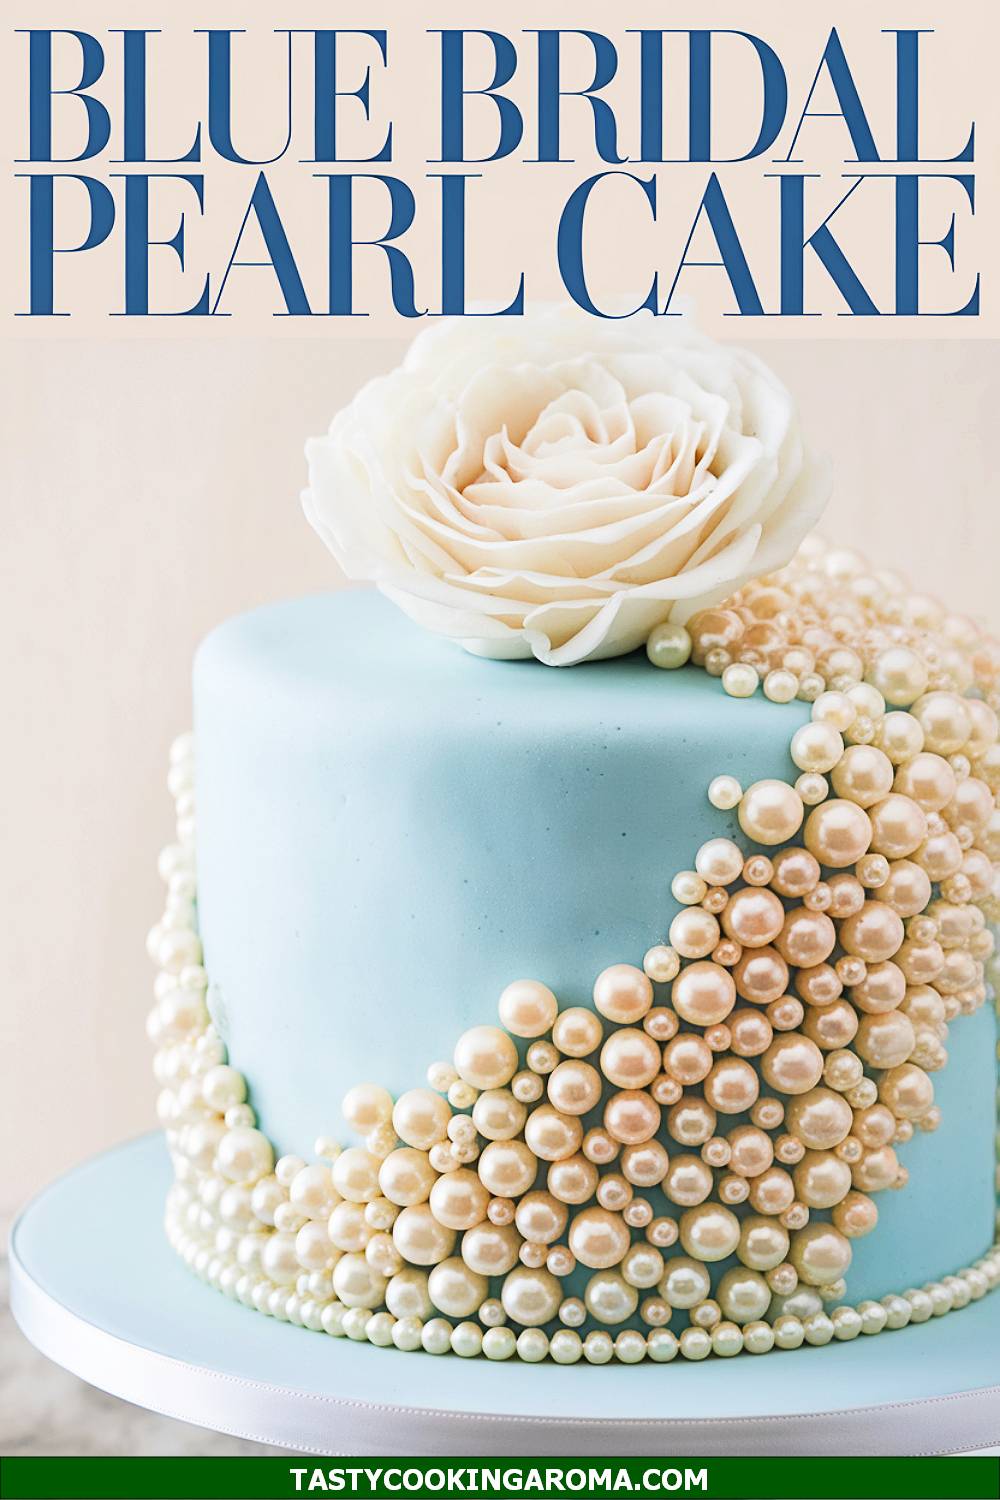
Blue Bridal Pearl Cake
This cake is a dreamy addition to any bridal shower or wedding celebration, especially if you’re sticking to the “blue” tradition. Its delicate pearl-like decor and soft blue buttercream piping give it a vintage, elegant feel that’s just perfect for a classy event. The flavor is versatile, so you can choose anything from vanilla to almond to complement the aesthetic. Plus, the intricate design is surprisingly beginner-friendly if you take your time with the piping.
Serving Size: 12 servings
Time Needed: 2 hours
Ingredients
- 2 ½ cups all-purpose flour
- 2 ½ tsp baking powder
- ½ tsp salt
- 1 cup unsalted butter, softened
- 2 cups granulated sugar
- 4 large eggs
- 1 tbsp vanilla extract
- 1 cup whole milk
- Light blue gel food coloring
- Buttercream frosting (homemade or store-bought)
- Pearl sprinkles for decoration
Instructions
- Preheat your oven to 350°F (175°C) and grease two 9-inch round cake pans. Line the pans with parchment paper for easy removal.
- In a medium bowl, whisk together the flour, baking powder, and salt. Set aside.
- In a large bowl, cream the butter and sugar until light and fluffy, about 3 minutes. Add the eggs one at a time, mixing well after each addition, and then stir in the vanilla extract.
- Alternately add the dry ingredients and milk to the butter mixture, beginning and ending with the dry ingredients. Mix until just combined. Add a few drops of light blue gel food coloring and gently fold until the color is even.
- Divide the batter evenly between the prepared pans and bake for 25-30 minutes, or until a toothpick inserted into the center comes out clean. Let the cakes cool completely before frosting.
- Frost the cake with buttercream, smoothing the sides and top. Use a piping bag fitted with a small round tip to pipe pearl-like dots around the edges and add pearl sprinkles for an elegant touch.
Quick Pros of the Recipe
- Perfect for bridal showers or wedding celebrations.
- Elegant yet easy pearl-like piping design.
- Customizable cake flavor to fit any theme.
- Beginner-friendly vintage aesthetic.
Ingredient Substitutions or Customization Ideas: Swap whole milk for almond or oat milk for a dairy-free option. You can also use edible silver or gold pearls for a more glamorous look.
Cooking Tips and Tricks: Chill your frosting slightly before piping to ensure clean, defined pearl dots. Use a turntable to make frosting and decorating the cake easier and more precise.
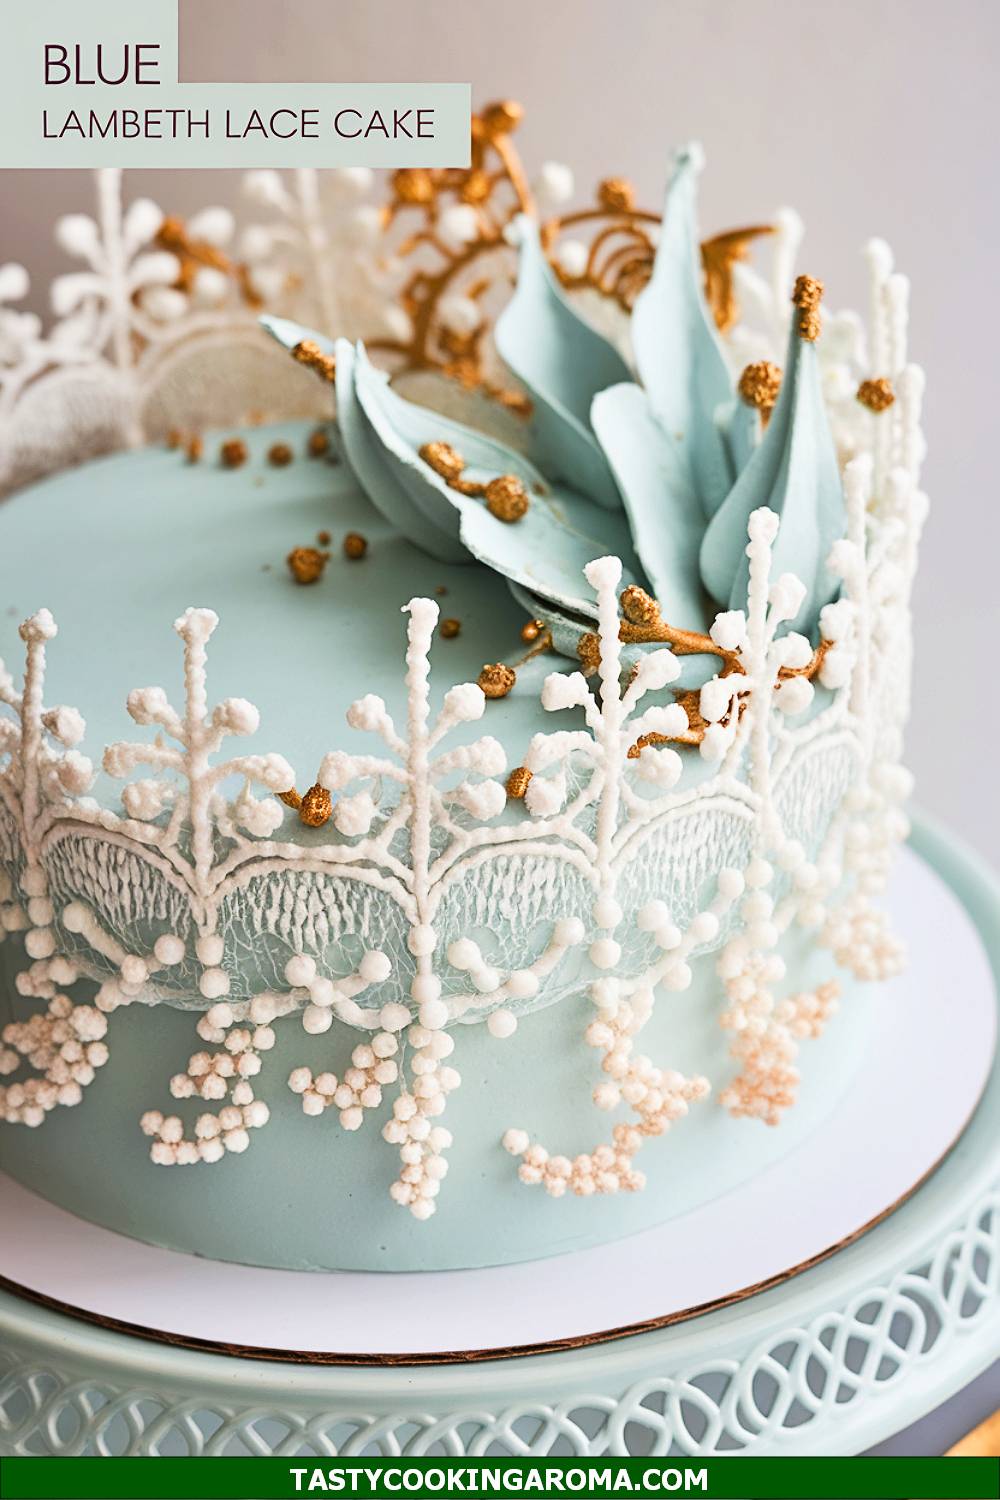
Light Blue Lambeth Lace Cake
This cake brings the intricate beauty of Lambeth piping techniques to life with a soft light blue finish. The delicate lace-like designs and layers of piped buttercream make it a showstopper for any formal event or vintage-themed party. While it looks intricate, the design is all about layering textures, so even a beginner can give it a try with patience and the right tools. The final result is both delicious and an absolute work of art.
Serving Size: 10 servings
Time Needed: 3 hours
Ingredients
- 3 cups cake flour
- 1 tbsp baking powder
- ½ tsp salt
- 1 cup unsalted butter, softened
- 2 cups granulated sugar
- 5 large egg whites
- 1 tbsp almond extract
- 1 ¼ cups whole milk
- Light blue gel food coloring
- Buttercream frosting (for piping and base coat)
Instructions
- Preheat your oven to 350°F (175°C) and prepare three 8-inch round cake pans by greasing and lining them with parchment paper.
- In a medium bowl, combine cake flour, baking powder, and salt. Set aside.
- In a large mixing bowl, cream butter and sugar until fluffy. Add egg whites one at a time, mixing well after each addition. Stir in almond extract.
- Alternately add the dry ingredients and milk to the wet ingredients, mixing until just combined. Add a few drops of light blue food coloring to achieve the desired shade.
- Divide the batter among the pans and bake for 20-25 minutes. Let the cakes cool completely before assembly.
- Frost the cake with a smooth buttercream base coat. Use piping tips (like star and round tips) to create layered lace patterns and intricate designs on the sides and top of the cake.
Quick Pros of the Recipe
- Stunning vintage-inspired design using Lambeth piping.
- Perfect for weddings, anniversaries, or themed parties.
- Almond flavor pairs beautifully with the light blue aesthetic.
- Challenging but rewarding for those looking to try advanced decorating techniques.
Ingredient Substitutions or Customization Ideas: Use vanilla extract instead of almond if you prefer a simpler flavor. For a floral twist, try rose or lavender extract in the cake batter.
Cooking Tips and Tricks: Practice your piping on parchment paper before decorating the cake. Always chill the cake between frosting layers to achieve clean, professional-looking designs.
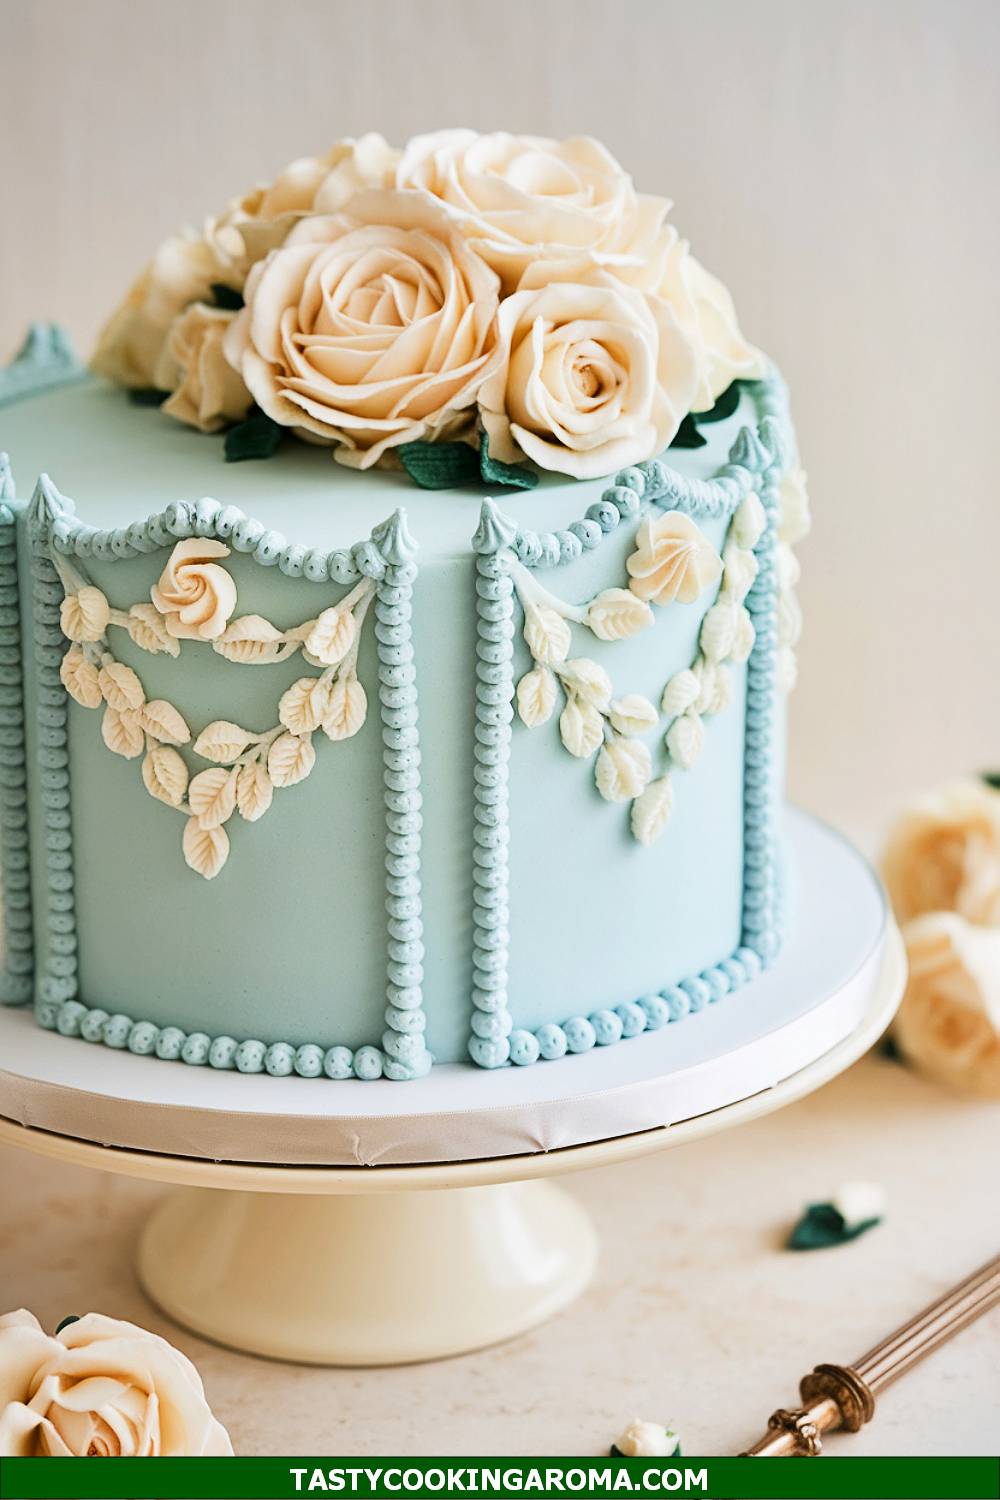
Baby Blue Victorian Rose Frame Cake
This cake is a true vintage masterpiece, featuring delicate rose frames and a soft baby blue hue that feels straight out of a Victorian painting. It’s as much a piece of art as it is a dessert, with its intricate buttercream roses and ornate piped frames. The soft pastel colors and floral accents make it perfect for birthdays, baby showers, or even a “mom-to-be” celebration. Despite its elaborate design, the recipe is surprisingly approachable with the right tools.
Serving Size: 8-10 servings
Time Needed: 2.5 hours
Ingredients
- 2 ½ cups all-purpose flour
- 2 tsp baking powder
- ½ tsp salt
- 1 cup unsalted butter, softened
- 1 ¾ cups granulated sugar
- 4 large eggs
- 2 tsp vanilla extract
- 1 cup buttermilk
- Baby blue gel food coloring
- Buttercream frosting (for base and decorations)
- Piping tips for roses and borders (e.g., star, petal, and round tips)
Instructions
- Preheat your oven to 350°F (175°C) and grease two 9-inch cake pans. Line the pans with parchment paper for easy removal.
- Whisk together the flour, baking powder, and salt in a medium bowl. Set aside.
- In a large bowl, cream the butter and sugar until light and fluffy. Add the eggs one at a time, mixing well after each addition, and stir in the vanilla extract.
- Alternately add the dry ingredients and buttermilk to the wet mixture, beginning and ending with the dry ingredients. Stir until just combined. Add baby blue gel food coloring and mix until evenly colored.
- Divide the batter between the prepared pans and bake for 25-30 minutes. Allow the cakes to cool completely before decorating.
- Frost the cake with a smooth buttercream base coat. Use piping tips to create rose patterns and ornate frames on the sides and top of the cake, layering textures for a Victorian-inspired look.
Quick Pros of the Recipe
- Gorgeous Victorian-inspired design perfect for special occasions.
- Baby blue color adds a soft, vintage charm.
- Customizable rose and frame designs for creative flair.
- Rich buttermilk cake pairs wonderfully with buttercream frosting.
Ingredient Substitutions or Customization Ideas: Use cream cheese frosting for a tangier twist, or experiment with pastel pink or lavender for the roses.
Cooking Tips and Tricks: Keep your piping bag at a 45-degree angle for better control while creating the rose and frame designs. Use a petal tip for realistic-looking buttercream roses.
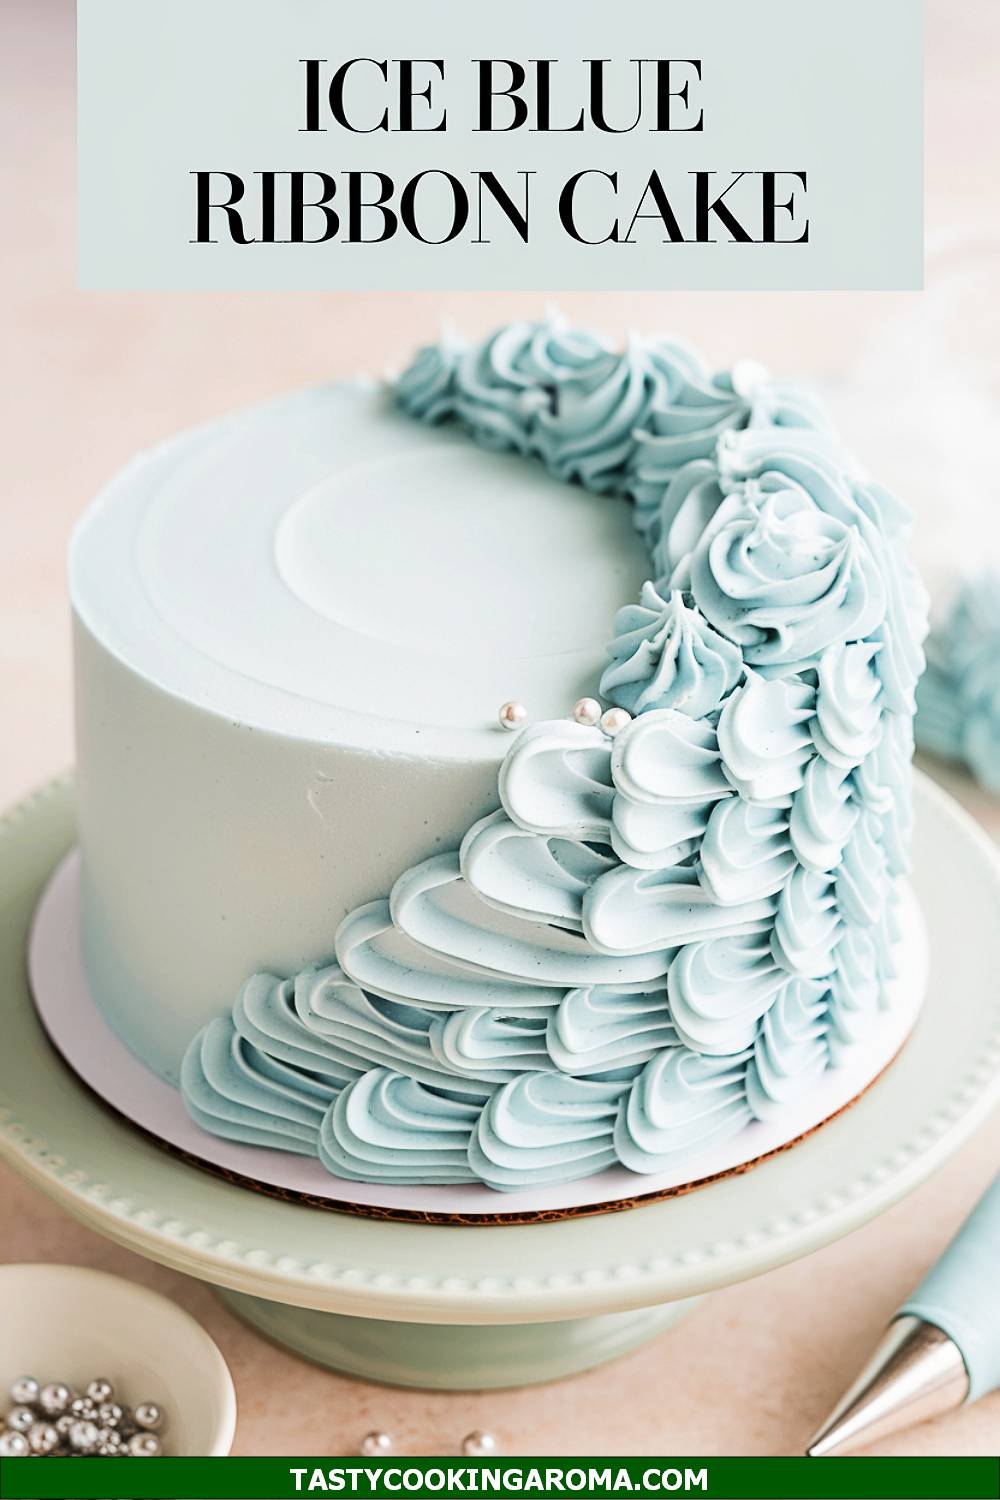
Ice Blue Piped Ribbon Cake
This Ice Blue Piped Ribbon Cake is a dream come true for anyone who loves delicate, vintage-style cake designs. The soft ice-blue buttercream paired with piped ribbon-like details makes it a showstopper for weddings, bridal showers, or elegant birthday parties. The flavor can be customized, but a classic vanilla or almond cake works wonderfully to complement the vintage aesthetic. It’s an ideal pick for beginners who want to practice piping while creating a truly stunning dessert.
Serving Size: 8 servings
Time Needed: 2 hours
Ingredients
- 2 layers of your favorite cake flavor (8-inch round)
- 4 cups buttercream frosting (lightly tinted ice blue)
- Piping bags fitted with a ribbon piping tip
- Edible pearl decorations (optional)
- Turntable for easy decorating
Instructions
- Start by leveling your cake layers to ensure they’re flat and even. Place one layer on a turntable and spread a thin layer of buttercream between the layers.
- Apply a crumb coat over the entire cake and chill it in the fridge for 20 minutes to set the base.
- Fill a piping bag with the ice-blue buttercream and attach a ribbon piping tip. Carefully pipe horizontal ribbon designs around the sides of the cake, starting from the base and working upwards.
- Once the sides are complete, add additional ribbon details or pearls on the top for a polished, vintage touch. Chill the cake again for 10-15 minutes before serving.
Quick Pros of the Recipe
- Beginner-friendly piping techniques.
- Customizable flavor to suit any occasion.
- Elegant design perfect for vintage-themed events.
- Great practice for mastering ribbon piping skills.
Ingredient Substitutions or Customization Ideas: Swap the edible pearls for tiny fondant flowers or gold leaf for a more luxurious look. If you’re short on time, use store-bought buttercream and tint it with blue gel food coloring.
Cooking Tips and Tricks: Keep your buttercream at the right consistency—not too soft or too stiff—for smooth piping. Using a turntable while piping makes it much easier to create even designs.
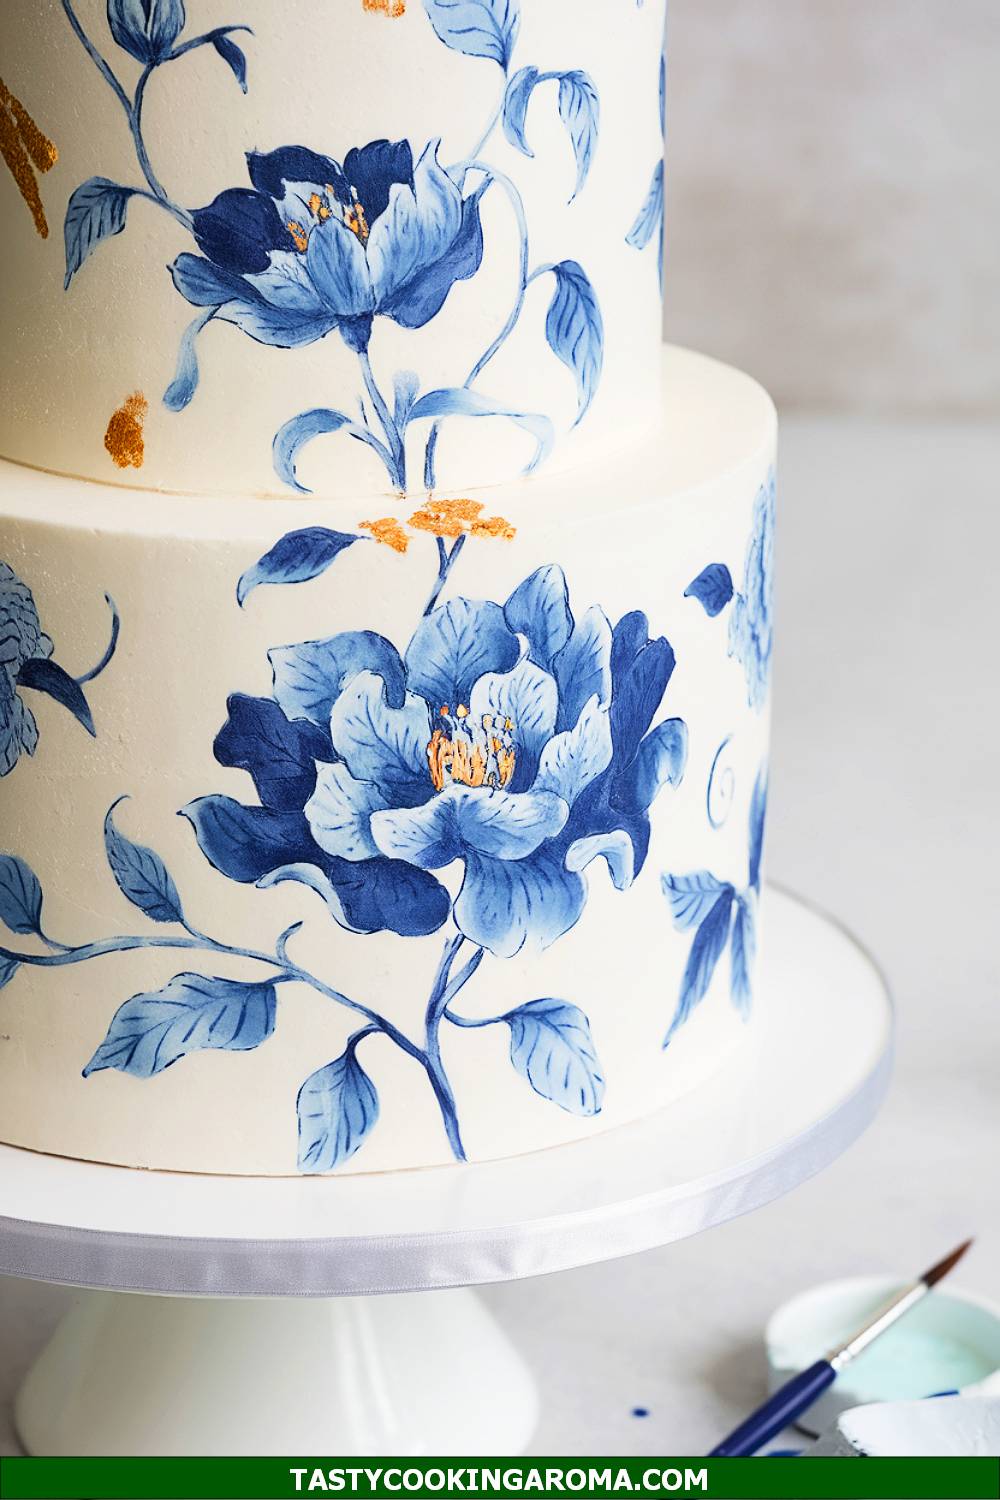
Blue Porcelain-Inspired Floral Cake
This Blue Porcelain-Inspired Floral Cake is like edible art, featuring intricate hand-piped floral designs inspired by vintage porcelain patterns. The combination of white and blue frosting creates a delicate, timeless aesthetic that feels both elegant and nostalgic. Despite its intricate appearance, the design can be simplified for beginners or made more elaborate for advanced decorators. This cake is perfect for bridal showers, weddings, or any occasion where you want to wow your guests.
Serving Size: 10 servings
Time Needed: 3 hours
Ingredients
- 3 layers of your favorite cake flavor (6-inch round)
- 5 cups buttercream frosting (divided into white and blue portions)
- Piping bags with small round and petal tips
- Edible metallic accents (optional)
- Food-safe paintbrush for detailing
Instructions
- Stack and fill your cake layers with white buttercream, then apply a smooth crumb coat around the outside. Chill for 20 minutes to set.
- Frost the cake with a final layer of white buttercream and smooth it out with an offset spatula. Chill again for another 15 minutes.
- Using blue buttercream in a piping bag fitted with a small round tip, pipe delicate floral designs inspired by porcelain patterns. Add leaves and petal details using a petal piping tip for dimension.
- For an extra touch, use a food-safe paintbrush to add metallic accents or outlines to your floral designs. Let the cake chill for at least 30 minutes before serving.
Quick Pros of the Recipe
- Stunning porcelain-inspired design.
- Customizable floral patterns for creativity.
- Perfect for formal or elegant occasions.
- Great for practicing fine piping and detailing skills.
Ingredient Substitutions or Customization Ideas: Use gel food coloring to create different shades of blue for added depth. For a modern twist, add edible gold or silver leaf accents to the design.
Cooking Tips and Tricks: Practice your floral patterns on parchment paper before piping directly onto the cake. Use a steady hand and take breaks to avoid smudging your designs.
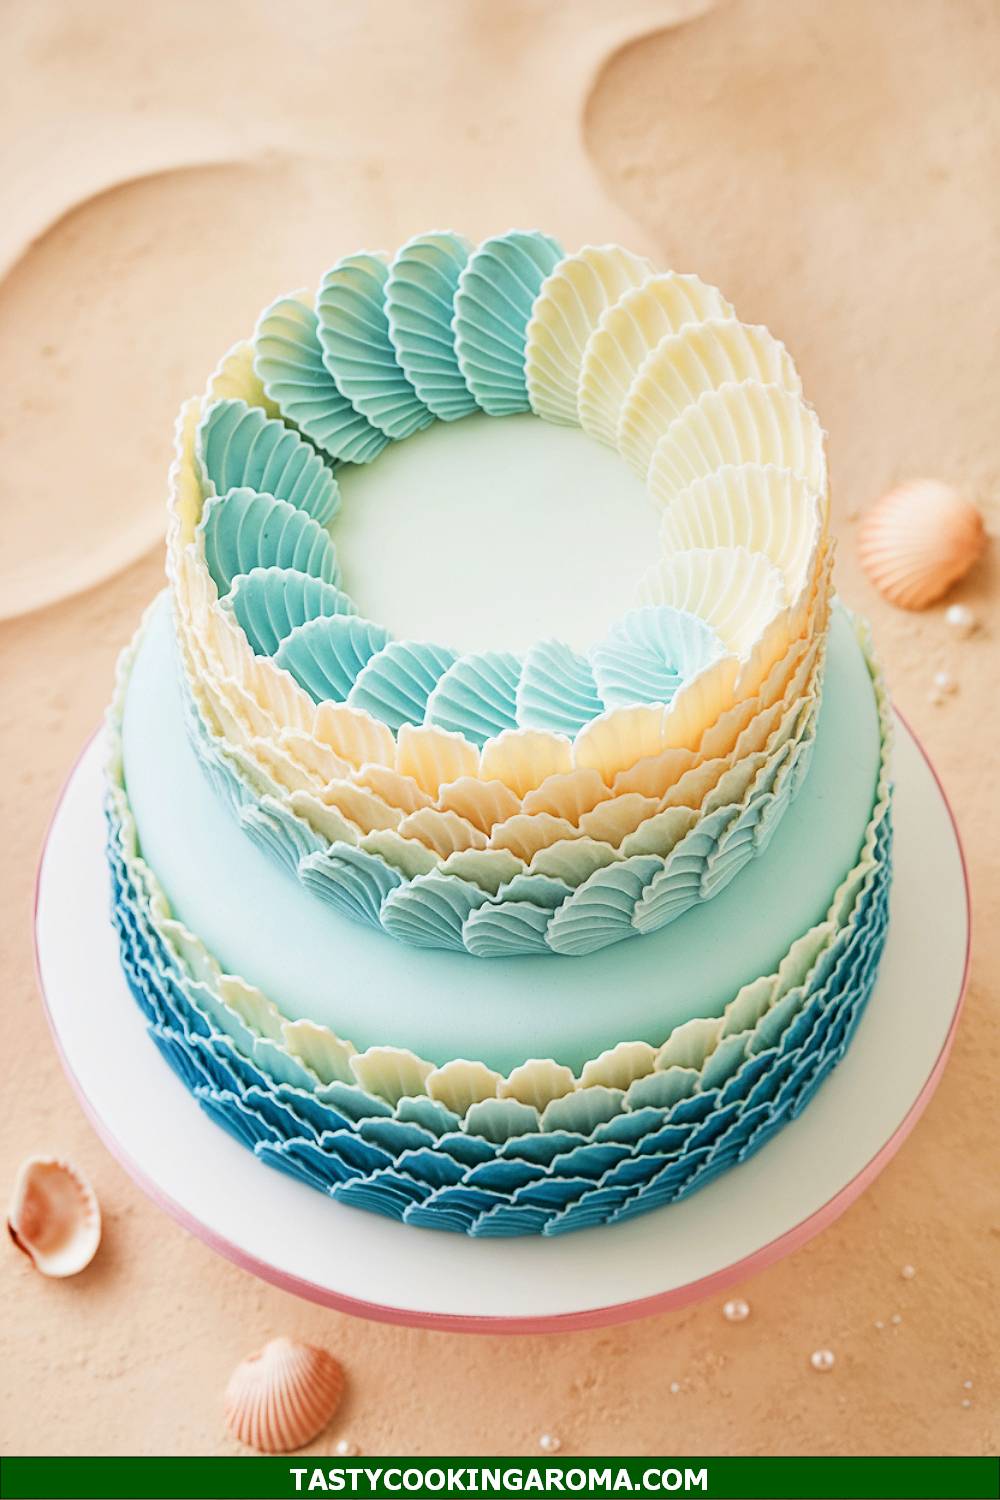
Pastel Blue Scalloped Shell Cake
The Pastel Blue Scalloped Shell Cake is a delightful vintage-inspired treat featuring piped shell borders and scalloped edges. Its soft pastel blue color gives it a dreamy, retro vibe, making it perfect for birthdays, baby showers, or even a “something blue” bridal shower. The design is simple enough for beginners but still looks polished and professional. Plus, the piped shell technique is a classic skill that every baker should try at least once.
Serving Size: 6 servings
Time Needed: 1.5 hours
Ingredients
- 2 layers of your favorite cake flavor (7-inch round)
- 3 cups buttercream frosting (light pastel blue)
- Piping bag with a star tip
- Optional: white or silver edible beads for accents
Instructions
- Begin by stacking and filling your cake layers with a thin layer of buttercream. Apply a crumb coat over the entire cake and chill for 15 minutes.
- Frost the cake with a smooth final coat of pastel blue buttercream, using an offset spatula for a clean finish.
- Fill a piping bag with blue buttercream and attach a star tip. Pipe scalloped shell borders around the base and top edges of the cake, overlapping slightly for a textured look.
- For a finishing touch, add edible beads or pearls along the piped shells. Chill the cake for 10 minutes before serving to set the design.
Quick Pros of the Recipe
- Simple yet elegant vintage design.
- Great for beginners learning piping techniques.
- Perfect for small gatherings or intimate celebrations.
- Customizable with different colors and accents.
Ingredient Substitutions or Customization Ideas: Use a gradient of blue shades for an ombre effect. You can also swap the star tip for other piping tips to create unique textures.
Cooking Tips and Tricks: Keep your piping bag at a consistent angle while piping to maintain even shell shapes. Chill the cake between steps to make frosting and decorating easier.
FAQ
What makes the Frosted Blue Velvet Spiral Cake special?
The Frosted Blue Velvet Spiral Cake stands out due to its elegant spiral design and rich, moist blue velvet layers. It’s perfect for a luxurious dessert or as an eye-catching centerpiece for events like weddings or birthdays. This cake combines classic flavor with modern aesthetics.
Can I customize the Light Blue Vintage Ruffle Cake?
Absolutely! The ruffled design of the Light Blue Vintage Cake allows for versatile customization. You can adjust the shade of blue or add edible pearls and flowers to fit themes like Mom To Be Cake Design or a Something Blue Bridal Shower Cake.
What flavors are in the Cottagecore Blueberry Lavender Drip Cake?
This cake embodies a Cottagecore Cake vibe with its blueberry and lavender flavors. The natural floral notes pair beautifully with the handcrafted drip design, making it a great pick for tea parties or outdoor gatherings.
How intricate is the Baby Blue Layered Daisy Cake for beginners?
The Baby Blue Cake Birthday design is beginner-friendly with its simple layered approach. The addition of edible daisies adds charm while being approachable for anyone learning Beginner Buttercream Cake Designs.
What design features make the Antique Icing Rosette Cake unique?
The Antique Icing Rosette Cake is characterized by its vintage-style piping, reminiscent of Old Fashion Cakes Decorating. The intricate rosettes make it a delightful Bolo Vintage showstopper for special occasions.
Can I use the Pastel Blue Ombre Tiered Blossom Cake for a wedding?
Yes! This elegant design, with its seamless ombre effect and delicate blossoms, is a stunning option for a wedding cake or Tiered Cakes Birthday. It adds timeless beauty to events with a pastel aesthetic.
What occasions are ideal for the Something Blue Bridal Pearl Cake?
This cake is perfect for weddings, bridal showers, or anniversaries. The incorporation of edible pearls screams elegance and fits the theme of a Something Blue Bridal Shower Cake or other celebratory events with a blue motif.
Is the Light Blue Lambeth Lace Cake difficult to decorate?
The Blue Lambeth Cake style involves traditional Lambeth piping techniques, which are intricate yet rewarding. For those seeking a challenge in Cake Decorating Piping, this cake is a masterpiece worth creating.
What theme does the Baby Blue Victorian Rose Frame Cake suit?
The vintage piping on this Vintage Themed Cake offers timeless charm. Perfect for tea parties, bridal showers, or elegant birthdays, the framed rose design makes this cake a heartwarming treat.
What type of frosting is used for the Ice Blue Piped Ribbon Cake?
The Ice Blue Cake frosting often uses buttercream for its smooth texture and the ease of creating delicate ribbon piping. It’s a great option for those practicing Trendy Cake Decorating.
Where can I showcase the Blue Porcelain-Inspired Floral Cake?
The intricate floral details of this cake make it ideal for milestone celebrations, gallery-style events, or even as a decorative dessert centerpiece at bridal showers. Its unique design resembles delicate porcelain art pieces.
How easy is the Pastel Blue Scalloped Shell Cake to make?
This cake features simple yet elegant scalloped piping, making it a great project for those learning Simple Cake Designs. Its gentle pastel tones create a delightful Aesthetic Blue Birthday Cake for any occasion.
Conclusion
From the decadent Frosted Blue Velvet Spiral Cake to the intricate piping of the Ice Blue Piped Ribbon Cake, this guide showcases 12 stunning designs that bring the charm of the Blue Vintage Cake trend to life.
Whether you’re drawn to the dreamy Light Blue Vintage Ruffle Cake or the rustic elegance of the Cottagecore Blueberry Lavender Drip Cake, there’s a perfect option for every occasion, from weddings to birthdays. For bakers of all skill levels, these designs range from approachable Beginner Buttercream Cake Designs to advanced Vintage Piping Cake techniques.
We hope this list inspires your next baking adventure, whether you’re crafting a Pastel Blue Cake Aesthetic or diving into intricate Old Fashion Cakes Decorating.
Save this article for later, share it with your fellow baking enthusiasts, and let us know in the comments: Which blue vintage cake are you most excited to try? Let’s make baking—and eating—a little more beautiful!
