12 Easter Cookie Cake Recipes That Will Have Everyone Asking for Seconds
Easter is right around the corner, and if you’re still trying to figure out what to bake, we’ve got you covered!
Whether you’re hosting brunch or just looking for a creative activity with the kids, this collection of Easter Cookie Cake ideas blends simplicity with irresistible flavors. Think Bunny Cookie Cakes, Easter Monster Cookies, and even Mini Egg Cookie Pies made with quick cake mix solutions—easy, fast, and oh-so-tasty.
Why You’ll Love This Recipe List:
- All recipes are beginner-friendly and use everyday ingredients like sugar cookie dough, Cadbury mini eggs, and chocolate chips.
- They deliver just the right balance of sweetness, chewiness, and festive charm.
- Many options are kid-approved, making them perfect for family baking sessions or kids’ Easter recipes.
- Skip the bakery lines—these Easter Baked Goods Ideas are more fun, more personalized, and guaranteed to impress!
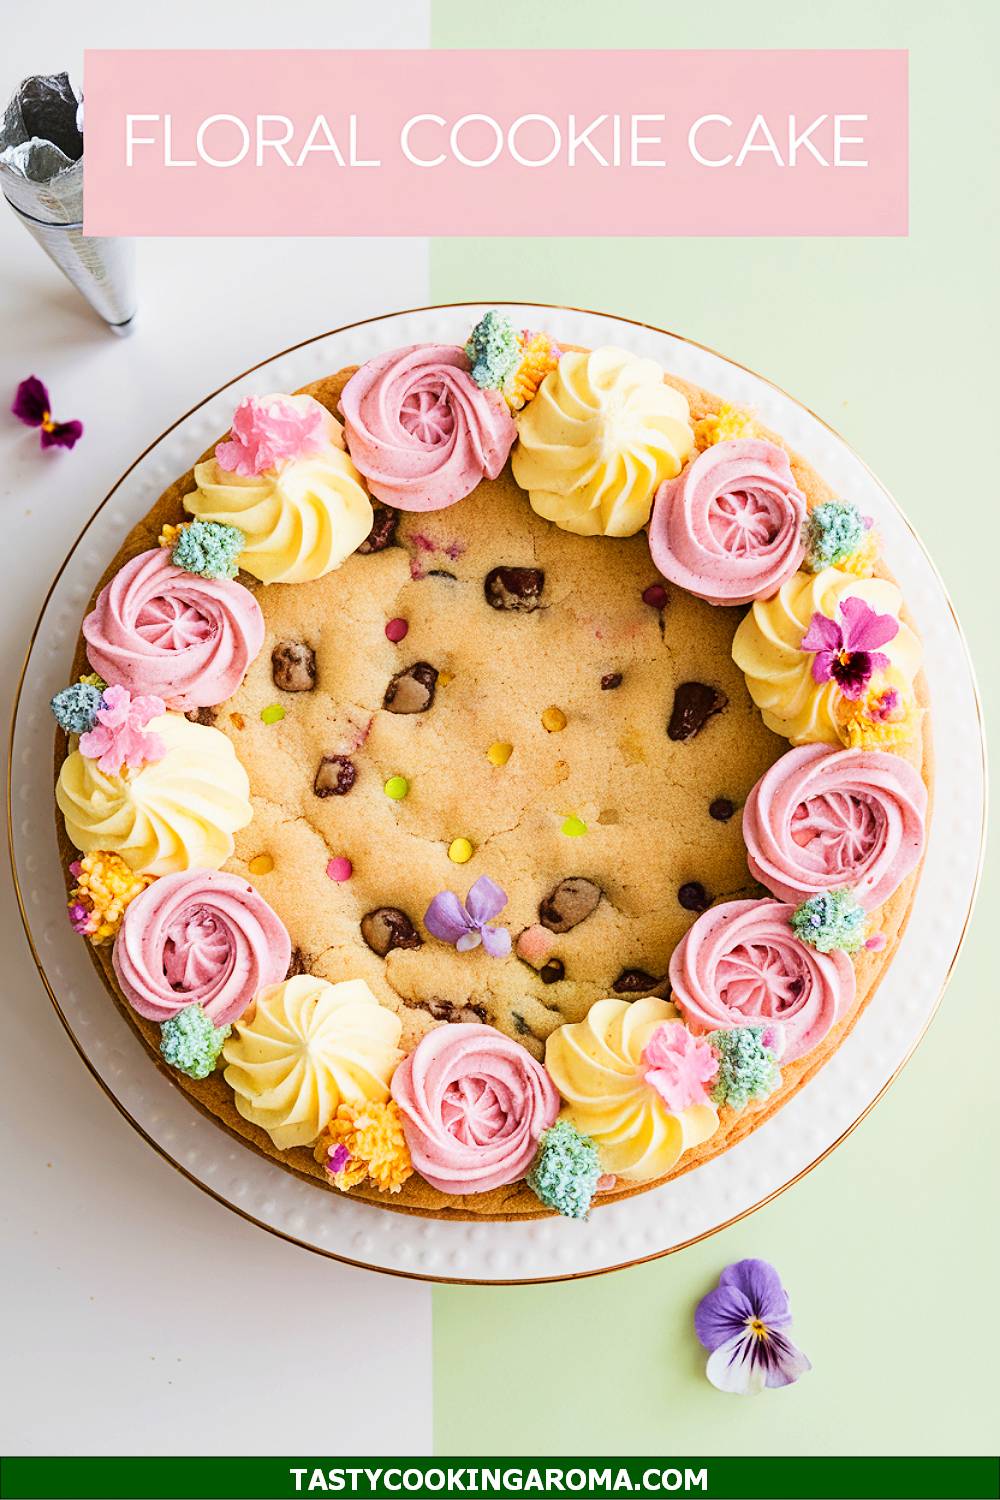
Floral Burst Easter Cookie Cake
If you’re looking for a dessert that screams “springtime,” the Floral Burst Easter Cookie Cake is a perfect choice! It’s a giant sugar cookie base topped with colorful pastel frosting and edible flower decorations, making it as pretty as it is delicious. The buttery cookie is soft yet firm enough to hold all the toppings without crumbling, making it easy to slice and serve. This is a fantastic centerpiece for your Easter table and is sure to be a hit with both kids and adults!
Serving Size: 8–10 servings
Time Needed: 45 minutes
Ingredients
- 1 cup unsalted butter, softened
- 1 cup granulated sugar
- 2 large eggs
- 1 teaspoon vanilla extract
- 2 1/2 cups all-purpose flour
- 1 teaspoon baking powder
- 1/2 teaspoon salt
- Pastel-colored frosting (store-bought or homemade)
- Edible flowers or pastel sprinkles for decoration
Instructions
- Preheat your oven to 350°F (175°C) and line a 9-inch round baking pan with parchment paper, leaving some overhang for easy removal.
- In a large bowl, cream together the butter and sugar until light and fluffy. Add the eggs and vanilla extract, mixing until fully combined.
- In a separate bowl, whisk together the flour, baking powder, and salt. Gradually add the dry ingredients to the wet mixture, mixing until a soft dough forms.
- Press the dough evenly into the prepared baking pan. Bake for 18–22 minutes, or until the edges are golden and the center is set. Let cool completely before removing from the pan.
- Spread pastel-colored frosting over the cooled cookie base and decorate with edible flowers or pastel sprinkles. Slice and serve!
Quick Pros of the Recipe
- Perfect for spring and Easter celebrations with its vibrant design.
- Easy to customize with different frosting colors and decorations.
- Soft, buttery cookie base that holds up well for slicing.
- Can be made ahead to save time on the holiday.
Ingredient Substitutions or Customization Ideas: Swap edible flowers for Easter candy like mini chocolate eggs or jelly beans for a sweeter twist. You can also use gluten-free flour to make it suitable for those with dietary restrictions.
Cooking Tips and Tricks: Chill the dough for 15 minutes before pressing it into the pan to make it easier to handle. If you’re using store-bought frosting, whip it with a hand mixer for a fluffier texture.
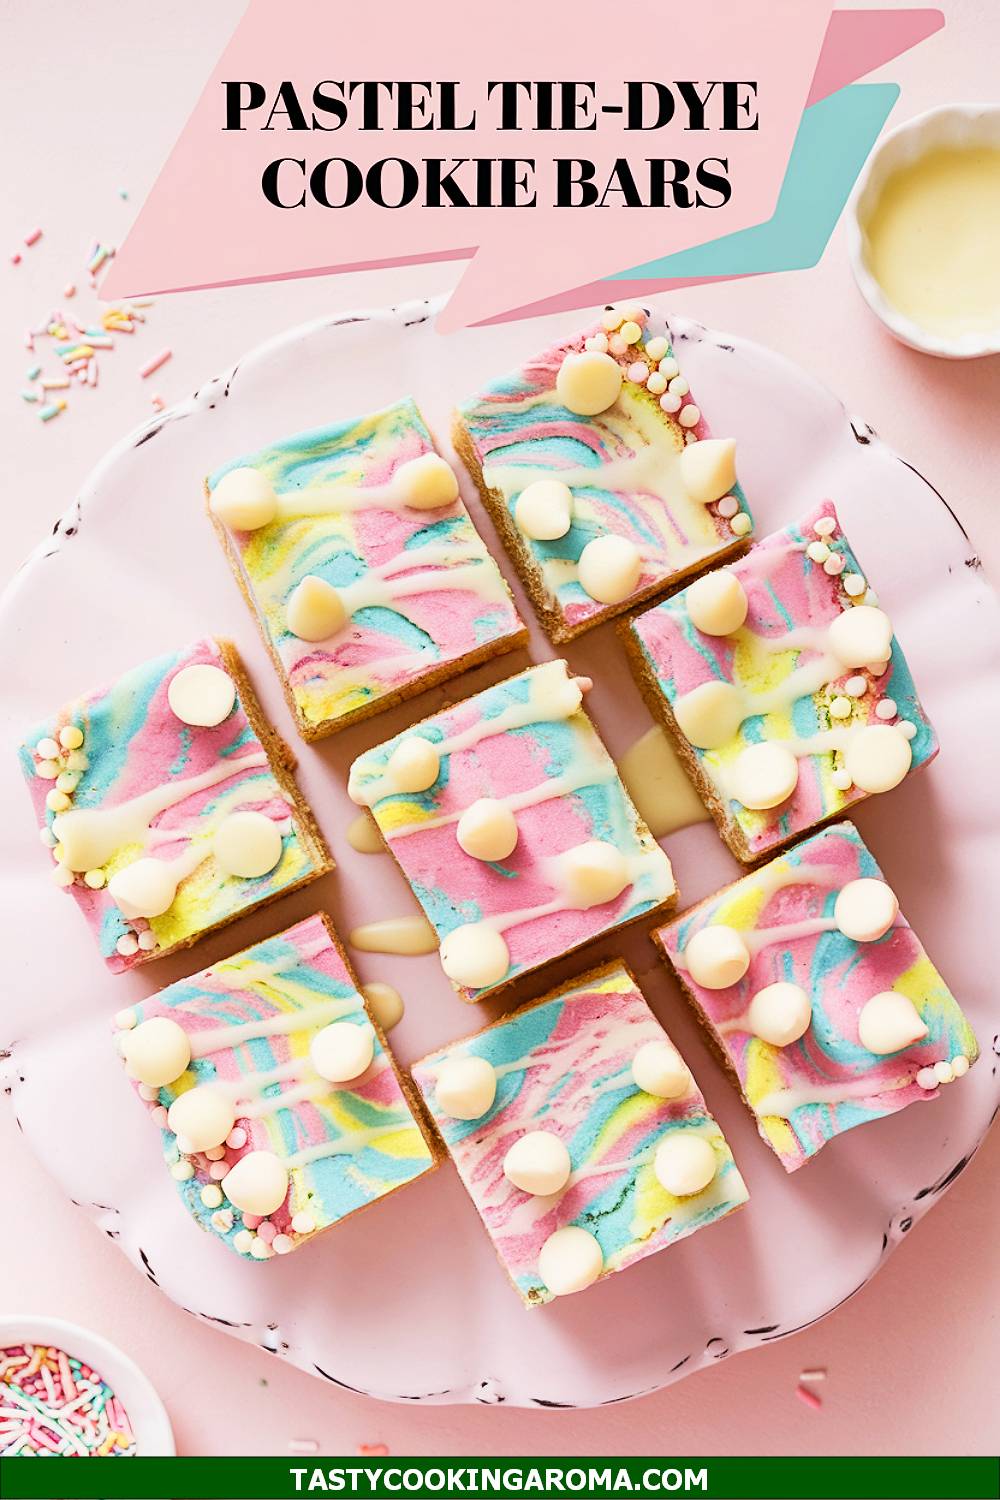
Pastel Tie-Dye Cookie Bars
These Pastel Tie-Dye Cookie Bars are a fun and colorful treat that will brighten up any Easter table! The soft and chewy bars are swirled with pastel-colored dough, creating a beautiful marbled effect that’s almost too pretty to eat. They’re quick to make and perfect for baking with kids, as the dough coloring and swirling process feels like a fun craft project. Plus, they taste as good as they look—sweet, buttery, and full of festive charm!
Serving Size: 12 bars
Time Needed: 35 minutes
Ingredients
- 1 cup unsalted butter, melted
- 1 cup brown sugar
- 1/2 cup granulated sugar
- 2 large eggs
- 1 teaspoon vanilla extract
- 2 1/2 cups all-purpose flour
- 1/2 teaspoon baking soda
- 1/2 teaspoon salt
- Pastel food coloring (pink, blue, yellow, etc.)
Instructions
- Preheat your oven to 350°F (175°C) and line a 9×13-inch baking dish with parchment paper.
- In a large bowl, mix together the melted butter, brown sugar, and granulated sugar until smooth. Add the eggs and vanilla extract, stirring until fully incorporated.
- In a separate bowl, whisk together the flour, baking soda, and salt. Gradually mix the dry ingredients into the wet ingredients until a dough forms.
- Divide the dough into 3–4 portions and color each portion with a different pastel food coloring. Drop spoonfuls of each colored dough into the baking dish and swirl them together gently with a knife or skewer to create a tie-dye effect.
- Bake for 20–25 minutes, or until the edges are golden and the center is set. Let cool completely before slicing into bars.
Quick Pros of the Recipe
- Visually stunning with its tie-dye effect.
- Soft and chewy texture that’s irresistible.
- Fun and interactive to make, especially with kids.
- Customizable with different colors or even sprinkles.
Ingredient Substitutions or Customization Ideas: Add white chocolate chips or sprinkles to the dough for extra texture and sweetness. For a dairy-free option, use a plant-based butter substitute.
Cooking Tips and Tricks: Avoid overmixing the colors to prevent the tie-dye effect from turning muddy. Use gel food coloring for more vibrant hues without altering the dough’s texture.
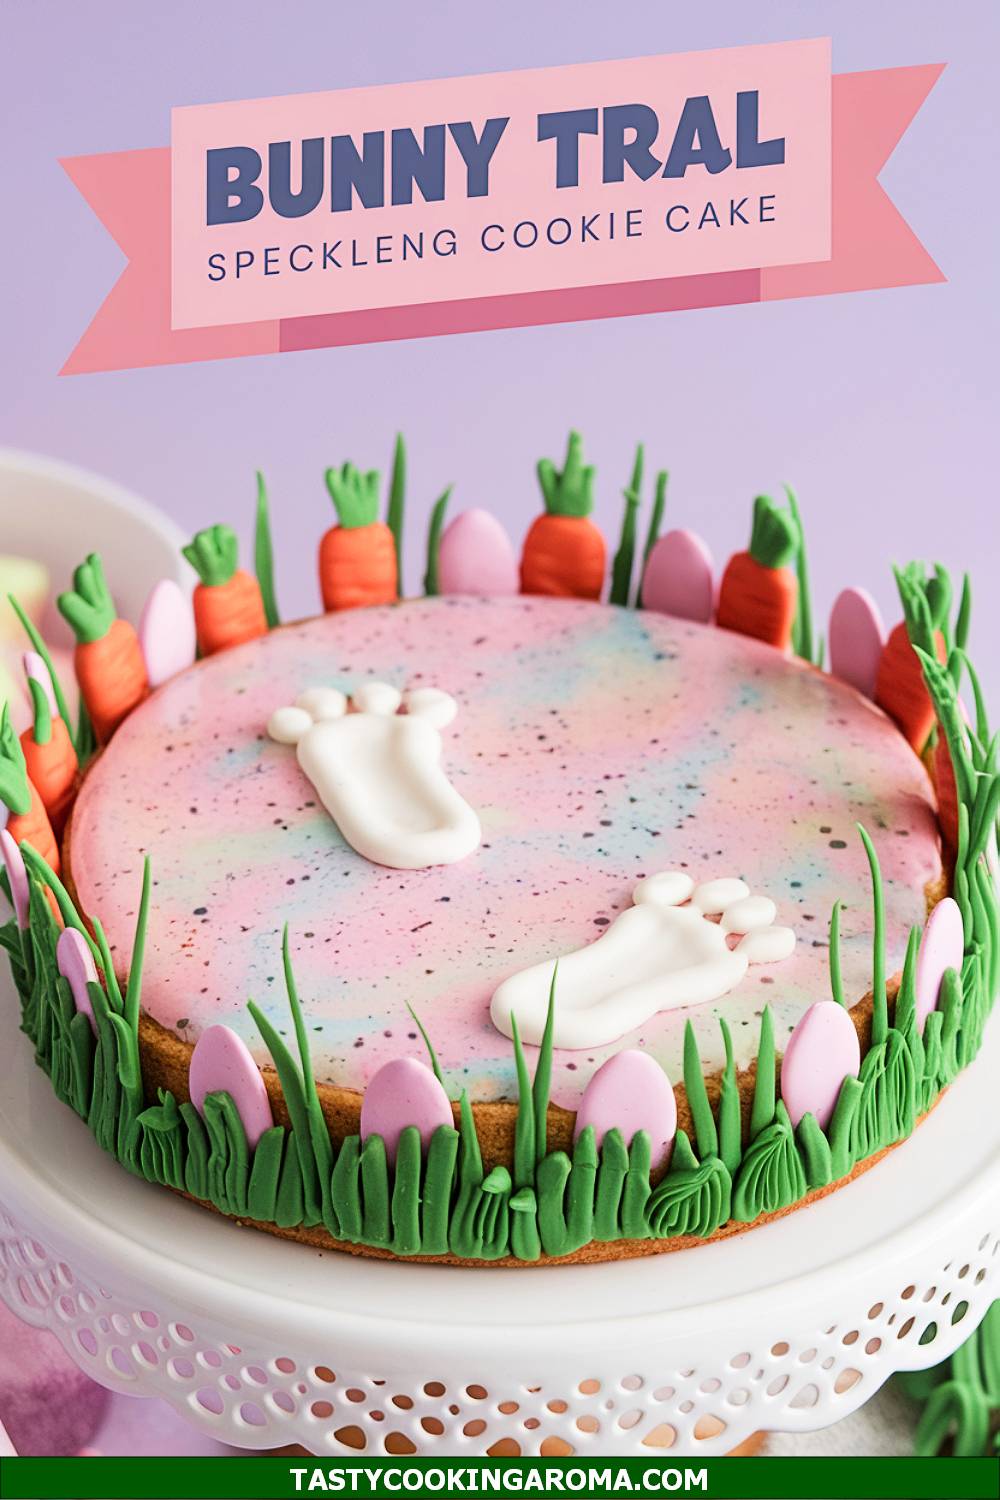
Bunny Trail Speckled Cookie Cake
The Bunny Trail Speckled Cookie Cake is a whimsical Easter dessert that’s as fun to make as it is to eat. The giant cookie is decorated with speckles of food-safe paint and topped with adorable bunny-themed candies and pastel accents. It’s a showstopper for any Easter gathering and has a soft, chewy texture with just the right amount of sweetness. The playful design is perfect for getting into the Easter spirit, and it’s surprisingly simple to put together!
Serving Size: 10–12 servings
Time Needed: 50 minutes
Ingredients
- 1 cup unsalted butter, softened
- 1 cup granulated sugar
- 1/2 cup brown sugar
- 2 large eggs
- 1 teaspoon vanilla extract
- 2 3/4 cups all-purpose flour
- 1 teaspoon baking soda
- 1/2 teaspoon salt
- Pastel-colored frosting
- Edible food-safe paint or cocoa powder mixed with water for speckles
- Bunny-shaped candies or chocolate eggs for decoration
Instructions
- Preheat your oven to 350°F (175°C) and grease a 10-inch round baking pan or line it with parchment paper.
- In a large bowl, cream together the butter, granulated sugar, and brown sugar until fluffy. Add the eggs and vanilla extract, mixing until combined.
- In a separate bowl, whisk together the flour, baking soda, and salt. Gradually mix the dry ingredients into the wet mixture until a soft dough forms.
- Press the dough evenly into the prepared pan and bake for 20–25 minutes, or until the edges are golden and the center is set. Let cool completely before decorating.
- Spread pastel frosting over the cooled cookie and use a clean toothbrush or small brush to flick edible paint or cocoa speckles onto the surface. Decorate with bunny-shaped candies and chocolate eggs to complete the look.
Quick Pros of the Recipe
- Eye-catching design that’s perfect for Easter celebrations.
- Soft and chewy cookie base with a festive topping.
- Simple techniques for a professional-looking result.
- Fun to decorate with kids or as a creative project.
Ingredient Substitutions or Customization Ideas: Swap the bunny candies for mini marshmallows or jelly beans for a different look. Use a chocolate cookie base for a richer flavor.
Cooking Tips and Tricks: Test the “speckling” technique on parchment paper first to perfect your flicking motion. Allow the cookie to cool completely before decorating to prevent the frosting from melting.
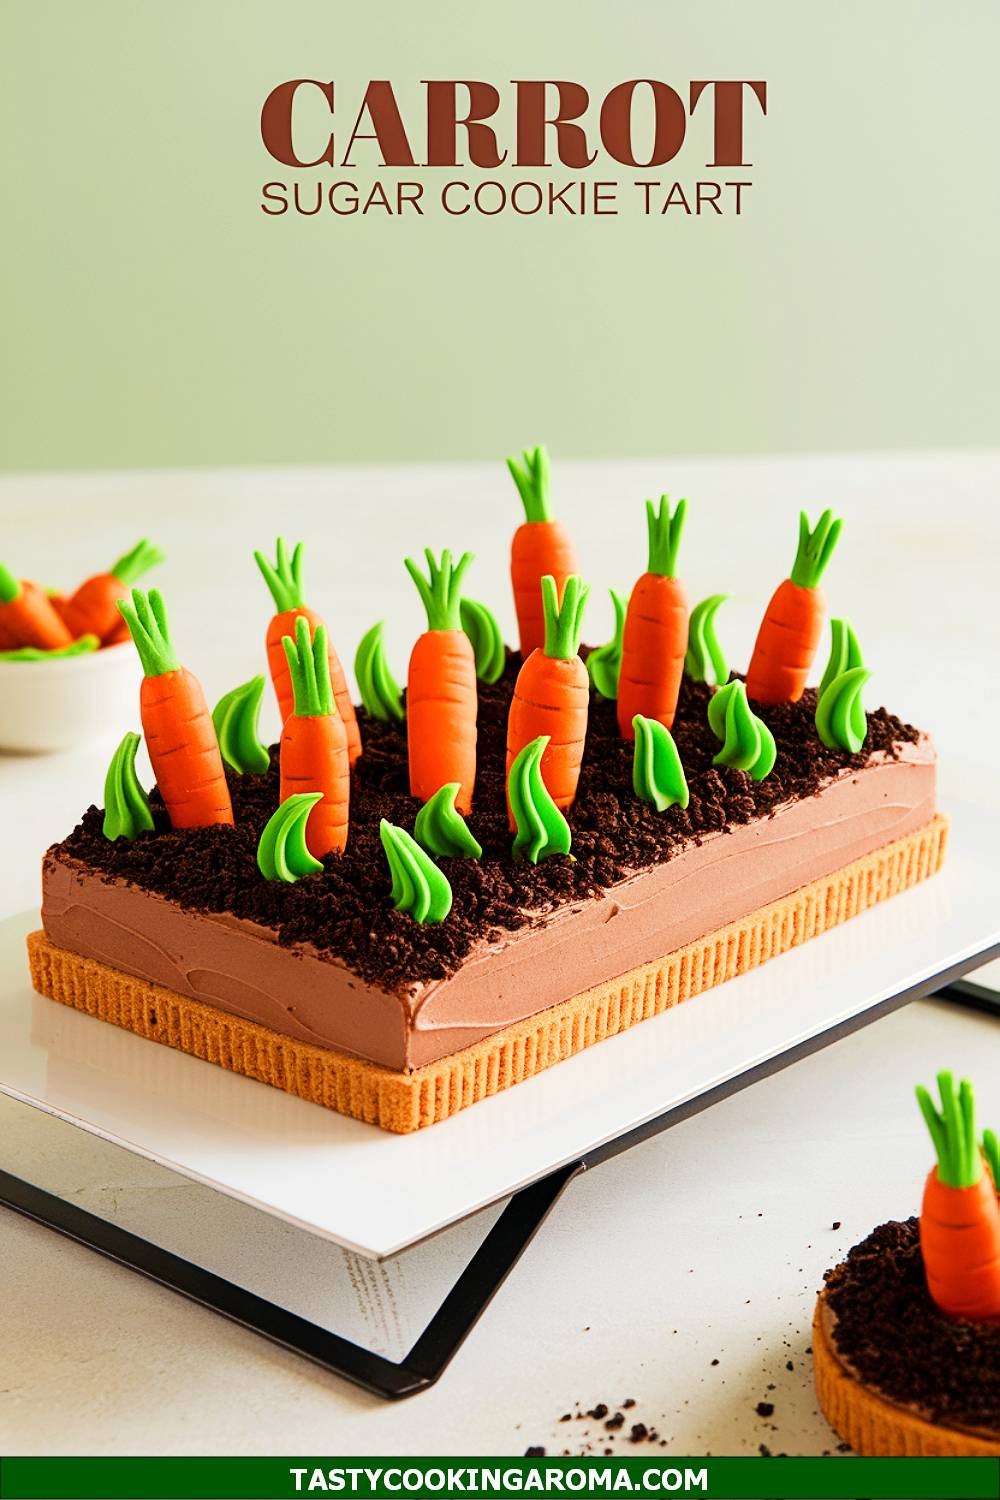
Carrot Patch Sugar Cookie Tart
This Carrot Patch Sugar Cookie Tart is as adorable as it is delicious! With a buttery sugar cookie crust as the base, it’s topped with a creamy layer of frosting and decorated to look like a mini carrot patch using crushed chocolate cookies and candy carrots. It’s a fun and easy dessert that screams springtime and is perfect for Easter gatherings. Kids and adults alike will love the playful design and the delightful mix of textures.
Serving Size: 8 servings
Time Needed: 45 minutes
Ingredients
- 1 roll of refrigerated sugar cookie dough
- 1 cup cream cheese frosting
- 1/2 cup crushed chocolate sandwich cookies (for “dirt”)
- Mini candy carrots or orange candy melts for decoration
- Green sprinkles or shredded coconut dyed green for grass
Instructions
- Preheat your oven to 350°F (175°C) and grease a tart pan or round baking dish.
- Press the refrigerated sugar cookie dough evenly into the pan to form the crust. Bake for 12–15 minutes or until lightly golden. Let it cool completely.
- Spread a generous layer of cream cheese frosting over the cooled cookie base.
- Sprinkle the crushed chocolate cookies over the frosting to create a “dirt” effect.
- Decorate with mini candy carrots or pipe carrot shapes using orange candy melts. Add green sprinkles or dyed shredded coconut around the edges for a grassy look.
- Chill in the fridge for about 20 minutes before serving to let everything set nicely.
Quick Pros of the Recipe
- Adorable and festive design perfect for Easter.
- Easy to make with minimal ingredients and prep time.
- Combines creamy, crunchy, and buttery textures in one bite.
- Customizable with different toppings and decorations.
Ingredient Substitutions or Customization Ideas: Swap the cream cheese frosting for whipped cream or chocolate frosting if you prefer. For a healthier twist, use crushed graham crackers instead of chocolate cookies for the dirt.
Cooking Tips and Tricks: Press the cookie dough evenly to avoid an uneven bake. If you’re making the candy carrots yourself, practice piping on parchment paper first for the best shapes.
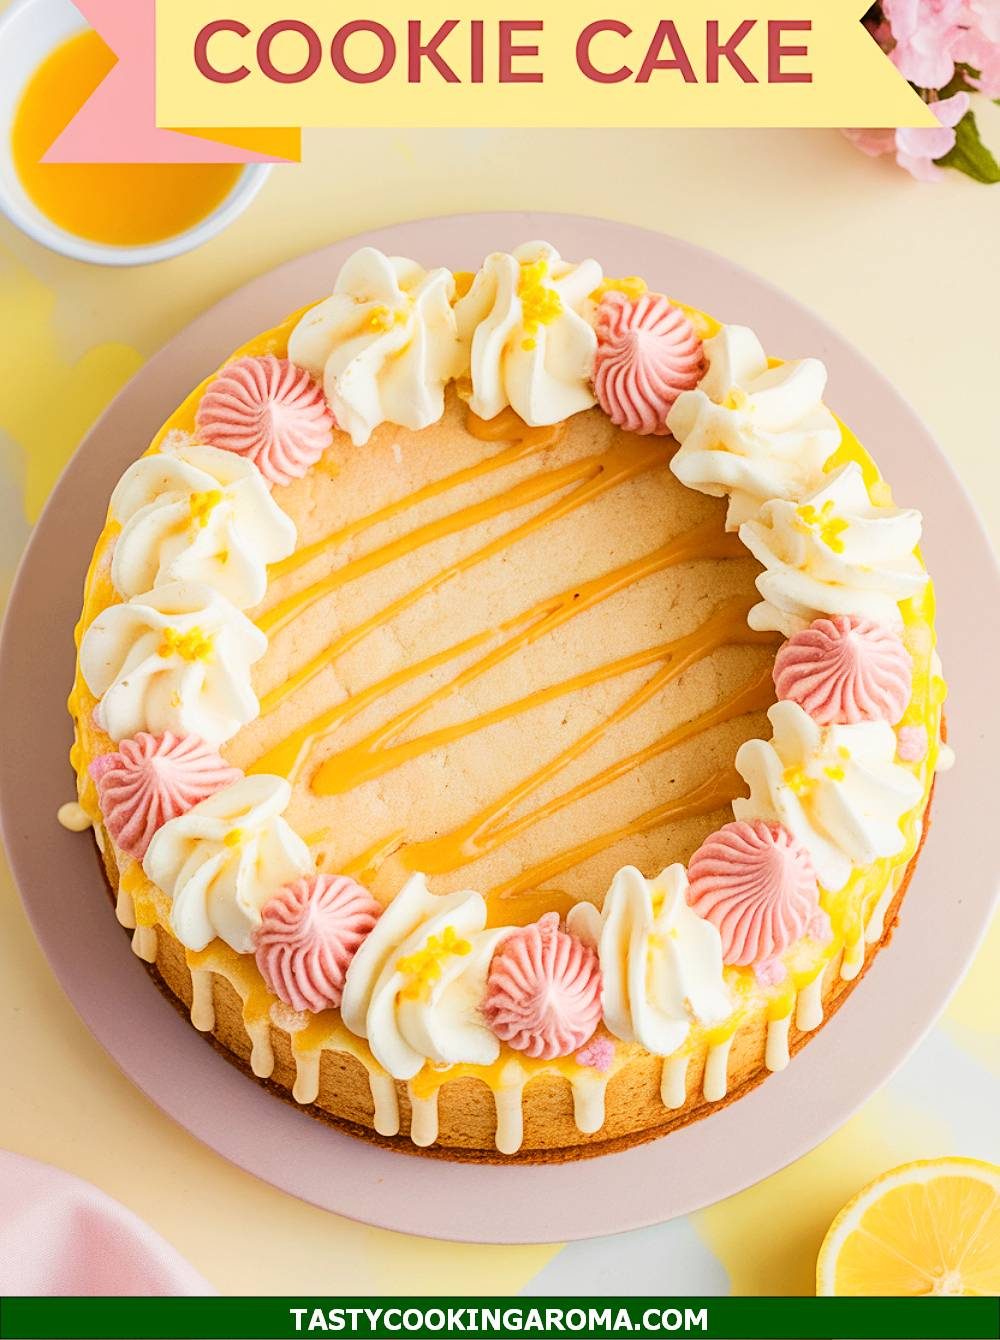
Lemon Drizzle Spring Blossoms Cookie Cake
If you’re a fan of fresh, zesty flavors, this Lemon Drizzle Spring Blossoms Cookie Cake is for you! The sugar cookie base is infused with lemon zest and topped with a tangy lemon glaze that adds a refreshing twist to your Easter dessert table. Decorated with pastel-colored candies or edible flowers, it’s as beautiful as it is tasty. This recipe is perfect for spring celebrations and will brighten up any dessert spread.
Serving Size: 8 servings
Time Needed: 40 minutes
Ingredients
- 1 package of sugar cookie mix (or homemade sugar cookie dough)
- 1 tablespoon lemon zest
- 1 cup powdered sugar
- 2 tablespoons fresh lemon juice
- Pastel candies or edible flowers for decoration
Instructions
- Preheat your oven to 350°F (175°C) and line a round cake pan with parchment paper.
- Prepare the sugar cookie dough according to package directions, mixing in the lemon zest for extra flavor.
- Press the dough evenly into the prepared pan and bake for 15–18 minutes, or until the edges are lightly golden. Let it cool completely in the pan.
- In a small bowl, whisk together powdered sugar and lemon juice to create a smooth glaze.
- Drizzle the glaze over the cooled cookie cake and spread it evenly. Decorate with pastel candies or edible flowers for a springtime touch.
- Let the glaze set for about 10 minutes before slicing and serving.
Quick Pros of the Recipe
- Bright and tangy flavor perfect for spring and Easter.
- Simple ingredients with a stunning presentation.
- Customizable with various toppings and decorations.
- Easy to make, even for beginner bakers.
Ingredient Substitutions or Customization Ideas: Substitute lime zest and juice for a different citrus flavor. You can also use white chocolate chips or nuts for added texture.
Cooking Tips and Tricks: Chill the dough for 10 minutes before baking to prevent over-spreading. Use a toothpick to create fun patterns with the lemon glaze before it sets.
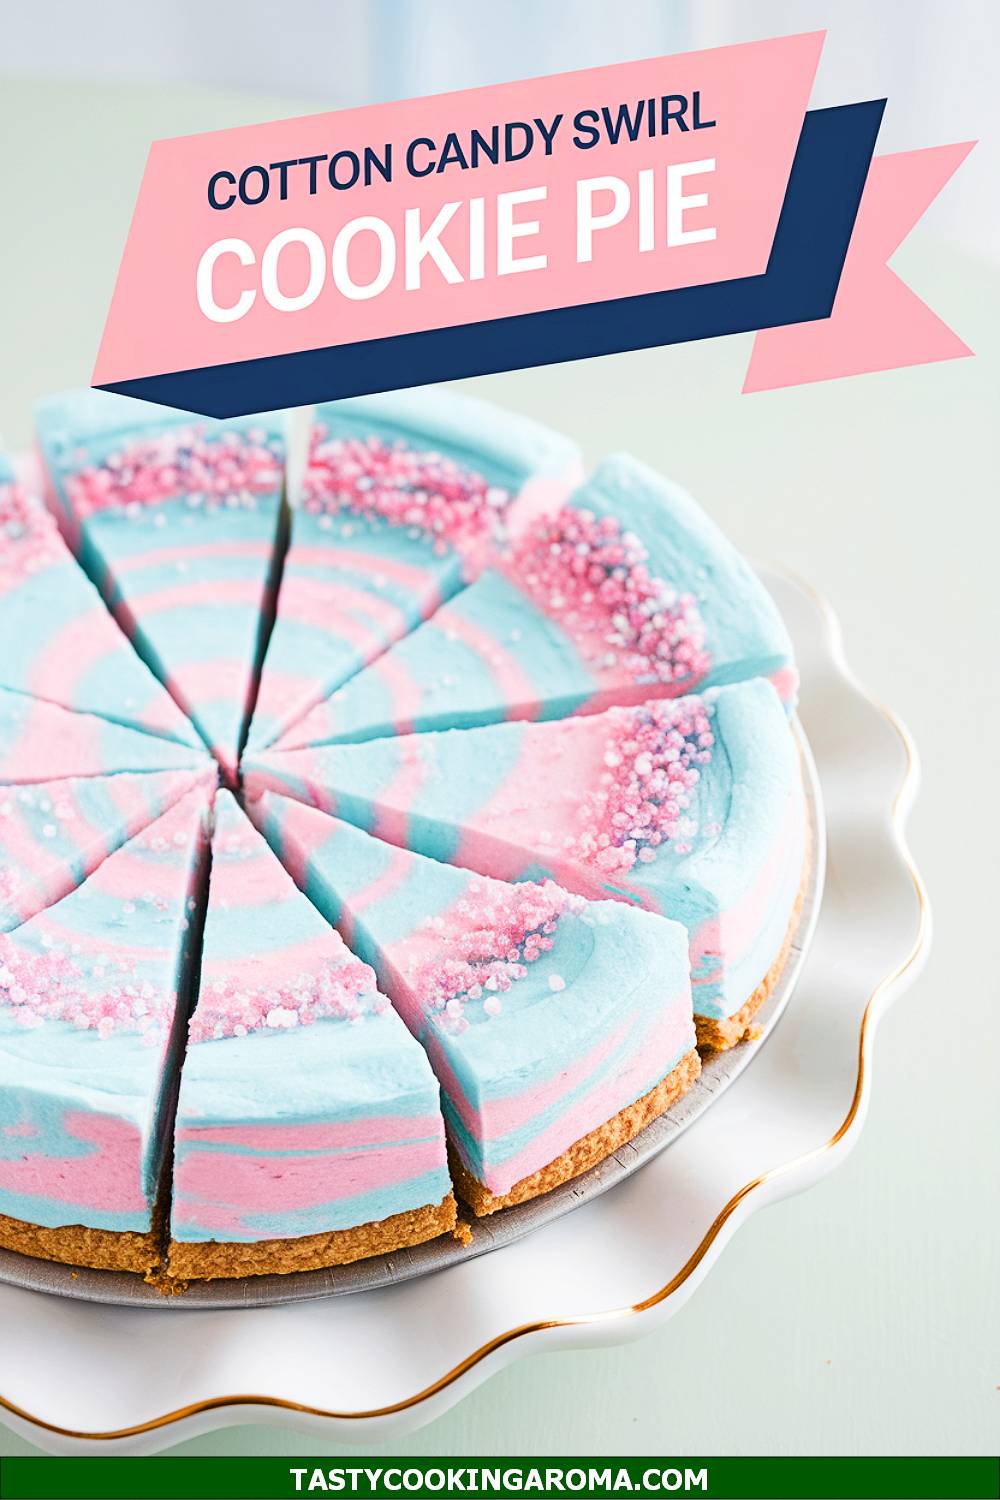
Cotton Candy Swirl Easter Cookie Pie
This Cotton Candy Swirl Easter Cookie Pie is a colorful and whimsical treat that’s sure to impress! With a soft and chewy cookie base swirled with pastel pink and blue hues, it’s as fun to make as it is to eat. The cotton candy flavoring adds a unique twist that kids will adore, making it a standout Easter dessert. It’s a delightful combination of flavor and vibrant colors that’s perfect for spring celebrations.
Serving Size: 10 servings
Time Needed: 50 minutes
Ingredients
- 1 package of sugar cookie mix
- Pink and blue food coloring
- 1/2 teaspoon cotton candy flavoring
- 1/2 cup white chocolate chips (optional)
- Sprinkles for decoration
Instructions
- Preheat your oven to 350°F (175°C) and grease a round pie dish.
- Prepare the sugar cookie dough according to package instructions, mixing in the cotton candy flavoring.
- Divide the dough into two equal parts and color one part pink and the other blue using food coloring.
- Layer the pink and blue dough into the pie dish, swirling them together slightly with a knife to create a marbled effect. Sprinkle white chocolate chips on top if desired.
- Bake for 20–25 minutes or until the edges are golden and the center is set. Let it cool completely before adding sprinkles and serving.
Quick Pros of the Recipe
- Vibrant and eye-catching colors perfect for Easter.
- Unique cotton candy flavor that’s fun and unexpected.
- Soft and chewy texture with optional white chocolate for added sweetness.
- Kid-friendly and easy to customize with different colors or flavors.
Ingredient Substitutions or Customization Ideas: Swap the cotton candy flavoring for vanilla or almond extract if you prefer a more traditional taste. You can also experiment with different color combinations to match other occasions.
Cooking Tips and Tricks: Don’t overmix the colors to maintain the swirled effect. Use gel food coloring for more vibrant hues without altering the dough’s consistency.
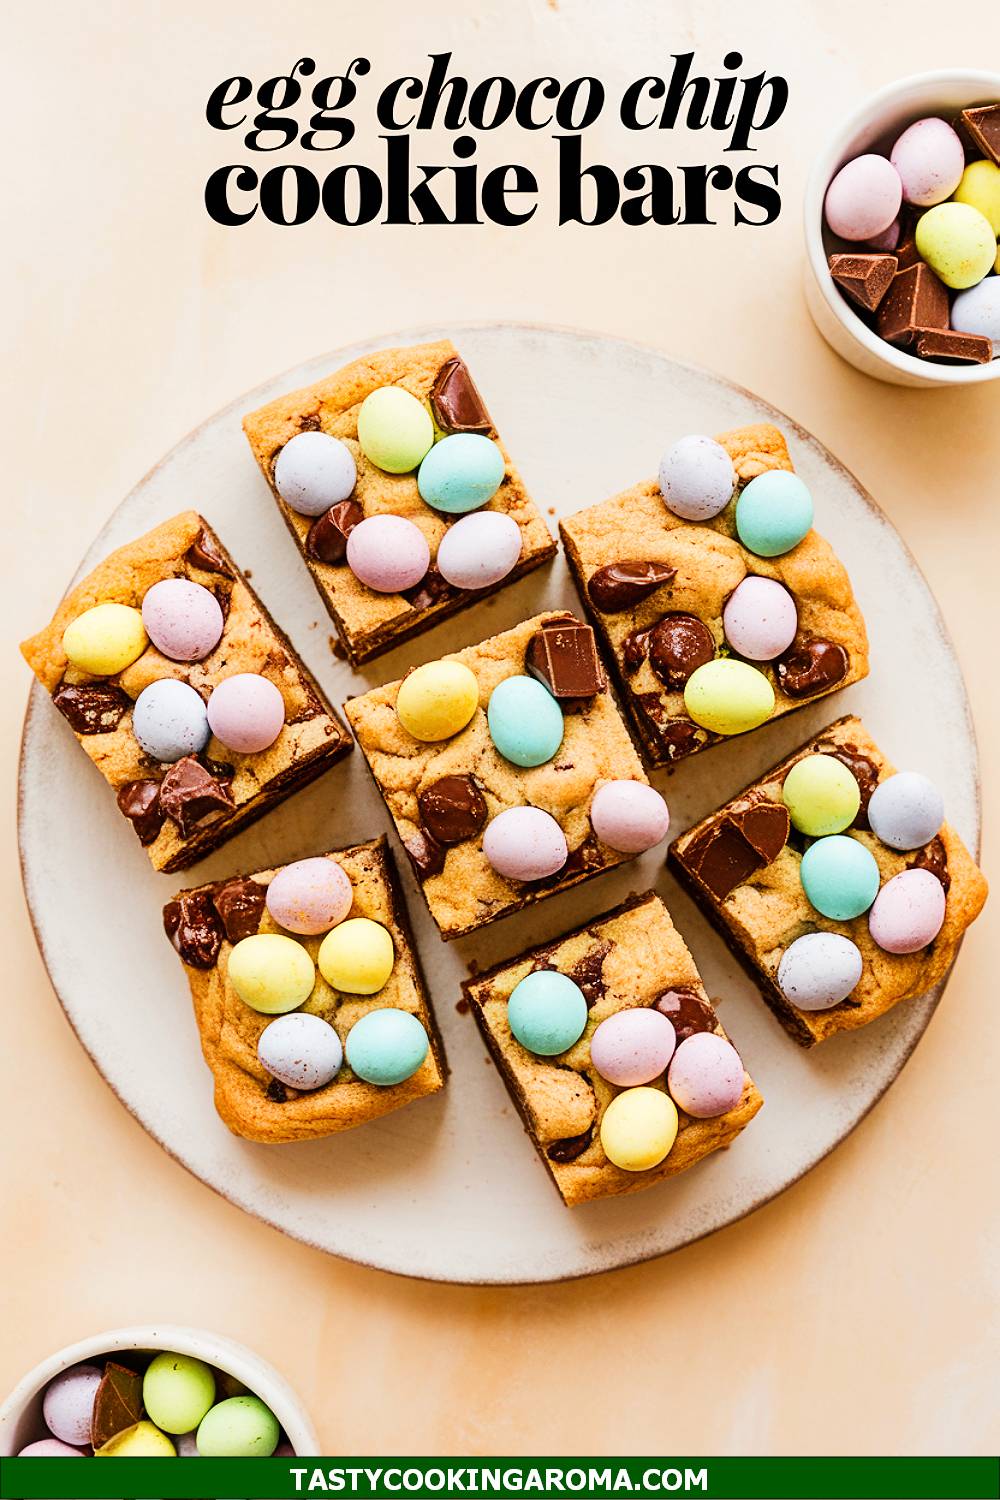
Mini Egg Chocolate Chip Cookie Bars
These Mini Egg Chocolate Chip Cookie Bars are a must-have for Easter celebrations! They’re loaded with gooey chocolate chips and crunchy Mini Eggs, making every bite a delightful mix of textures and flavors. What’s great is how easy they are to whip up, using simple pantry staples and a few festive ingredients. Perfect for sharing with family or sneaking a piece for yourself—because who can resist that colorful, candy-filled goodness?
Serving Size: 12 bars
Time Needed: 40 minutes
Ingredients
- 1 cup unsalted butter, softened
- 1 cup brown sugar
- 1/2 cup granulated sugar
- 2 large eggs
- 2 tsp vanilla extract
- 2 1/2 cups all-purpose flour
- 1 tsp baking soda
- 1/2 tsp salt
- 1 cup semi-sweet chocolate chips
- 1 1/2 cups Cadbury Mini Eggs, roughly chopped
Instructions
- Preheat your oven to 350°F (175°C) and line a 9×13-inch baking pan with parchment paper or lightly grease it.
- In a large bowl, cream together the butter, brown sugar, and granulated sugar until light and fluffy. Add the eggs one at a time, followed by the vanilla, and mix until well combined.
- In a separate bowl, whisk together the flour, baking soda, and salt. Gradually add the dry ingredients to the wet ingredients, mixing until just combined.
- Fold in the chocolate chips and 1 cup of the chopped Cadbury Mini Eggs, reserving the remaining 1/2 cup for topping.
- Spread the dough evenly into the prepared baking pan. Sprinkle the reserved Cadbury Mini Eggs on top for extra color and crunch.
- Bake for 25–30 minutes, or until the edges are golden and a toothpick inserted into the center comes out clean. Let cool completely before cutting into bars.
Quick Pros of the Recipe
- Perfect blend of soft cookie texture and crunchy candy.
- Uses simple, everyday ingredients.
- Colorful and festive for Easter celebrations.
- Kid-friendly and great for sharing!
Ingredient Substitutions or Customization Ideas: Swap the Cadbury Mini Eggs with pastel M&Ms for a different candy option. You can also use white chocolate chips for a sweeter twist or sprinkle in some shredded coconut for extra texture.
Cooking Tips and Tricks: Make sure to roughly chop the Cadbury Mini Eggs so they distribute evenly in the dough. For a chewier texture, slightly underbake the cookie bars and let them firm up as they cool.
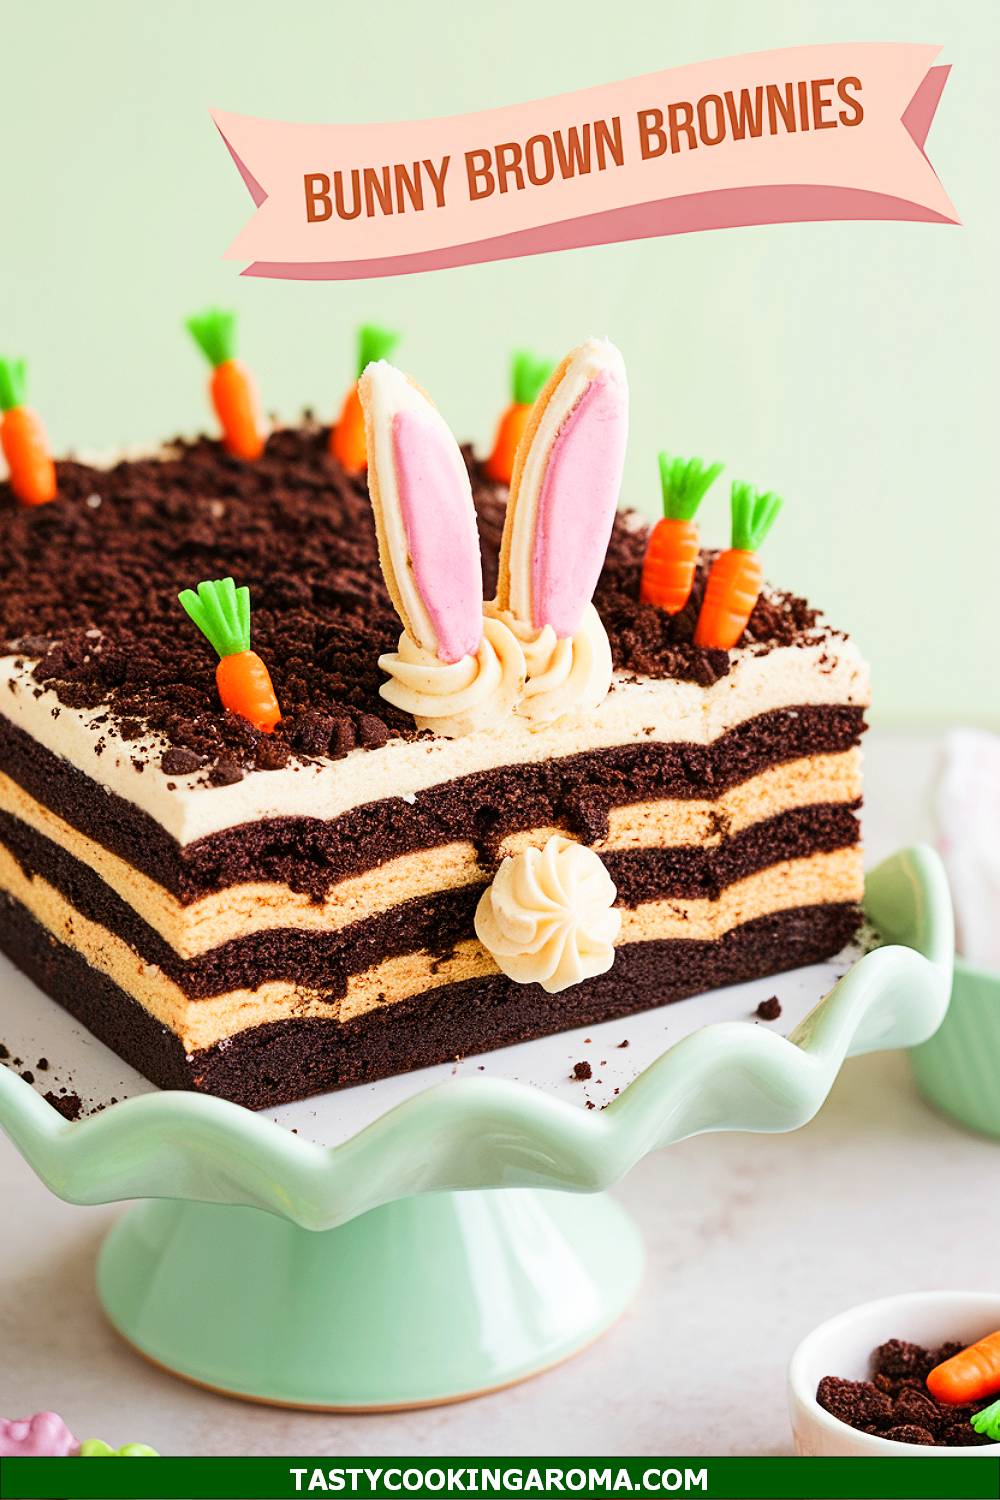
Bunny Burrow Easter Brookies
If you’ve never tried brookies before, Easter is the perfect time to start! These Bunny Burrow Easter Brookies combine the best of brownies and cookies in one irresistible dessert. Imagine a fudgy brownie base topped with a soft, chewy cookie layer, all decorated with pastel candies and sprinkles to create a whimsical “bunny burrow” look. They’re not only delicious but also a fun baking project for kids and adults alike!
Serving Size: 16 squares
Time Needed: 50 minutes
Ingredients
- 1 box brownie mix (plus ingredients listed on the box)
- 1/2 cup unsalted butter, softened
- 1/2 cup brown sugar
- 1/4 cup granulated sugar
- 1 large egg
- 1 tsp vanilla extract
- 1 1/4 cups all-purpose flour
- 1/2 tsp baking soda
- 1/4 tsp salt
- 1 cup pastel chocolate candies (e.g., M&Ms or Cadbury Mini Eggs)
- 1/4 cup pastel sprinkles
Instructions
- Preheat your oven to 350°F (175°C) and line a 9×9-inch baking pan with parchment paper or lightly grease it.
- Prepare the brownie mix according to the package instructions and pour it into the prepared pan, spreading it out evenly.
- In a separate bowl, cream together the butter, brown sugar, and granulated sugar for the cookie layer. Add the egg and vanilla, mixing until smooth.
- In another bowl, whisk together the flour, baking soda, and salt. Gradually mix the dry ingredients into the wet ingredients until a dough forms, then fold in the pastel candies.
- Drop spoonfuls of the cookie dough over the brownie batter, gently spreading it to cover most of the surface. Sprinkle with pastel sprinkles for a festive touch.
- Bake for 35–40 minutes, or until the cookie layer is golden and a toothpick inserted into the center comes out with just a few crumbs. Cool completely before cutting into squares.
Quick Pros of the Recipe
- Combines the best of brownies and cookies in one dessert.
- Visually stunning with festive pastel colors.
- Fun and easy to make with kids.
- A crowd-pleaser for any Easter gathering.
Ingredient Substitutions or Customization Ideas: Use a homemade brownie recipe instead of a box mix for a richer flavor. You can also swap the pastel candies for chopped Easter-themed chocolate bars or add crushed graham crackers for a s’mores-like twist.
Cooking Tips and Tricks: For clean slices, chill the brookies in the fridge for 20 minutes before cutting. To ensure even baking, avoid overloading the cookie layer with too much dough.
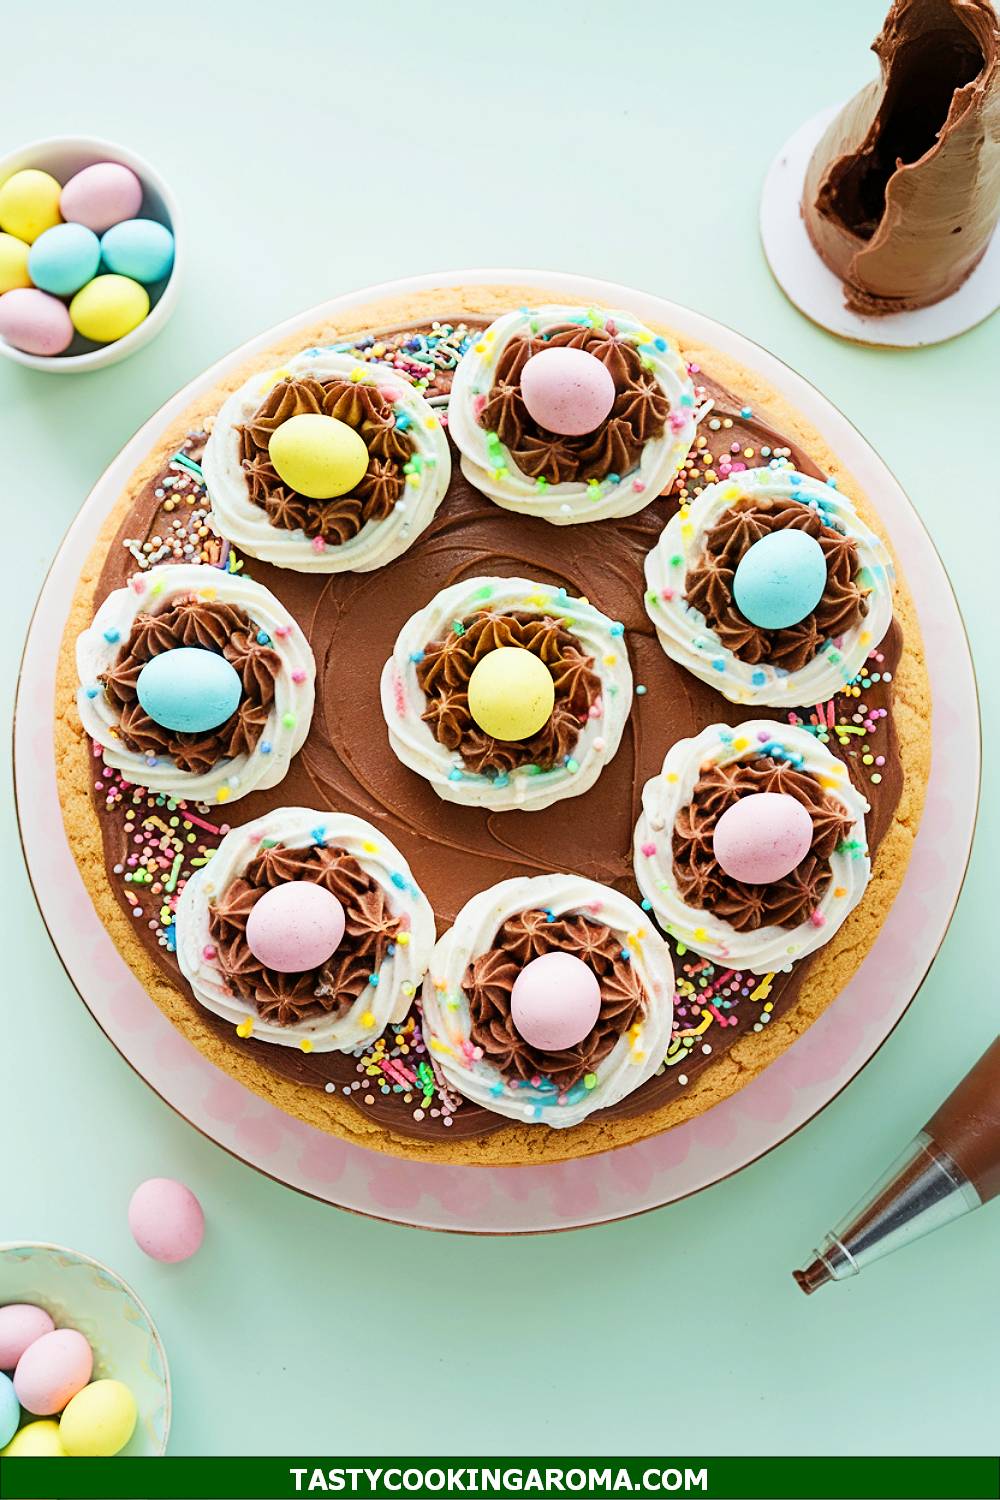
Easter Egg Nest Cookie Cake with Candy Toppings
This Easter Egg Nest Cookie Cake is as fun to make as it is to eat! The cookie cake is soft and chewy, with a golden crust that pairs perfectly with the sweet candy toppings. Shaped like a giant nest and decorated with colorful Easter eggs and shredded coconut “grass,” it’s a showstopper for your dessert table. Plus, it’s easy to customize with your favorite candies and spring decorations!
Serving Size: 10–12 slices
Time Needed: 45 minutes
Ingredients
- 1 cup unsalted butter, softened
- 1 cup brown sugar
- 1/2 cup granulated sugar
- 2 large eggs
- 2 tsp vanilla extract
- 2 1/2 cups all-purpose flour
- 1 tsp baking soda
- 1/2 tsp salt
- 1 cup semi-sweet chocolate chips
- 1 cup shredded sweetened coconut
- 1 1/2 cups assorted Easter candies (e.g., jelly beans, Cadbury Mini Eggs, or Reese’s Pieces)
Instructions
- Preheat your oven to 350°F (175°C) and lightly grease a round pizza pan or line it with parchment paper.
- In a large bowl, cream together the butter, brown sugar, and granulated sugar. Add the eggs one at a time, followed by the vanilla, and mix until smooth.
- In another bowl, whisk together the flour, baking soda, and salt. Gradually mix the dry ingredients into the wet ingredients until fully combined. Fold in the chocolate chips.
- Spread the dough evenly onto the prepared pizza pan, shaping it into a nest-like circle with a slightly raised edge.
- Bake for 20–25 minutes, or until the edges are golden brown and the center is set. Let cool completely.
- Decorate the cookie cake with shredded coconut to resemble grass and top with assorted Easter candies to create the egg nest effect. Slice and serve!
Quick Pros of the Recipe
- Visually stunning with a fun “nest” design.
- Customizable with your favorite Easter candies.
- Perfect for sharing at parties or family gatherings.
- Soft, chewy texture with a delightful crunch from the toppings.
Ingredient Substitutions or Customization Ideas: For a nutty twist, mix in chopped pecans or walnuts. You can also use green-tinted shredded coconut for a more vibrant “grass” effect.
Cooking Tips and Tricks: To avoid overbaking, take the cookie cake out of the oven as soon as the center is set—it will continue to firm up as it cools. Use a pizza cutter for clean and even slices.
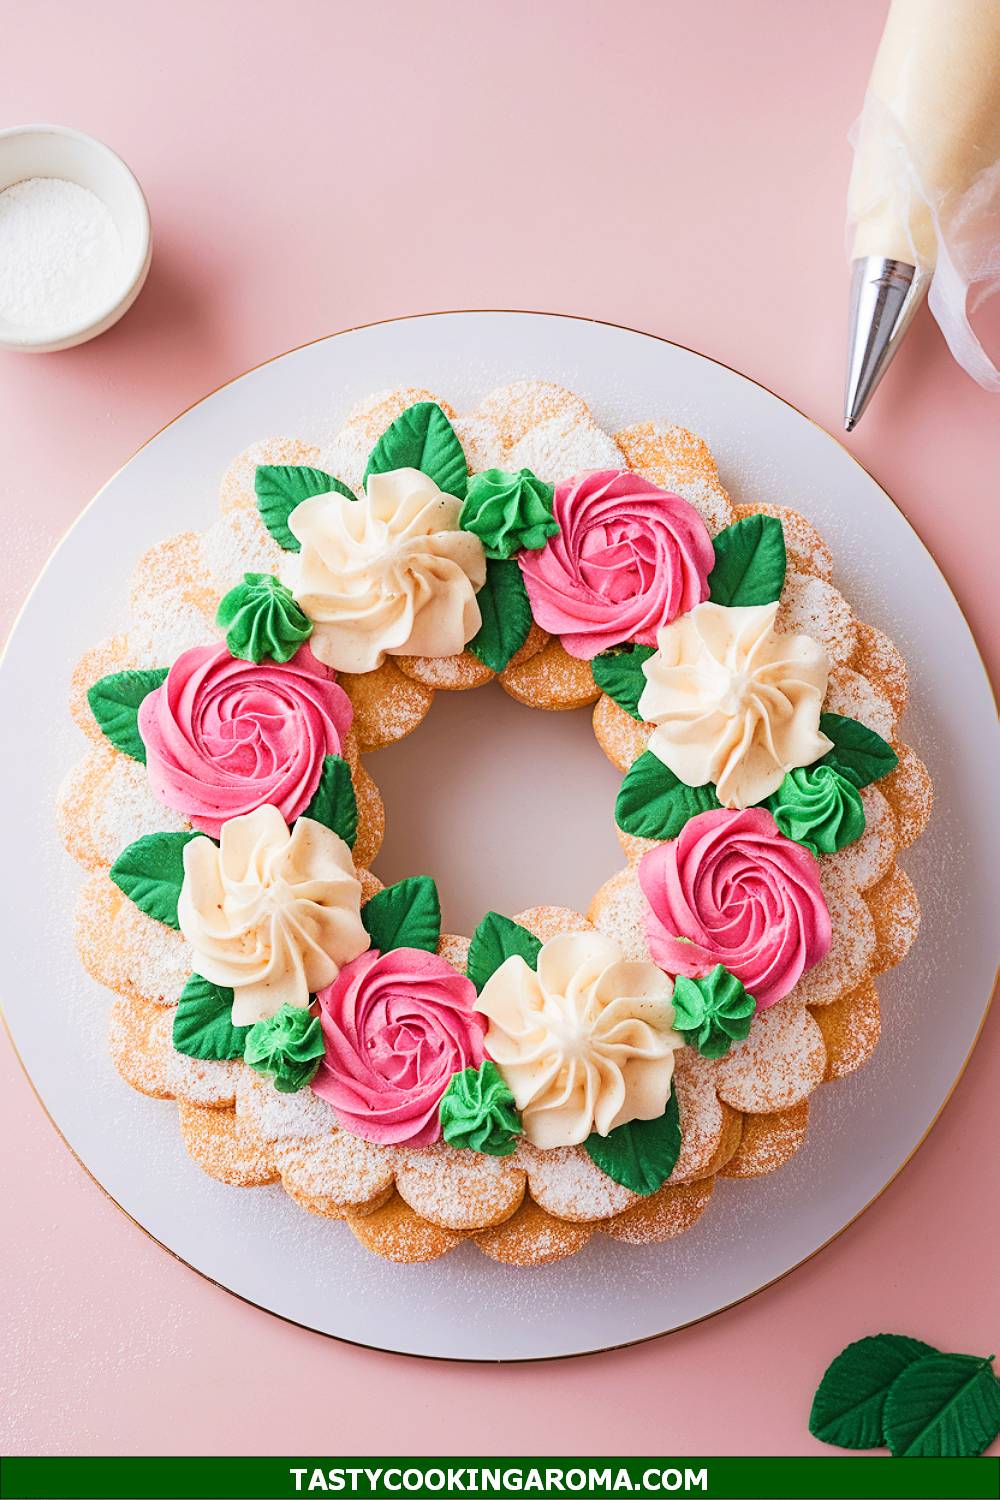
Spring Garden Italian Cookie Wreath
Italian cookies are always a crowd-pleaser, and this cookie wreath adds a cheerful spring twist to the classic recipe. The soft, cakey texture of these cookies pairs beautifully with a light glaze and colorful pastel sprinkles. It’s a stunning centerpiece for your Easter table that is surprisingly easy to make. Plus, the wreath shape is perfect for celebrating the season with a touch of tradition!
Serving Size: 8 servings
Time Needed: 1 hour
Ingredients
- 2 ½ cups all-purpose flour
- 1 teaspoon baking powder
- ½ teaspoon salt
- ½ cup unsalted butter, softened
- ¾ cup granulated sugar
- 3 large eggs
- 1 teaspoon vanilla extract
- 1 teaspoon almond extract
- 1 cup powdered sugar
- 2–3 tablespoons milk
- Pastel sprinkles for decoration
Instructions
- Preheat your oven to 350°F (175°C) and line a baking sheet with parchment paper.
- In a medium bowl, whisk together the flour, baking powder, and salt. Set aside.
- In a large mixing bowl, cream together the butter and sugar until light and fluffy. Add eggs one at a time, mixing well after each addition, then stir in the vanilla and almond extracts.
- Gradually add the dry ingredients to the wet ingredients, mixing until a soft dough forms.
- Divide the dough into small portions, roll each into a thin rope, and shape them into circles to form the “wreaths.” Place them on the prepared baking sheet.
- Bake for 12–15 minutes or until the edges are lightly golden. Let the cookies cool completely.
- For the glaze, mix powdered sugar and milk until smooth. Drizzle over the cookies and top with pastel sprinkles before the glaze sets.
Quick Pros of the Recipe
- Visually stunning and perfect as a centerpiece.
- Soft and cakey texture with a hint of almond flavor.
- Customizable with different sprinkle colors or glaze flavors.
Ingredient Substitutions or Customization Ideas: Swap almond extract for lemon or orange extract for a citrusy twist. Use vegan butter and a flaxseed egg substitute to make these cookies dairy-free and vegan-friendly.
Cooking Tips and Tricks: Chill the dough for 15–20 minutes before shaping to make it easier to handle. Use a piping bag to drizzle the glaze neatly over the cookies for a professional look.
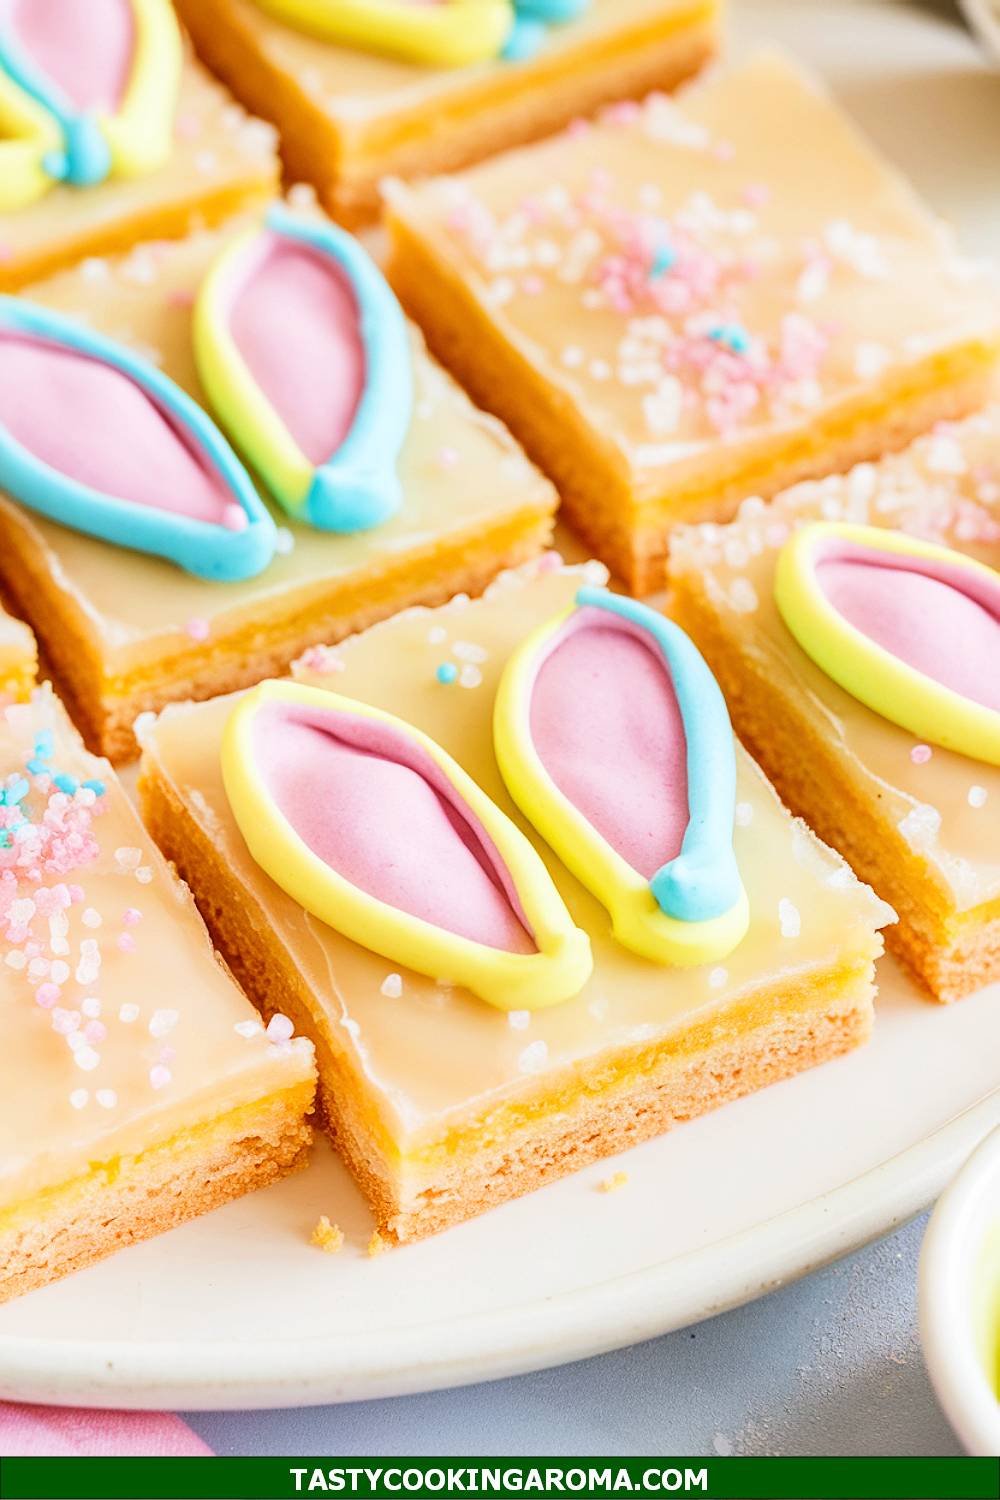
Lemon Glazed Bunny Ear Cookie Bars
These bunny ear cookie bars are as adorable as they are delicious! The tangy lemon glaze provides a bright and zesty contrast to the buttery sugar cookie base. Shaped like bunny ears, they’re a fun and creative dessert that’s perfect for kids and adults alike. They’ll definitely bring a smile to everyone’s face at your Easter gathering!
Serving Size: 12 servings
Time Needed: 45 minutes
Ingredients
- 1 box sugar cookie cake mix
- ½ cup unsalted butter, melted
- 1 large egg
- 1 cup powdered sugar
- 2 tablespoons lemon juice
- 1 teaspoon lemon zest
- Pink and white food coloring (optional)
Instructions
- Preheat your oven to 350°F (175°C) and grease a 9×13-inch baking pan.
- In a large bowl, combine the sugar cookie cake mix, melted butter, and egg. Mix until a soft dough forms.
- Press the dough evenly into the prepared pan and bake for 20–25 minutes, or until the edges are lightly golden. Let the cookie base cool completely before cutting.
- Use a bunny ear cookie cutter to cut out shapes from the cooled cookie base. Set aside the scraps for snacking or decoration.
- In a small bowl, whisk together the powdered sugar, lemon juice, and lemon zest to make the glaze. If desired, add pink or white food coloring for a festive touch.
- Drizzle or brush the glaze over the bunny ear cookie bars and let it set before serving.
Quick Pros of the Recipe
- Perfect combination of buttery sweetness and zesty lemon flavor.
- Simple to make using a store-bought cake mix.
- Adorable bunny ear shapes make it fun for kids.
Ingredient Substitutions or Customization Ideas: Substitute the lemon glaze with a vanilla glaze or chocolate drizzle for a different flavor profile. Use gluten-free sugar cookie mix for a gluten-free version.
Cooking Tips and Tricks: Use parchment paper to line the baking pan for easy removal. If you don’t have a bunny ear cutter, freehand the shapes using a knife or stencil.
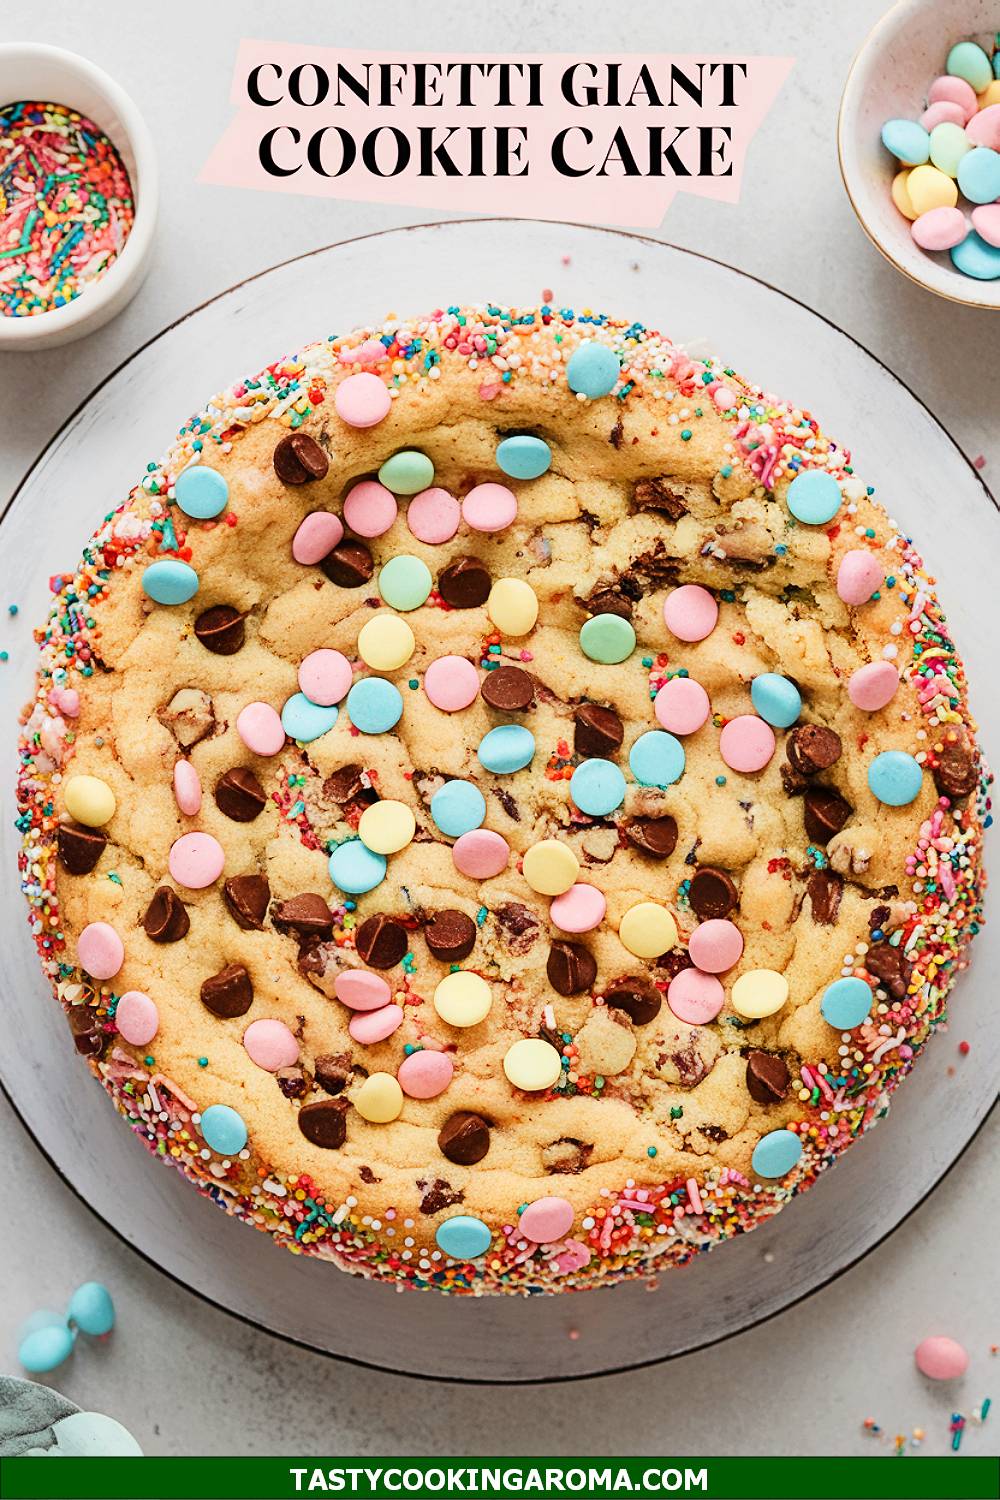
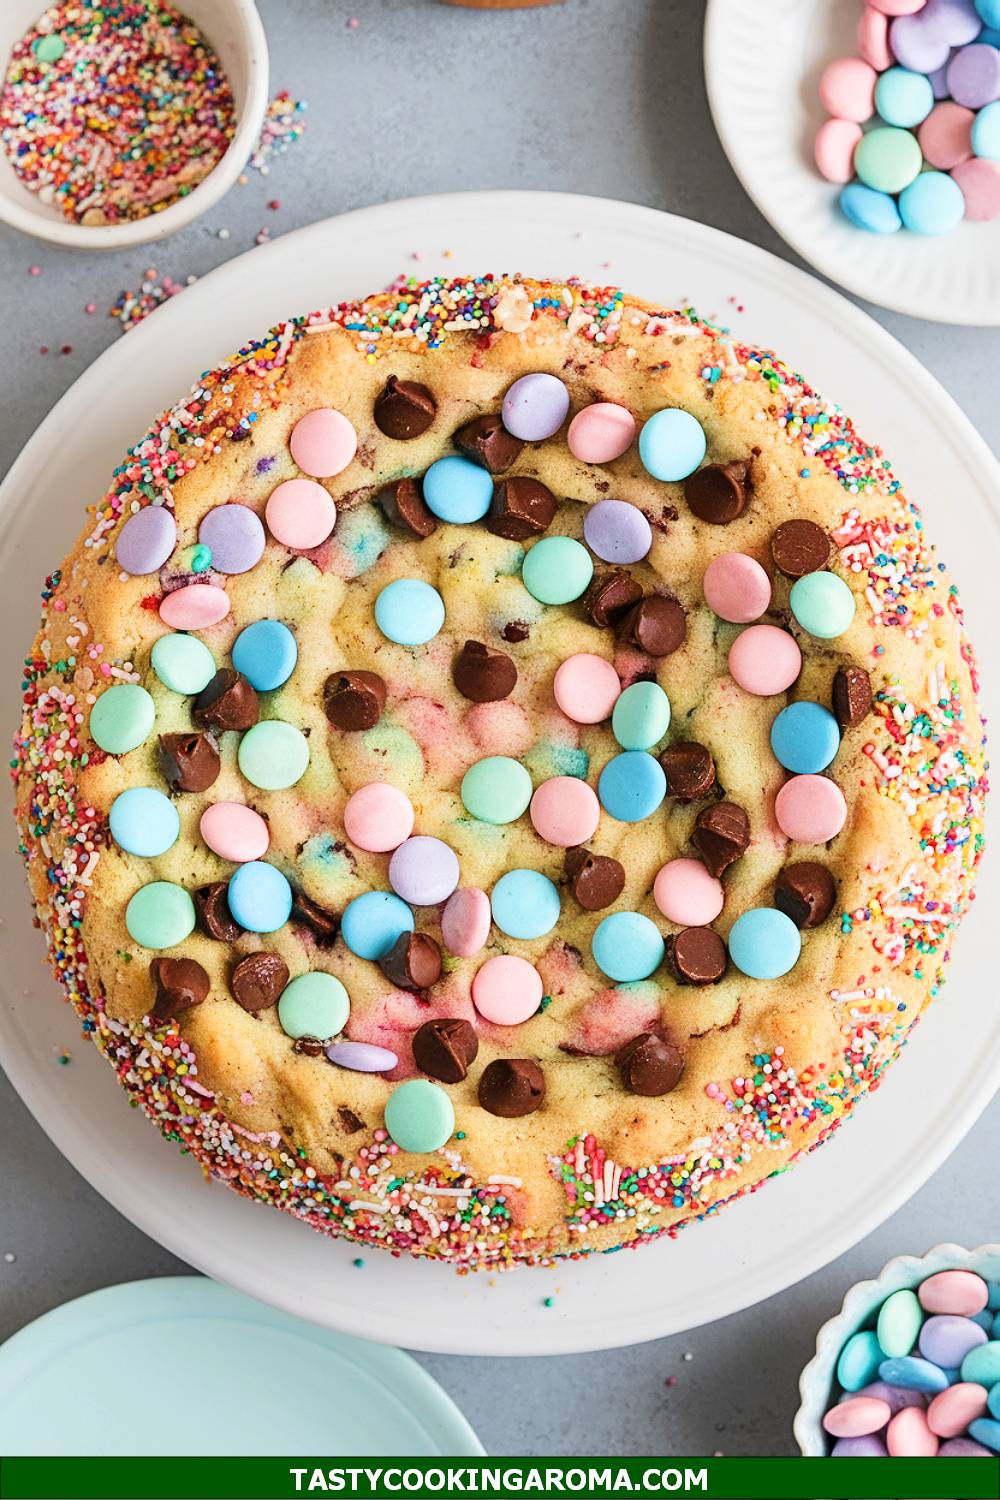
Giant Pastel Confetti Monster Cookie Cake
This giant pastel confetti monster cookie cake is a showstopper dessert that’s perfect for Easter celebrations. Packed with colorful sprinkles, chocolate chips, and candy-coated chocolates, every bite is a delightful explosion of flavor and texture. It’s easy to make and serves a crowd, making it a fantastic option for family gatherings. Plus, decorating it with pastel frosting and more candy makes it as fun to create as it is to eat!
Serving Size: 10–12 servings
Time Needed: 40 minutes
Ingredients
- 1 cup unsalted butter, softened
- 1 cup brown sugar
- ½ cup granulated sugar
- 2 large eggs
- 1 teaspoon vanilla extract
- 2 cups all-purpose flour
- 1 teaspoon baking soda
- ½ teaspoon salt
- 1 cup mini chocolate chips
- 1 cup pastel-colored candy-coated chocolates
- ½ cup pastel sprinkles
Instructions
- Preheat your oven to 350°F (175°C) and grease a 10-inch round springform pan.
- In a large bowl, cream together the butter, brown sugar, and granulated sugar until light and fluffy. Beat in the eggs one at a time, followed by the vanilla extract.
- In a separate bowl, whisk together the flour, baking soda, and salt. Gradually add the dry ingredients to the wet ingredients, mixing until just combined.
- Fold in the mini chocolate chips, candy-coated chocolates, and sprinkles. Spread the dough evenly into the prepared pan.
- Bake for 20–25 minutes, or until the edges are golden brown and the center is set. Let the cookie cake cool completely in the pan before decorating or serving.
Quick Pros of the Recipe
- Colorful and festive, perfect for Easter.
- Easy to share as a centerpiece dessert.
- Amazing mix of textures from chocolate chips, candies, and sprinkles.
Ingredient Substitutions or Customization Ideas: Use peanut butter chips or white chocolate chips instead of mini chocolate chips for a flavor twist. Add chopped nuts for extra crunch.
Cooking Tips and Tricks: Don’t overbake the cookie cake—remove it from the oven as soon as the center is set for a soft and chewy texture. Use a sharp knife to slice cleanly through the candy pieces when serving.
FAQ
How can I make these recipes healthier?
You can make these recipes healthier by using substitutions and reducing sugar. For instance, replace regular sugar with a natural sweetener like honey or stevia, or use whole wheat flour instead of all-purpose. For recipes like the Floral Burst Easter Cookie Cake or Lemon Glazed Bunny Ear Cookie Bars, you can try low-fat or dairy-free alternatives for butter and cream. Additionally, incorporating fresh fruit or nuts into your Easter Sugar Cookie Bars and Easter Bakery Treats can add both nutrition and texture.
Can I make these desserts ahead of time?
Absolutely! Many of these treats, like the Carrot Patch Sugar Cookie Tart, Cadbury Mini Egg Chocolate Chip Cookie Bars, and Spring Garden Italian Cookie Wreath, can be prepared a day or two in advance. Store them in an airtight container at room temperature or in the fridge for freshness. If your dessert includes frosting or glaze, such as the Lemon Drizzle Spring Blossoms Cookie Cake, consider applying it closer to serving time to maintain its appearance and texture.
Can I customize these recipes for dietary restrictions?
Yes! Many of these recipes are highly customizable. For gluten-free options, try gluten-free flour blends for the Easter Egg Nest Cookie Cake or Easter Monster Cookies. If you’re accommodating allergies, opt for dairy-free chocolate in the Cadbury Egg Cookie Cake or create vegan-friendly versions of the Bunny Burrow Easter Brookies with plant-based substitutes. You can even make simple swaps like using almond milk or coconut butter in the Cotton Candy Swirl Easter Cookie Pie.
What’s the easiest recipe for beginners?
The Giant Pastel Confetti Monster Cookie Cake and the Pastel Tie-Dye Cookie Bars are perfect for beginners. These recipes use basic ingredients and simple preparation techniques like mixing and pressing dough into a pan. Plus, you’ll end up with vibrant, crowd-pleasing treats that align perfectly with Kids Easter Recipes and Easter Food Dishes.
How can I create unique decorations?
Decorative flair brings these Easter Cookie Cake Ideas to life! For the Bunny Trail Speckled Cookie Cake, you can use edible food sprays or paints to create a speckled egg effect. Molding shapes like bunny ears or flowers for desserts such as the Lemon Glazed Bunny Ear Cookie Bars or the Spring Garden Italian Cookie Wreath is another creative touch. Using pastel-colored candies, sprinkles, or edible glitter adds a whimsical feel to your Easter Cadbury Egg Dessert.
Can we involve kids in these recipes?
Definitely! Many of these Kids Easter Recipes are perfect for family bonding. Let kids help decorate the Easter Egg Nest Cookie Cake with Candy Toppings or swirl colors for the Cotton Candy Swirl Easter Cookie Pie. They can also enjoy rolling dough and cutting playful shapes for the Carrot Patch Sugar Cookie Tart. These activities are both fun and rewarding for kids of all ages!
What ingredients make these recipes stand out?
The freshness of zesty lemon, vibrant food colors, and nostalgic candies like mini Cadbury eggs are standout ingredients in recipes like the Mini Egg Cookie Cake, Easter Cadbury Egg Dessert, and Lemon Glazed Bunny Ear Cookie Bars. In addition, using creative bases such as a cake mix cookie or traditional Italian cookie dough for the Spring Garden Italian Cookie Wreath ensures your treats are both unique and delicious.
Conclusion
This delightful collection of Easter Baking Ideas Desserts offers something for everyone, from whimsical designs like the Bunny Burrow Easter Brookies to vibrant creations like the Pastel Tie-Dye Cookie Bars.
If you’re still deciding which to make first, we suggest diving into the crowd-pleasing Giant Pastel Confetti Monster Cookie Cake or the all-time favorite Egg Cookie Cake. These Easter Bakery Treats are just as enjoyable to prepare as they are to eat!
We’d love to hear from you:
Which recipe are you most excited to try?
Save this article for later so you can revisit these incredible Easter Cookie Cake Ideas, and don’t forget to share it with your friends and family. Let the Easter baking festivities begin!
