The Ultimate Guide to 12 Coquette Cakes That Will Steal the Spotlight
If you’re scrolling Pinterest for the perfect cake inspo for an upcoming birthday, look no further.
Whether it’s for a sweet sixteen bash, a 19th birthday party, or a girly 15th birthday cake extravaganza, there’s no denying that the modern coquette birthday cake is having a serious moment.
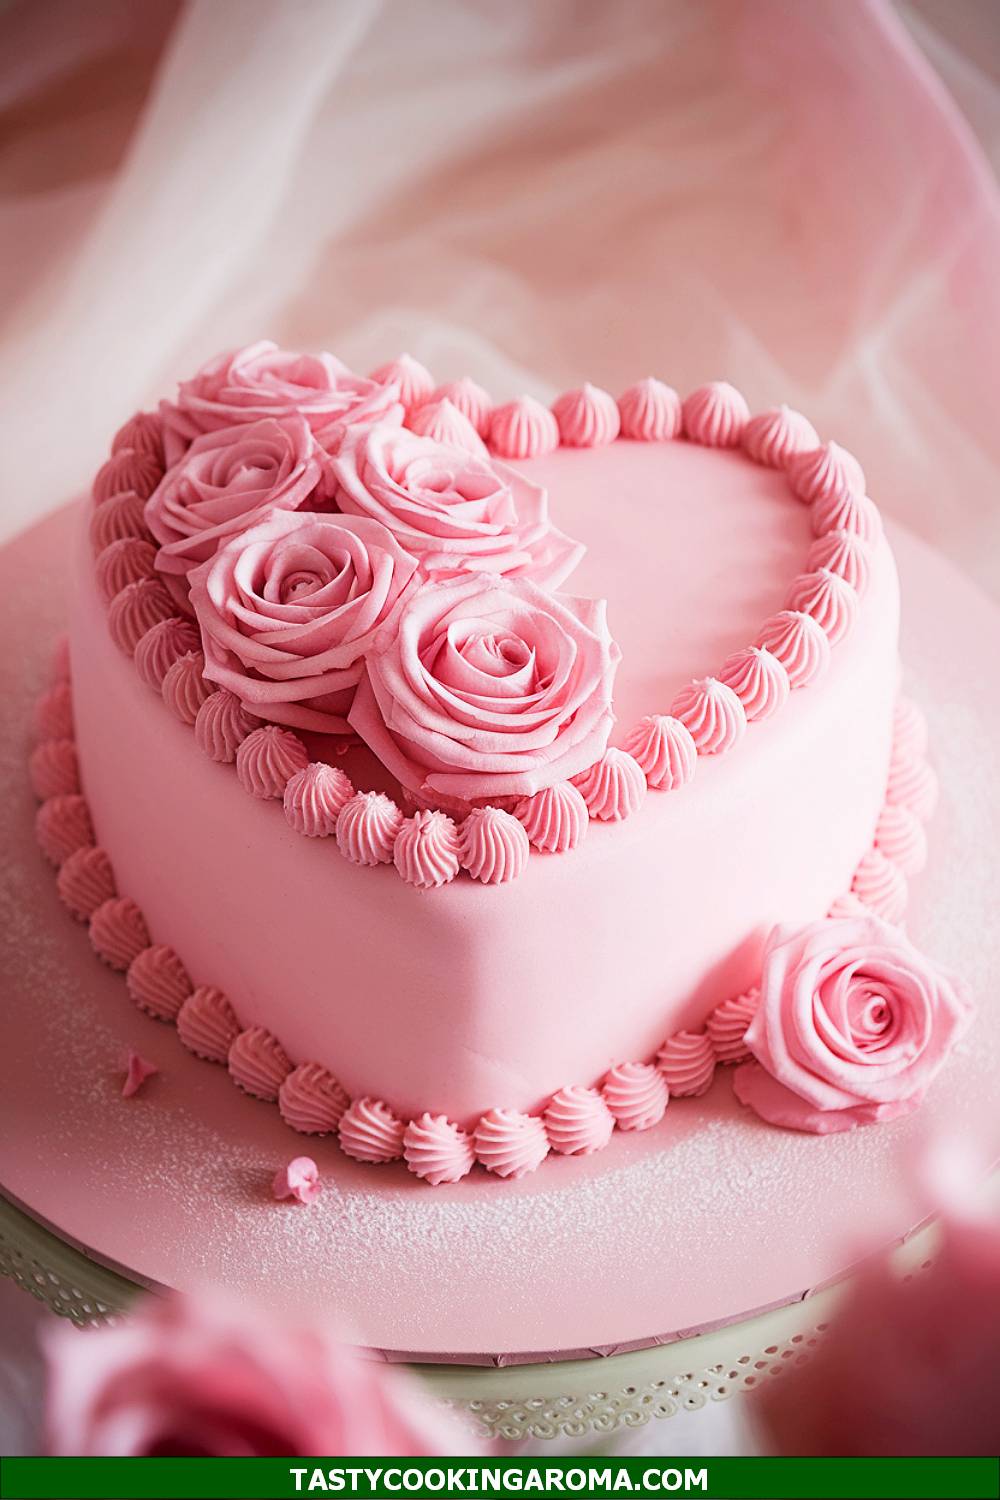
These cakes—think pink cake with bows, two-tiered cakes draped in florals, or even sculptural coquette heart cakes—combine beauty with deliciousness. This list is your ultimate go-to for designing a coquette aesthetic birthday masterpiece!
Why You’ll Love This Recipe List
- All the recipes are easy to follow—perfect for busy planners.
- The cakes look fancy but use simple ingredients you likely have at home.
- They’ll be the highlight of your party, satisfying both taste buds and Instagram feeds.
- If you don’t check these out, you’re missing out on the prettiest aesthetic cakes for girls this year!
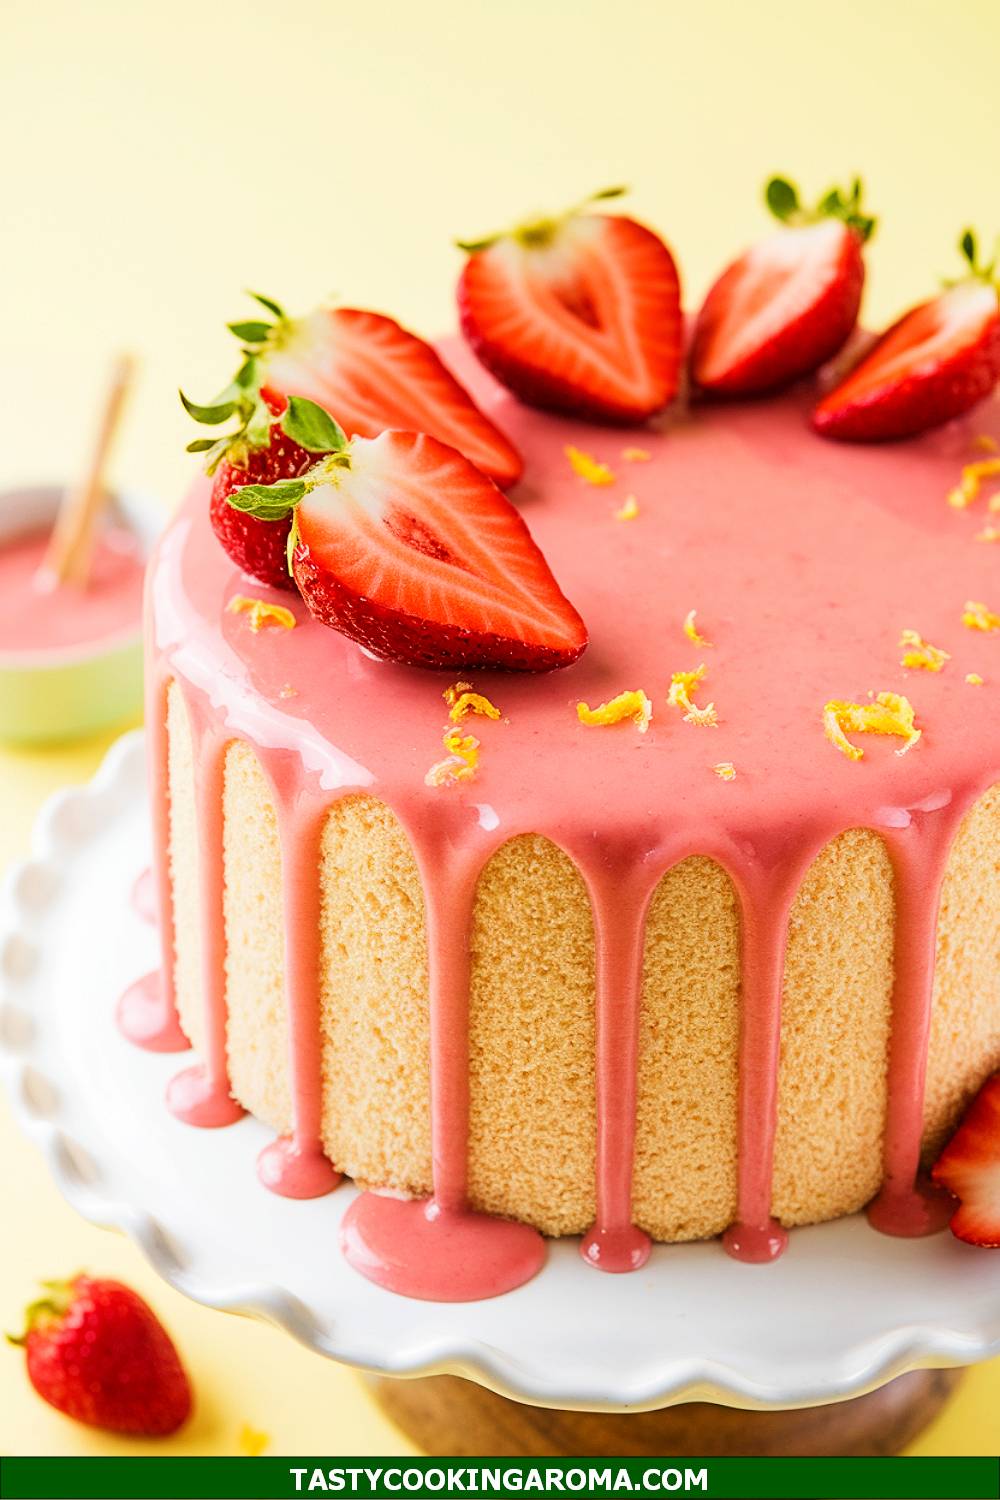
Strawberry Lemonade Drizzle Cake
This cake is everything you’d want in a sweet and tangy dessert. The combination of juicy strawberries and zesty lemonade creates a refreshing flavor that’s perfect for a birthday party or a sunny afternoon gathering. It’s light, moist, and topped with a lovely drizzle that adds a touch of elegance without being overly complicated. Plus, the pink hues and fruity aroma make it a standout coquette aesthetic cake!
Serving Size: 8 servings
Time Needed: 1 hour 15 minutes
Ingredients
- 1 ½ cups all-purpose flour
- 1 cup granulated sugar
- ½ cup unsalted butter, softened
- 2 large eggs
- ½ cup milk
- ¼ cup fresh strawberry puree
- 2 tbsp lemon juice
- 1 tsp baking powder
- ½ tsp baking soda
- Pinch of salt
- 1 cup powdered sugar (for the drizzle)
- 2 tbsp lemon juice (for the drizzle)
Instructions
- Preheat your oven to 350°F (175°C) and grease a 9-inch round cake pan.
- In a large bowl, cream together the butter and sugar until light and fluffy. Add the eggs one at a time, mixing well after each addition.
- Mix in the strawberry puree, lemon juice, and milk until combined.
- In a separate bowl, whisk together the flour, baking powder, baking soda, and salt. Gradually fold the dry ingredients into the wet mixture until just combined.
- Pour the batter into the prepared pan and bake for 35–40 minutes, or until a toothpick inserted in the center comes out clean. Let the cake cool completely.
- For the drizzle, mix the powdered sugar and lemon juice until smooth. Drizzle it over the cooled cake for a glossy, tangy finish.
Quick Pros of the Recipe
- Refreshing strawberry-lemonade flavor combination.
- Soft, moist texture with a zesty drizzle.
- Simple ingredients that are easy to find.
- Perfect for pink, girly birthday themes.
Ingredient Substitutions or Customization Ideas: Swap fresh strawberries with raspberries for a twist, or use lime juice instead of lemon for a slightly different citrus kick. You could also add a few drops of pink food coloring for an even bolder hue.
Cooking Tips and Tricks: To enhance the strawberry flavor, roast the strawberries before pureeing them. Also, make sure the cake is completely cool before adding the drizzle to avoid it melting into the cake.
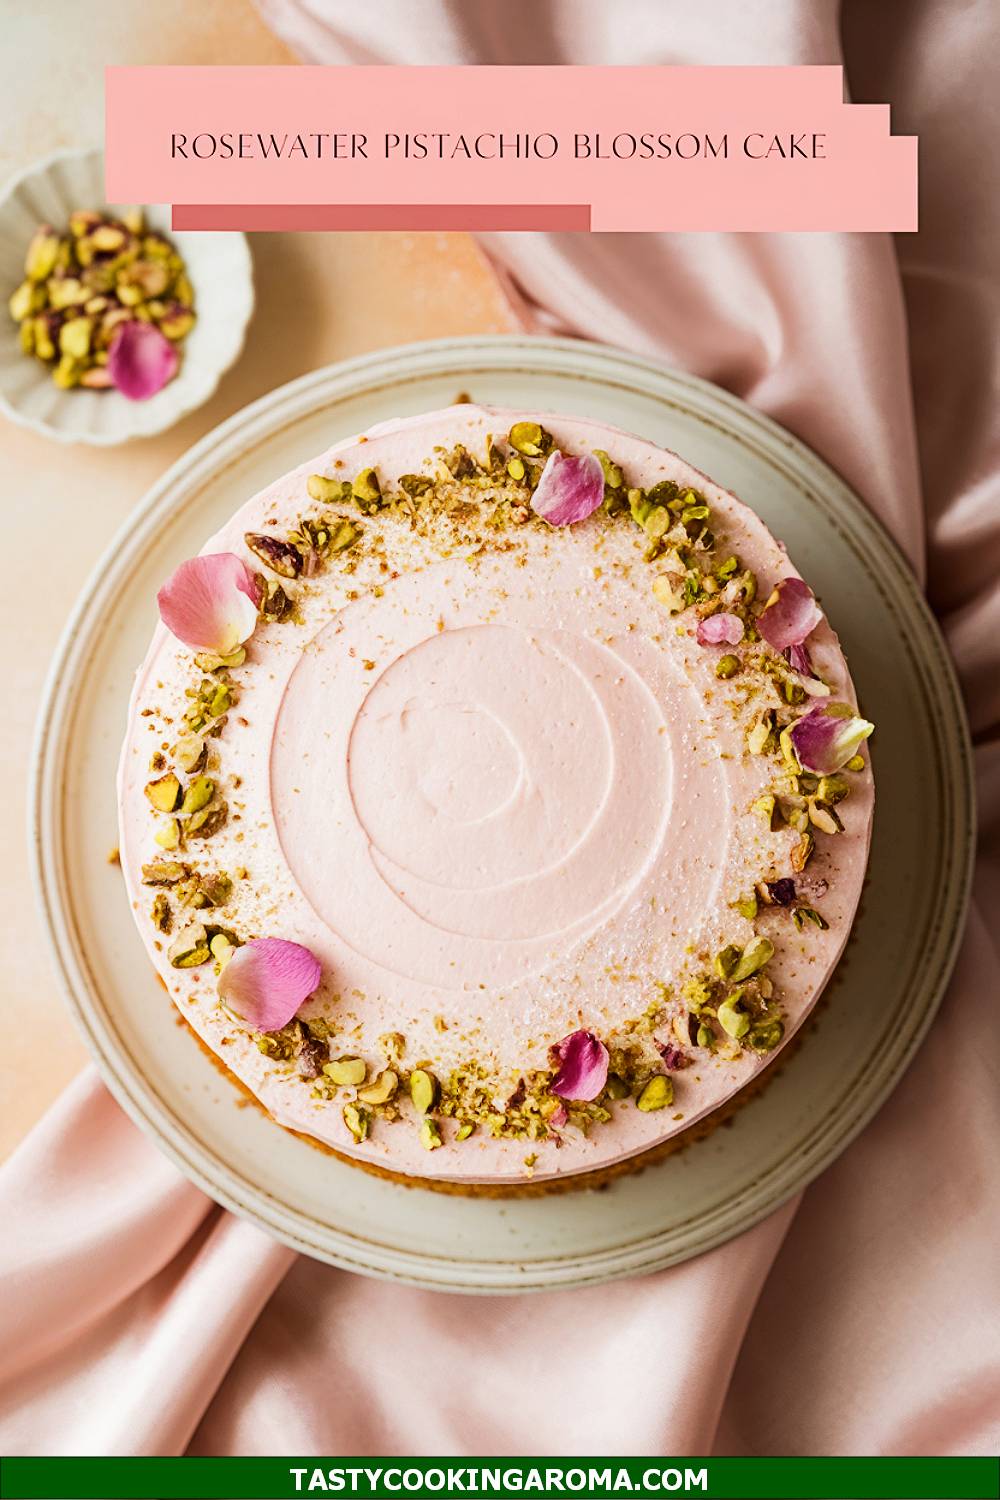
Rosewater Pistachio Blossom Cake
This cake feels like a luxurious treat straight out of a dreamy garden party. The delicate rosewater flavor pairs beautifully with the nutty pistachios, creating a unique and sophisticated dessert. It’s soft, aromatic, and topped with pretty edible flowers or crushed pistachios for a gorgeous coquette aesthetic. Trust me, it’s the kind of cake that looks almost too pretty to eat—but it’s so worth it!
Serving Size: 10 servings
Time Needed: 1 hour 30 minutes
Ingredients
- 1 ¾ cups all-purpose flour
- 1 cup granulated sugar
- ¾ cup unsalted butter, softened
- 3 large eggs
- ½ cup milk
- 1 tsp rosewater
- ½ cup finely chopped pistachios
- 1 tsp baking powder
- ½ tsp baking soda
- Pinch of salt
- Powdered sugar and edible flowers (optional, for garnish)
Instructions
- Preheat your oven to 350°F (175°C) and grease a 9-inch bundt or round cake pan.
- In a large bowl, cream together the butter and sugar until fluffy. Add the eggs one at a time, beating well.
- Stir in the rosewater and milk until combined.
- In a separate bowl, whisk together the flour, baking powder, baking soda, salt, and chopped pistachios.
- Gradually fold the dry ingredients into the wet mixture until smooth. Pour the batter into the prepared pan.
- Bake for 40–45 minutes, or until a toothpick inserted in the center comes out clean. Let the cake cool completely before garnishing with powdered sugar and edible flowers.
Quick Pros of the Recipe
- Unique rosewater and pistachio flavor combination.
- Visually stunning with edible flowers as garnish.
- Aromatic and perfect for special occasions.
- Simple yet luxurious ingredients.
Ingredient Substitutions or Customization Ideas: Replace rosewater with orange blossom water for a citrusy floral twist. You can also use almonds instead of pistachios if preferred.
Cooking Tips and Tricks: Be careful with the rosewater—it’s potent, so a little goes a long way. For extra crunch, sprinkle some pistachios on top of the batter before baking.
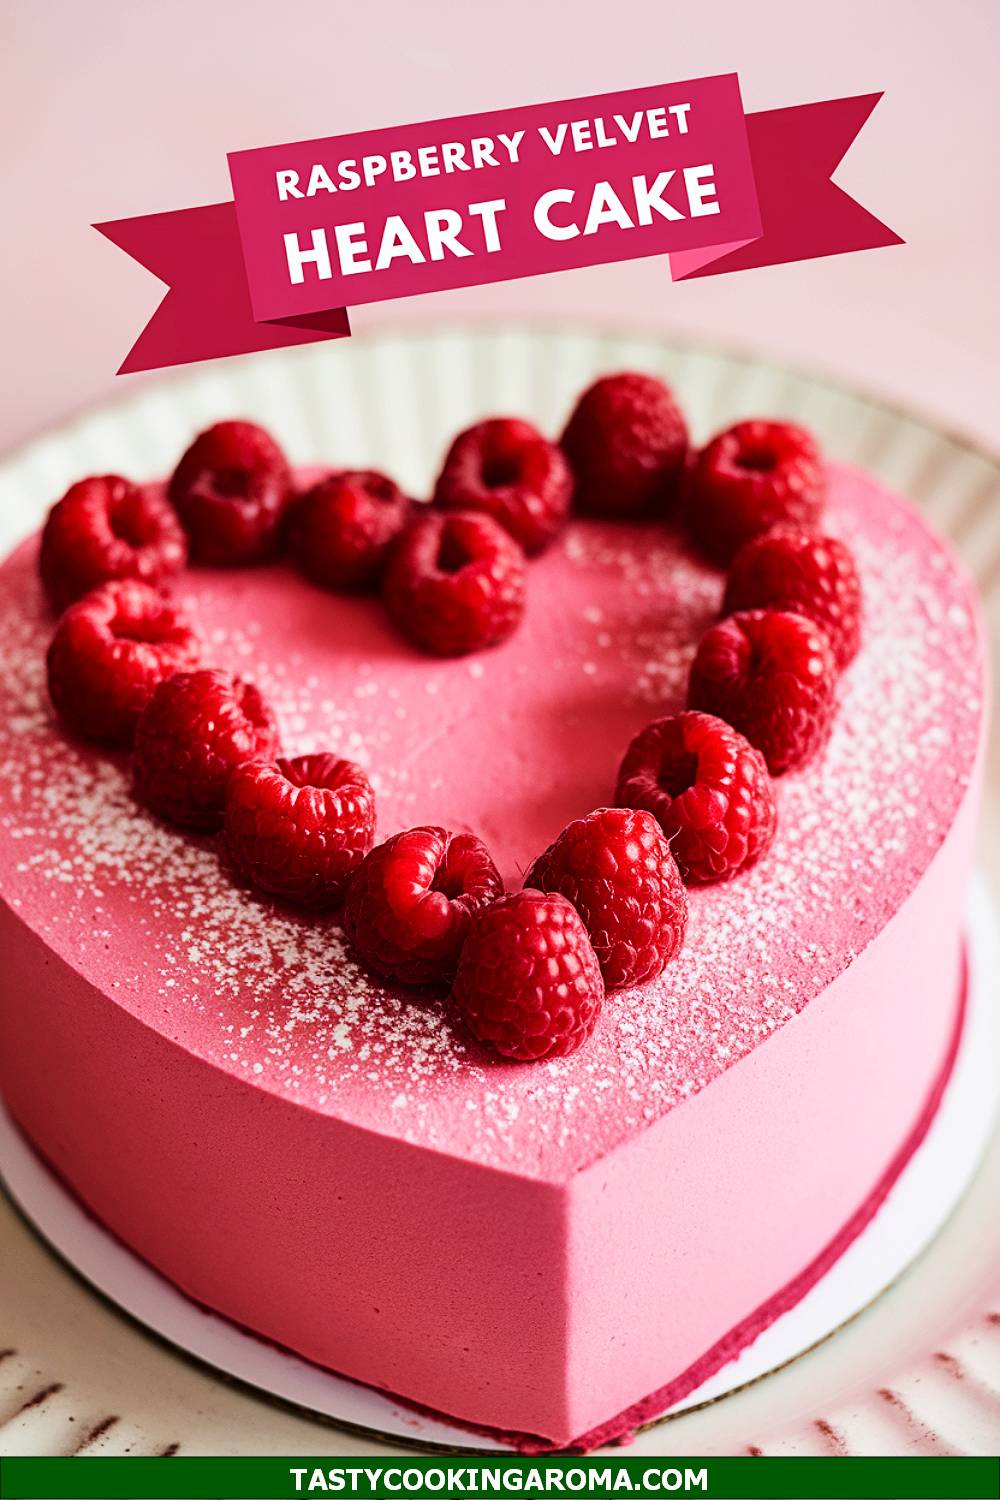
Raspberry Velvet Heart Cake
This heart-shaped cake is perfect for birthdays, anniversaries, or any celebration that calls for a touch of romance. The rich, velvety raspberry flavor is paired with a smooth cream cheese frosting, making every bite indulgent and satisfying. Its heart shape and vibrant pink color make it a stunning centerpiece for a coquette-themed party. Plus, the balance of sweetness and tartness is absolutely delightful!
Serving Size: 8 servings
Time Needed: 1 hour 20 minutes
Ingredients
- 1 ½ cups all-purpose flour
- 1 cup granulated sugar
- ½ cup unsalted butter, softened
- 2 large eggs
- ½ cup buttermilk
- 1 tsp vanilla extract
- ½ cup raspberry puree
- 1 tsp baking powder
- ½ tsp baking soda
- Pinch of salt
- 1 cup cream cheese frosting (store-bought or homemade)
- Fresh raspberries and pink sprinkles (optional, for decoration)
Instructions
- Preheat your oven to 350°F (175°C) and grease a heart-shaped cake pan.
- In a large bowl, cream together the butter and sugar until light and fluffy. Add the eggs one at a time, mixing well after each addition.
- Mix in the vanilla extract, raspberry puree, and buttermilk until smooth.
- In another bowl, whisk together the flour, baking powder, baking soda, and salt. Gradually fold the dry ingredients into the wet mixture until just combined.
- Pour the batter into the prepared pan and bake for 35–40 minutes, or until a toothpick inserted in the center comes out clean. Let the cake cool completely before frosting with cream cheese frosting.
- Decorate with fresh raspberries and pink sprinkles for an extra touch of charm.
Quick Pros of the Recipe
- Rich raspberry flavor with a velvety texture.
- Adorable heart shape perfect for coquette-themed occasions.
- Balanced sweetness and tartness with cream cheese frosting.
- Simple yet eye-catching decorations.
Ingredient Substitutions or Customization Ideas: Use strawberry puree instead of raspberry for a sweeter flavor. Add a few drops of pink food coloring to enhance the vibrant look.
Cooking Tips and Tricks: Make sure the cake is completely cool before frosting to prevent the frosting from melting. To ensure a moist cake, don’t overmix the batter—just combine until smooth.
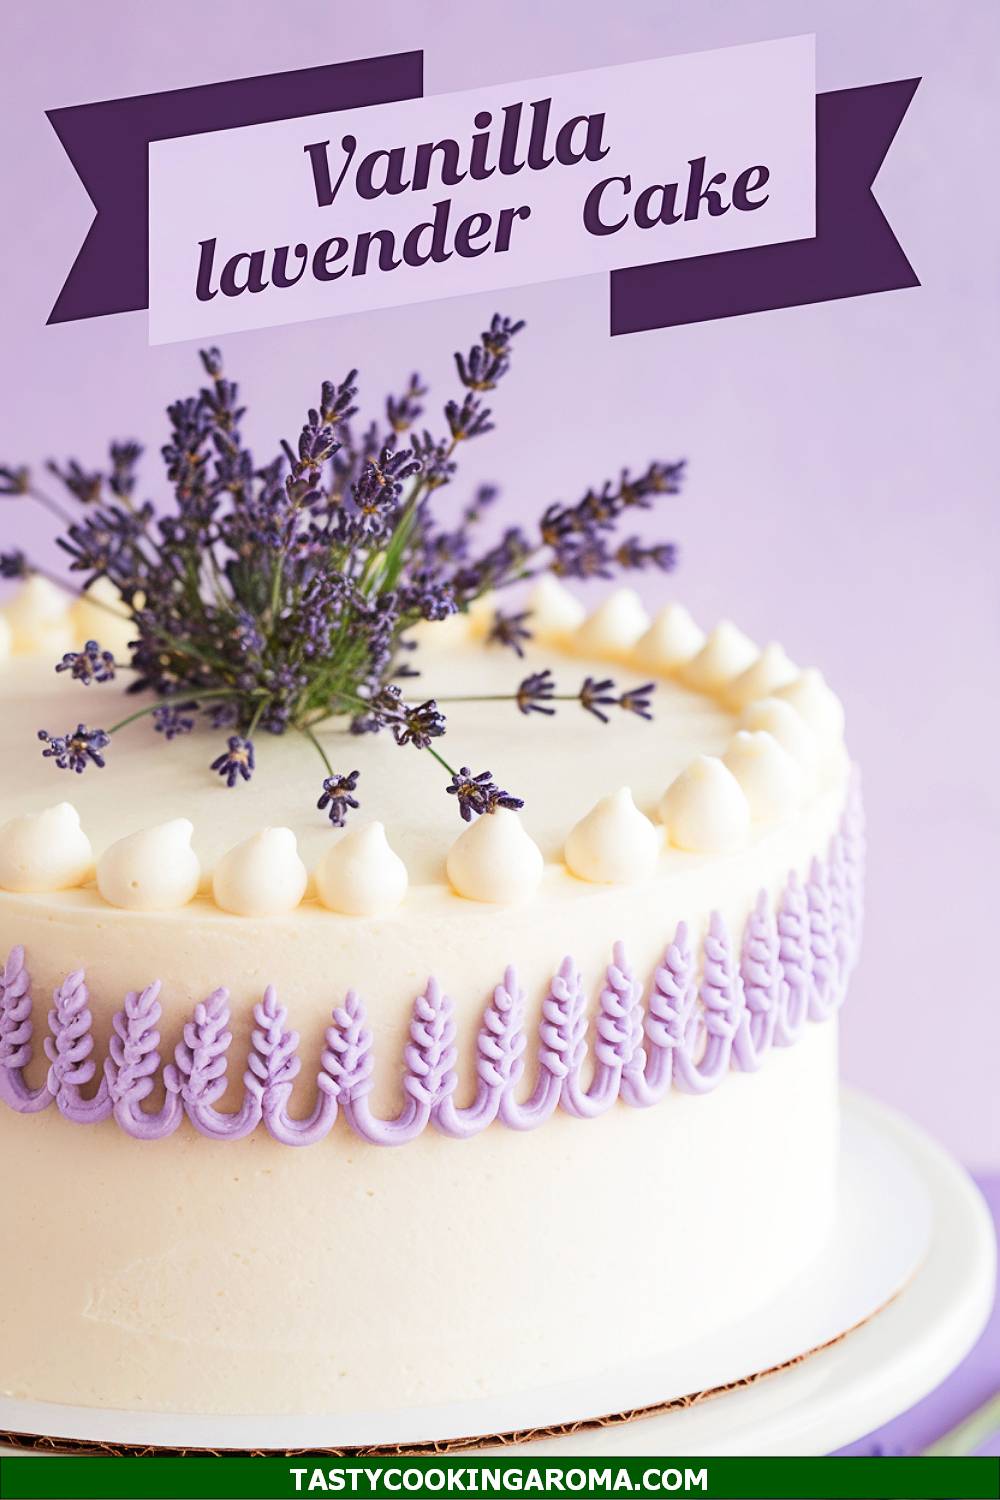
Vanilla Lavender Lace Cake
This Vanilla Lavender Lace Cake is as dreamy as it sounds! The soft, floral lavender flavor pairs beautifully with the sweet vanilla, creating a cake that feels like a springtime garden party. Its delicate lace-inspired frosting design adds a touch of vintage charm, making it perfect for any coquette aesthetic celebration. Whether it’s a birthday or just a special treat, this cake is sure to impress with its elegance and unique flavor.
Serving Size: 8 servings
Time Needed: 1 hour 30 minutes
Ingredients
- 2 ½ cups all-purpose flour
- 2 ½ teaspoons baking powder
- ½ teaspoon salt
- 1 cup unsalted butter, softened
- 2 cups granulated sugar
- 4 large eggs
- 1 teaspoon pure vanilla extract
- 1 teaspoon food-grade lavender extract
- 1 cup whole milk
- 2 cups buttercream frosting (for decoration)
- Edible lace toppers or stencils (optional)
Instructions
- Preheat your oven to 350°F (175°C) and grease two 8-inch round cake pans. Line the bottoms with parchment paper for easy removal.
- In a medium bowl, whisk together the flour, baking powder, and salt. Set aside.
- In a large mixing bowl, cream the butter and sugar together until light and fluffy, about 3–4 minutes.
- Add the eggs, one at a time, mixing well after each addition. Stir in the vanilla and lavender extracts.
- Gradually add the dry ingredients to the wet ingredients, alternating with the milk. Begin and end with the dry ingredients, mixing just until combined.
- Divide the batter evenly between the prepared pans and smooth the tops with a spatula. Bake for 30–35 minutes or until a toothpick inserted into the center comes out clean.
- Let the cakes cool in the pans for 10 minutes, then transfer them to a wire rack to cool completely.
- Frost the cake with buttercream frosting, adding lace-inspired patterns using a piping bag or edible lace toppers for decoration.
Quick Pros of the Recipe
- Unique floral lavender flavor adds sophistication.
- Elegant design perfect for coquette-themed parties.
- Moist and fluffy texture makes it a crowd-pleaser.
- Customizable frosting design for added creativity.
Ingredient Substitutions or Customization Ideas: Swap lavender extract with almond or rose extract for a different floral twist. You can also use gluten-free flour to make it suitable for gluten-sensitive guests.
Cooking Tips and Tricks: To get the perfect lace design, practice piping patterns on parchment paper before decorating the cake. Also, ensure your butter is fully softened for a smoother batter and fluffier cake texture.
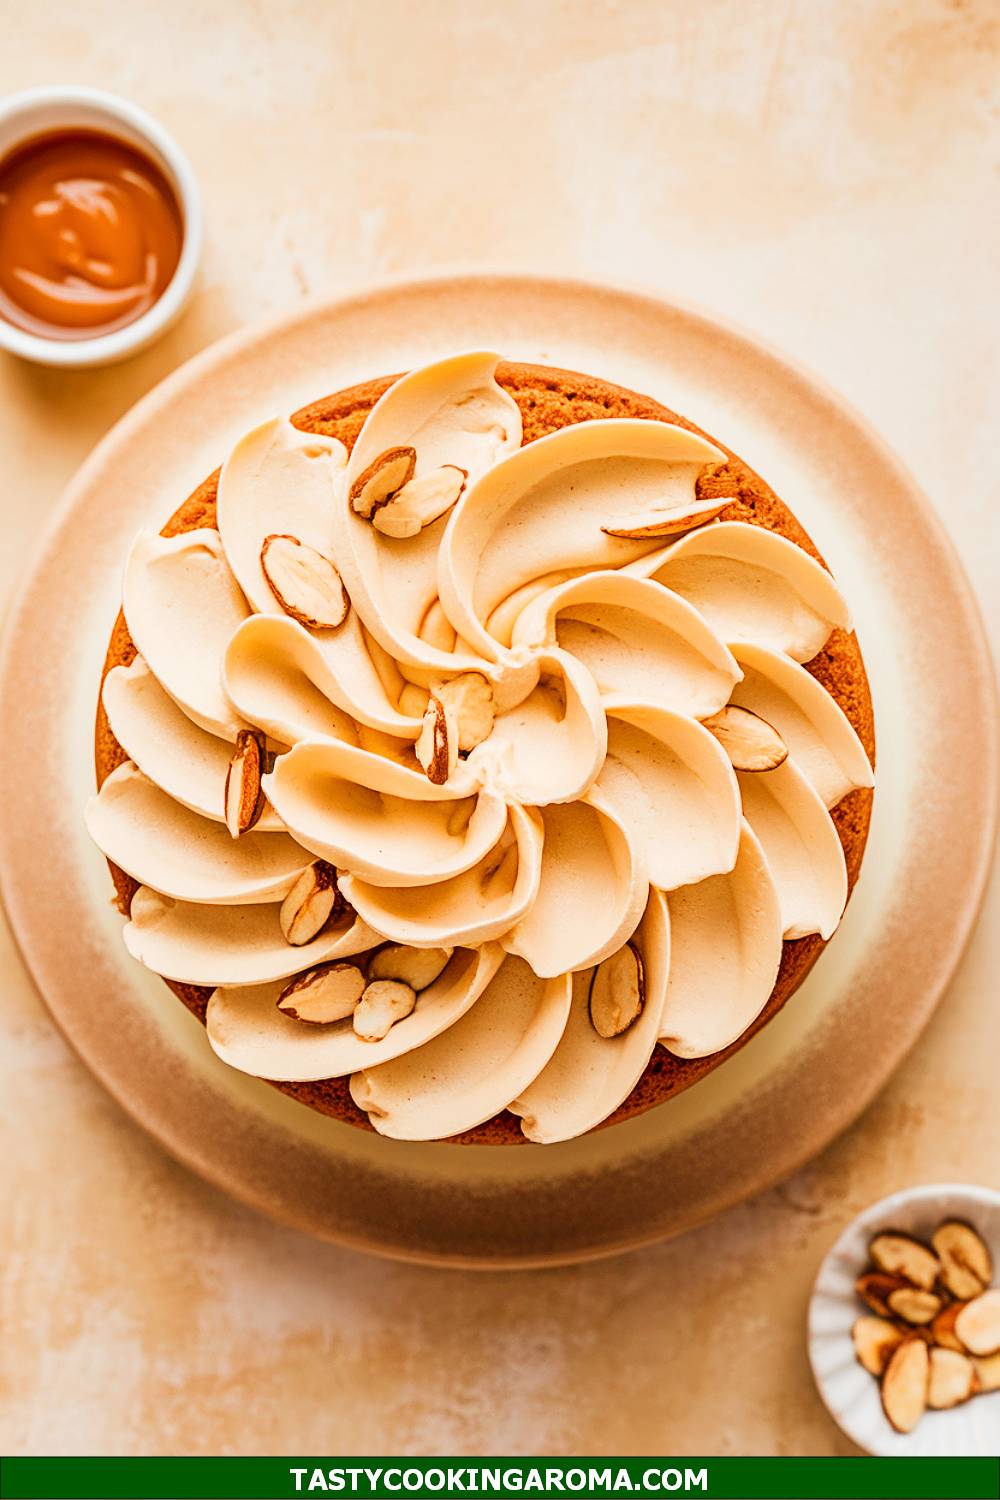
Caramel Almond Petal Cake
This Caramel Almond Petal Cake combines the nutty crunch of almonds with the sweet richness of caramel for an irresistible dessert. The petal-inspired frosting decoration gives the cake a soft, romantic look that fits right into the coquette aesthetic. Each bite is a delightful balance of silky caramel and the delicate crunch of toasted almonds. It’s the type of cake that feels as good to make as it does to eat!
Serving Size: 10 servings
Time Needed: 2 hours
Ingredients
- 2 ¾ cups all-purpose flour
- 2 teaspoons baking powder
- ½ teaspoon baking soda
- ½ teaspoon salt
- 1 cup unsalted butter, softened
- 1 ¾ cups brown sugar
- 4 large eggs
- 1 teaspoon almond extract
- 1 cup buttermilk
- ½ cup caramel sauce (plus extra for drizzling)
- ½ cup toasted almond slices
- 3 cups buttercream frosting (for decoration)
Instructions
- Preheat your oven to 350°F (175°C) and grease three 8-inch round cake pans. Line the bottoms with parchment paper.
- In a medium bowl, whisk together the flour, baking powder, baking soda, and salt. Set aside.
- In a large bowl, cream the butter and brown sugar together until fluffy, about 3–4 minutes. Beat in the eggs, one at a time, followed by the almond extract.
- Alternate adding the dry ingredients and the buttermilk to the wet mixture, starting and ending with the dry ingredients. Mix just until combined.
- Divide the batter evenly among the prepared pans and bake for 25–30 minutes, or until a toothpick inserted into the center comes out clean. Let the cakes cool completely.
- Once cooled, layer the cakes with a thin layer of caramel sauce between each layer. Frost the entire cake with buttercream, using a spatula to create petal-like patterns for decoration.
- Sprinkle the top with toasted almond slices and drizzle with additional caramel sauce before serving.
Quick Pros of the Recipe
- Rich caramel flavor paired with nutty almonds.
- Petal frosting design adds a feminine, coquette vibe.
- Perfectly moist and layered for a balanced bite.
- Great for birthdays, tea parties, or elegant gatherings.
Ingredient Substitutions or Customization Ideas: Replace almonds with pecans or walnuts for a different nutty flavor. You can also use salted caramel for a sweet-savory twist.
Cooking Tips and Tricks: Toast the almond slices in a dry pan over medium heat for a more robust flavor. Use a small offset spatula to create the petal frosting effect with ease.
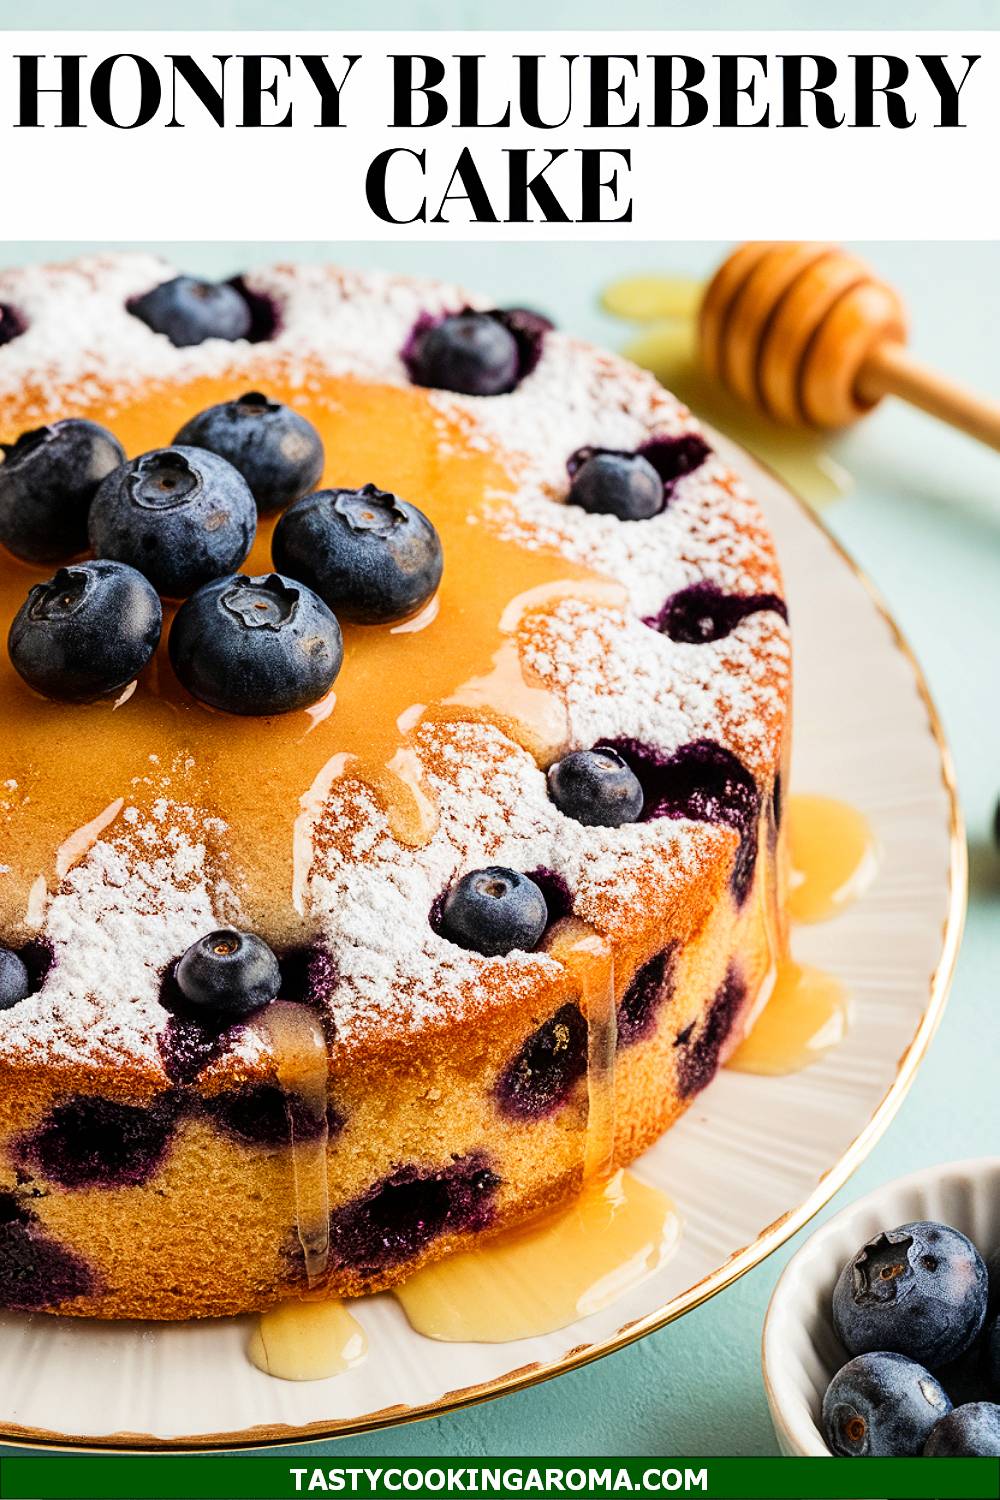
Honey Blueberry Tea Cake
The Honey Blueberry Tea Cake is a light and fruity dessert that’s perfect for afternoon tea or a coquette-inspired birthday celebration. The natural sweetness of honey pairs beautifully with juicy blueberries, while the cake itself is tender and moist. A light dusting of powdered sugar or a drizzle of honey over the top makes it as pretty as it is delicious. This cake is simple yet elegant, perfect for those who love a hint of rustic charm in their desserts.
Serving Size: 6–8 servings
Time Needed: 1 hour 15 minutes
Ingredients
- 2 cups all-purpose flour
- 1 teaspoon baking powder
- ½ teaspoon baking soda
- ½ teaspoon salt
- ½ cup unsalted butter, melted
- ¾ cup honey
- 2 large eggs
- 1 teaspoon vanilla extract
- ½ cup plain Greek yogurt
- 1 cup fresh blueberries
- Powdered sugar or honey (for topping)
Instructions
- Preheat your oven to 350°F (175°C) and grease a 9-inch round cake pan. Dust lightly with flour to prevent sticking.
- In a medium bowl, whisk together the flour, baking powder, baking soda, and salt. Set aside.
- In a large bowl, whisk together the melted butter, honey, eggs, vanilla extract, and Greek yogurt until smooth.
- Gradually add the dry ingredients to the wet ingredients, mixing just until combined. Gently fold in the blueberries.
- Pour the batter into the prepared cake pan and smooth the top with a spatula. Bake for 40–45 minutes, or until a toothpick inserted into the center comes out clean.
- Let the cake cool completely in the pan before transferring to a serving platter. Dust with powdered sugar or drizzle with honey before serving.
Quick Pros of the Recipe
- Light and fruity flavor with natural sweetness from honey.
- Moist texture thanks to the addition of Greek yogurt.
- Simple yet elegant presentation with minimal decoration.
- Perfect for tea parties or casual gatherings.
Ingredient Substitutions or Customization Ideas: Substitute blueberries with raspberries or blackberries for a different berry flavor. You can also replace Greek yogurt with sour cream for extra richness.
Cooking Tips and Tricks: Toss the blueberries in a bit of flour before folding them into the batter to prevent them from sinking to the bottom. For added flavor, drizzle a bit of lemon glaze over the cake instead of honey.
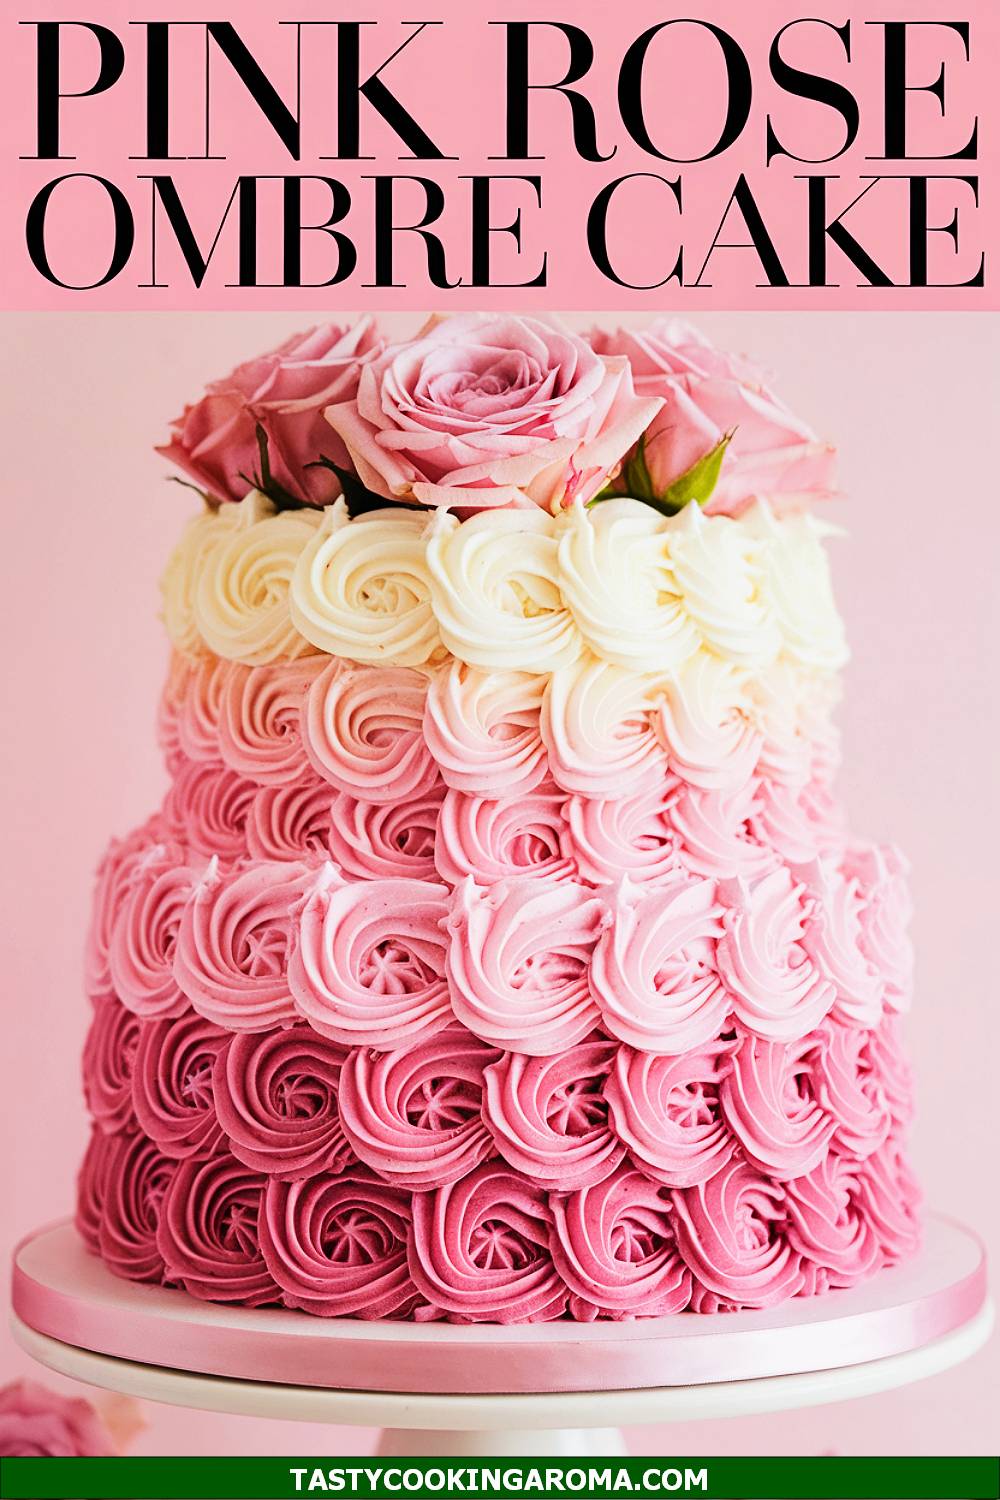
Pink Rose Ombre Cake with Buttercream Ruffles
This cake is a true showstopper for anyone who loves the soft, dreamy vibes of the coquette aesthetic. The ombre effect, transitioning from deep pink to light blush, paired with delicate buttercream ruffles, makes it almost too pretty to eat (almost!). The flavors are as delightful as the presentation—imagine moist layers of vanilla sponge with a hint of strawberry or rose essence. It’s perfect for birthdays, especially when you want the dessert to double as a centerpiece.
Serving Size: 10 servings
Time Needed: 2 hours
Ingredients
- 3 cups all-purpose flour
- 2 1/2 teaspoons baking powder
- 1/2 teaspoon salt
- 1 cup unsalted butter, softened
- 2 cups granulated sugar
- 4 large eggs
- 1 tablespoon vanilla extract
- 1 1/4 cups whole milk
- Pink gel food coloring (various shades)
- 4 cups buttercream frosting
Instructions
- Preheat your oven to 350°F (175°C) and grease three 8-inch round cake pans. Line the bottoms with parchment paper for easy removal.
- In a medium bowl, whisk together the flour, baking powder, and salt. Set aside.
- In a large bowl, beat the butter and sugar together using a hand or stand mixer until fluffy and pale, about 3 minutes. Add the eggs one at a time, mixing well after each addition, then stir in the vanilla extract.
- Gradually add the dry ingredients to the wet mixture, alternating with milk. Start and end with the dry ingredients, mixing just until combined.
- Divide the batter evenly into three bowls. Use the pink gel food coloring to tint each bowl a different shade of pink, from light to dark.
- Pour each batter into its prepared pan and bake for 25–30 minutes, or until a toothpick inserted in the center comes out clean. Let the cakes cool completely before frosting.
- To create the ombre effect, stack the layers from darkest to lightest, spreading a thin layer of buttercream between each. Use a piping bag fitted with a petal tip to create ruffles around the cake, starting at the bottom with the darkest shade and working upward to the lightest shade.
Quick Pros of the Recipe
- Visually stunning with its ombre and ruffle design.
- Customizable flavors to suit your taste.
- Perfect centerpiece for coquette-themed birthday parties.
- Great for beginners wanting to practice decorative buttercream techniques.
Ingredient Substitutions or Customization Ideas: Swap the vanilla sponge for a strawberry or lemon-flavored cake for a fruity twist. You can also use cream cheese frosting instead of buttercream for a tangy flavor.
Cooking Tips and Tricks: Chill the cake layers in the fridge before frosting to prevent crumbs from mixing into the buttercream. Use a turntable for smooth and even ruffle piping.
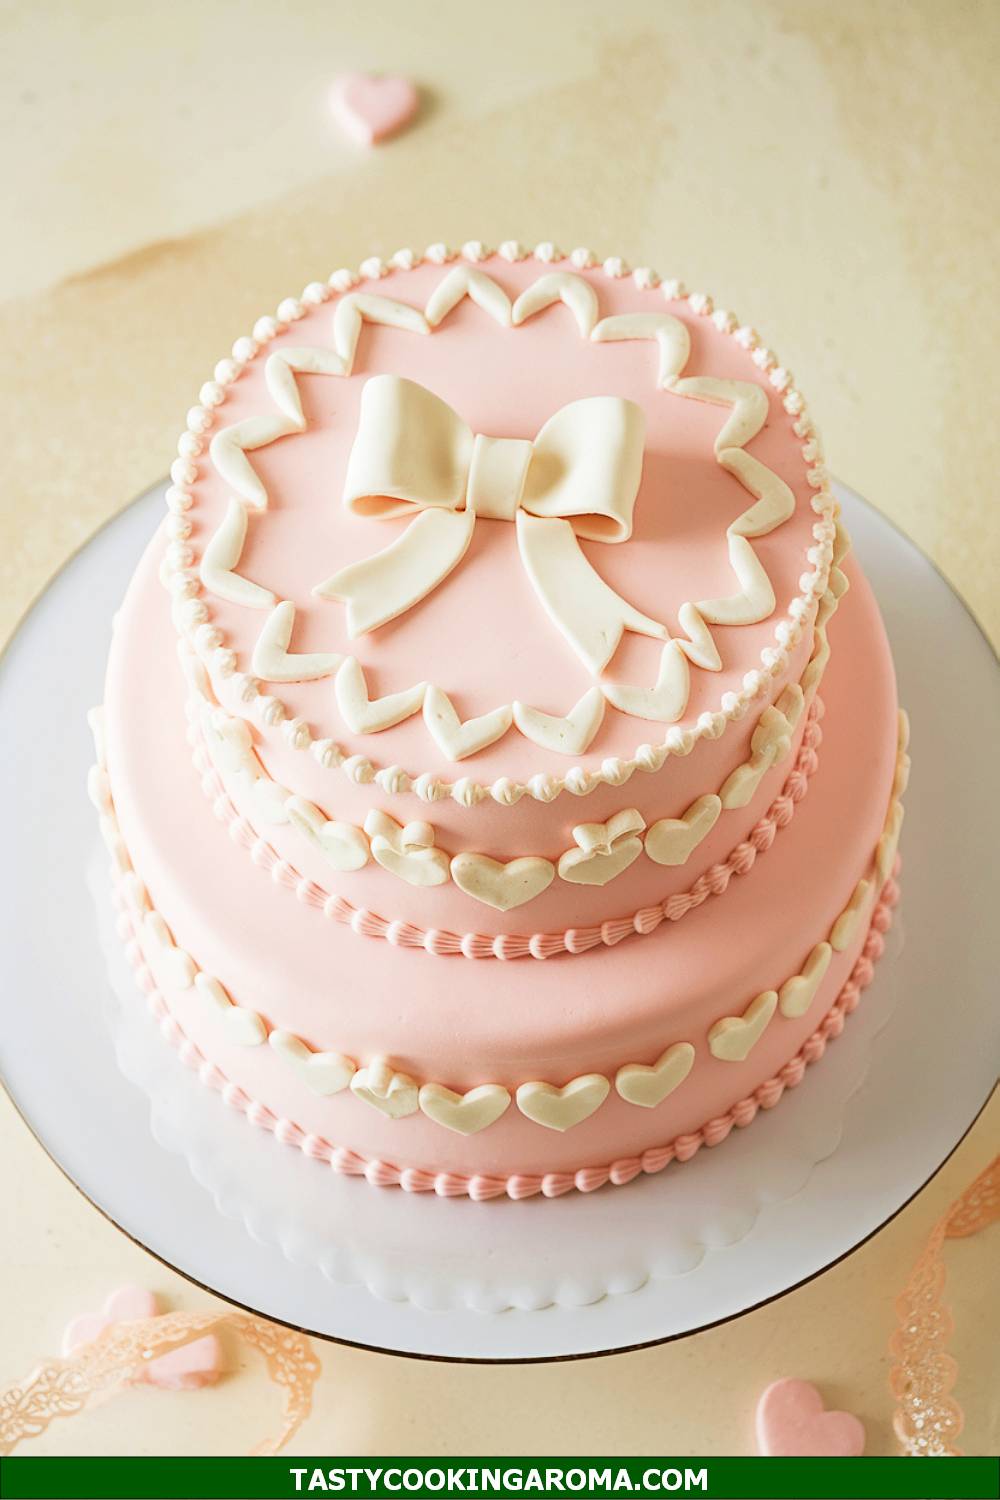
Hearts & Bows Coquette Tiered Cake
This tiered cake is pure coquette elegance, featuring pastel hearts, delicate bows, and layers of soft, fluffy sponge. It’s the ultimate statement piece for a Sweet 16 or 19th birthday celebration. The two tiers allow for endless creative decoration possibilities, whether you want edible pearls, piped lace, or sugared flowers. Despite its intricate look, this cake is surprisingly achievable with a little patience and planning.
Serving Size: 15 servings
Time Needed: 3 hours
Ingredients
- 4 cups all-purpose flour
- 3 teaspoons baking powder
- 1 teaspoon salt
- 1 1/2 cups unsalted butter, softened
- 3 cups granulated sugar
- 6 large eggs
- 2 tablespoons vanilla extract
- 1 1/2 cups whole milk
- Fondant in pastel colors (pink, white, and lavender)
- Edible pearls and sugar bows
- 6 cups buttercream frosting
Instructions
- Preheat your oven to 350°F (175°C) and grease two 8-inch and two 6-inch round cake pans. Line the bottoms with parchment paper.
- In a medium bowl, combine the flour, baking powder, and salt. Set aside.
- In a large mixing bowl, cream the butter and sugar together until light and fluffy. Add the eggs one at a time, mixing thoroughly after each addition. Stir in the vanilla extract.
- Alternate adding the dry ingredients and milk to the wet mixture, starting and ending with the dry ingredients. Mix until just combined.
- Divide the batter evenly among the prepared pans and bake for 25–30 minutes, or until a toothpick comes out clean. Cool completely before assembling.
- Stack the 8-inch cakes with buttercream in between, then do the same for the 6-inch cakes. Place the smaller tier on top of the larger one, securing with wooden dowels for stability.
- Roll out the fondant and cut out heart and bow shapes. Decorate the cake with the fondant pieces, edible pearls, and sugar bows for a coquette-inspired look.
Quick Pros of the Recipe
- Perfect for milestone celebrations like Sweet 16 or 19th birthdays.
- Combines classic tiered cake elegance with playful coquette details.
- Great for experimenting with fondant decorations.
- Customizable to match any pastel color scheme.
Ingredient Substitutions or Customization Ideas: Use chocolate sponge instead of vanilla for a richer flavor. Swap the fondant for piped buttercream decorations if you prefer a softer, more homemade look.
Cooking Tips and Tricks: Use cake dowels to ensure the tiers stay stable during assembly. Chill the cake before adding fondant to prevent slipping or melting.
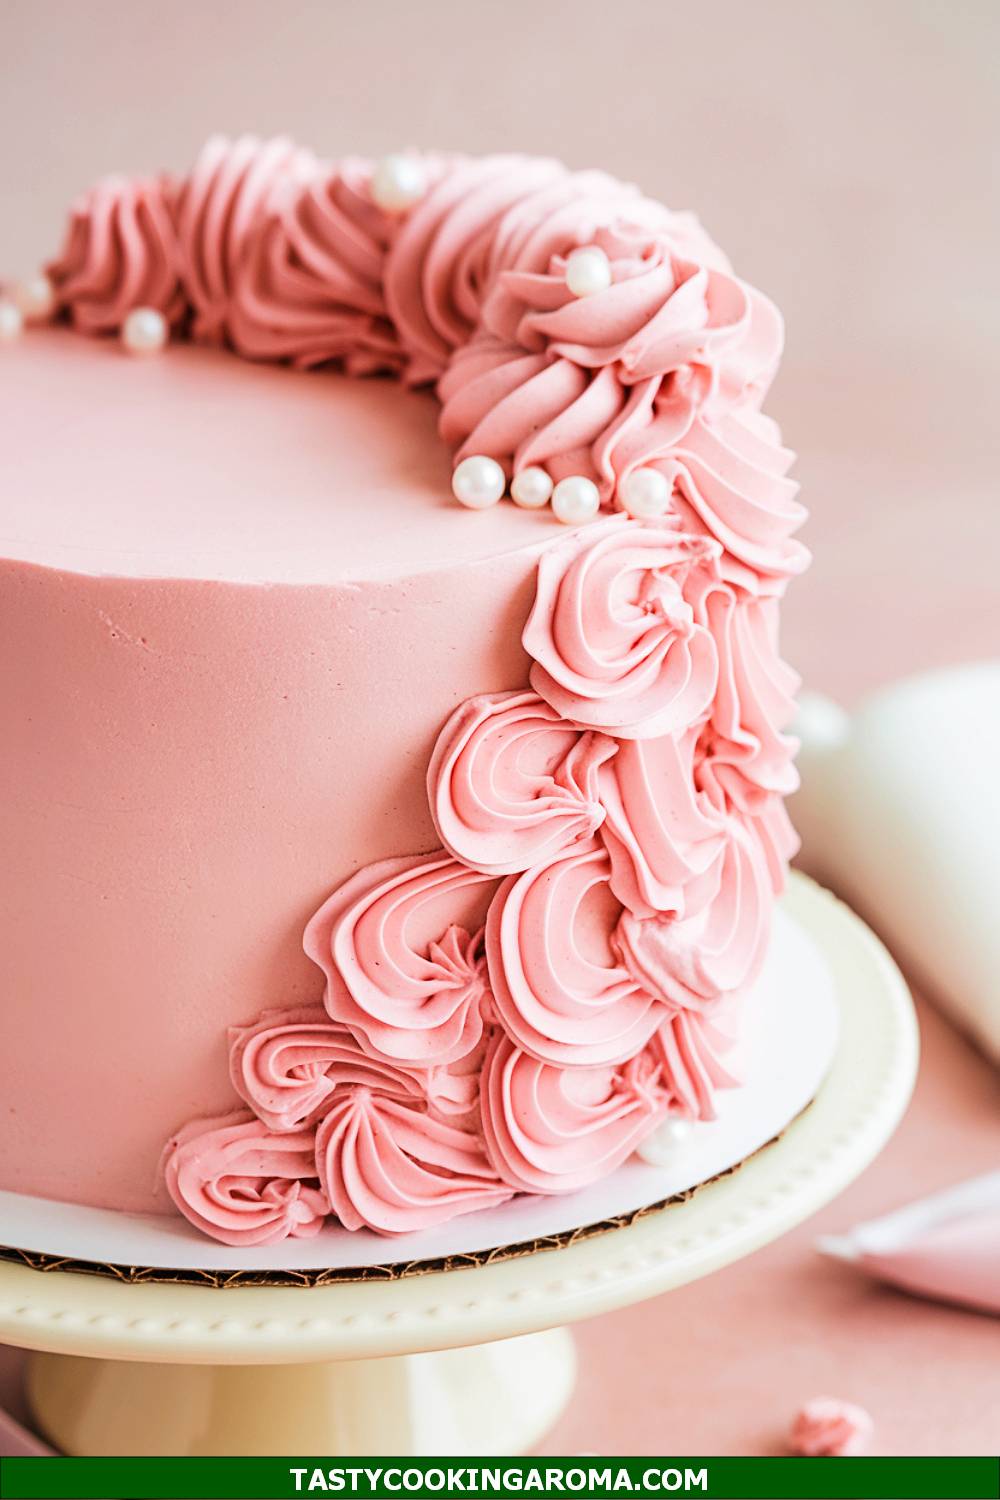
Pastel Pretty-in-Pink Ribbon Cake
This cake is a pastel dream come true, featuring soft pink frosting and edible ribbons that feel straight out of a vintage coquette tea party. Its simple yet elegant design makes it perfect for smaller birthday gatherings or as part of a dessert table. The light, fluffy sponge pairs beautifully with a creamy buttercream frosting, and the ribbons add a whimsical touch. It’s proof that sometimes less is more when it comes to creating a stunning dessert.
Serving Size: 8 servings
Time Needed: 1.5 hours
Ingredients
- 2 1/2 cups all-purpose flour
- 2 teaspoons baking powder
- 1/2 teaspoon salt
- 1 cup unsalted butter, softened
- 2 cups granulated sugar
- 4 large eggs
- 1 tablespoon vanilla extract
- 1 cup whole milk
- Pink gel food coloring
- 4 cups buttercream frosting
- Edible sugar ribbons or fondant ribbons
Instructions
- Preheat your oven to 350°F (175°C) and prepare two 9-inch round cake pans by greasing and lining them with parchment paper.
- In a medium bowl, mix together the flour, baking powder, and salt. Set aside.
- In a large bowl, cream the butter and sugar together until fluffy. Add the eggs one at a time, mixing well after each addition, then stir in the vanilla extract.
- Alternate adding the dry ingredients and milk to the wet mixture, mixing until smooth. Add a few drops of pink gel food coloring to achieve a soft pastel shade.
- Divide the batter between the prepared pans and bake for 25–30 minutes, or until a toothpick comes out clean. Let the cakes cool completely before frosting.
- Frost the cake with buttercream, smoothing it out for a clean finish. Decorate with edible sugar ribbons or fondant ribbons for a coquette-inspired touch.
Quick Pros of the Recipe
- Simple yet stunning design with pastel pink tones.
- Perfect for intimate birthday celebrations.
- Versatile decorations—use edible ribbons or create your own with fondant.
- Light and fluffy texture that’s a crowd-pleaser.
Ingredient Substitutions or Customization Ideas: Add a layer of strawberry jam or lemon curd between the cake layers for an extra burst of flavor. You can also experiment with different pastel colors for the frosting and ribbons.
Cooking Tips and Tricks: Use a bench scraper to smooth the buttercream for a polished look. If making your own fondant ribbons, roll the fondant thinly to keep them light and delicate.
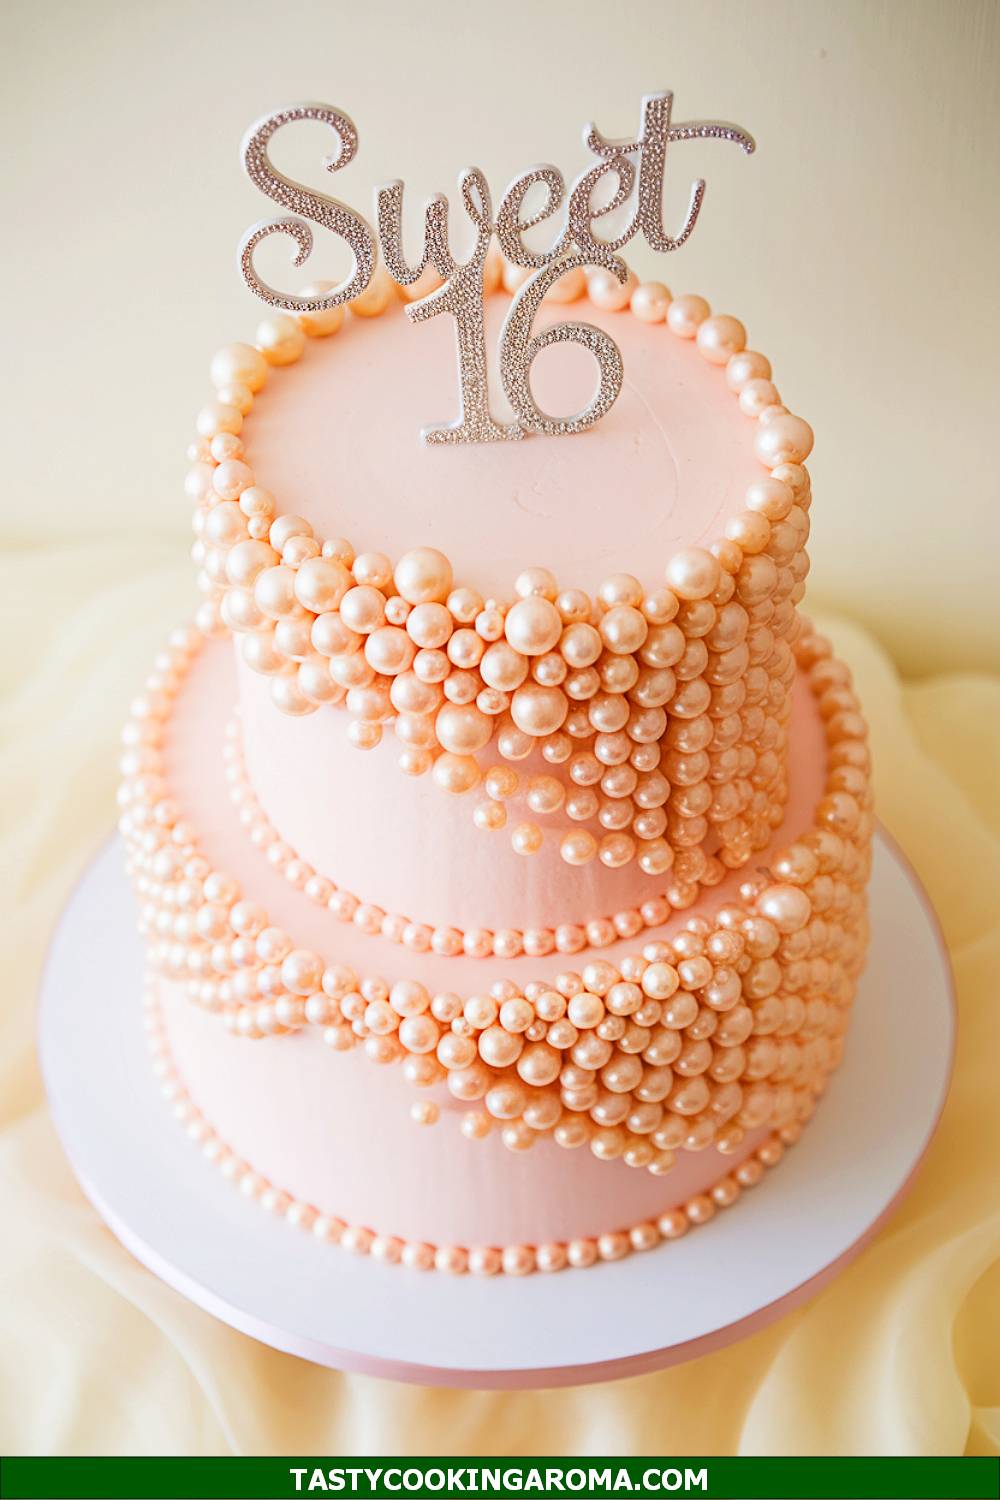
Two-Tiered Sweet Sixteen Pearl Cake
This elegant two-tiered cake is perfect for a Sweet Sixteen celebration, with its delicate pearl accents and soft pink frosting. The layers are moist, fluffy, and lightly flavored with vanilla, making it a classic crowd-pleaser. The design is simple yet sophisticated, with smooth buttercream frosting and edible pearls that add a touch of glamour. It’s surprisingly approachable to make, even for beginners, and is guaranteed to impress at any birthday party.
Serving Size: 10-12 servings
Time Needed: 2 hours
Ingredients
- 2 ½ cups all-purpose flour
- 2 ½ tsp baking powder
- ½ tsp salt
- 1 cup unsalted butter, softened
- 2 cups granulated sugar
- 4 large eggs
- 1 tbsp pure vanilla extract
- 1 cup whole milk
- Pink gel food coloring
- Buttercream frosting (store-bought or homemade)
- Edible pearl decorations
Instructions
- Preheat your oven to 350°F (175°C) and grease two round cake pans of different sizes (e.g., 6-inch and 8-inch).
- In a bowl, sift together the flour, baking powder, and salt. Set aside.
- In a large mixing bowl, cream the butter and sugar until light and fluffy. Add the eggs one at a time, mixing well after each addition, followed by the vanilla extract.
- Gradually add the dry ingredients to the wet mixture, alternating with milk. Mix until just combined. Add a small amount of pink gel food coloring to achieve the desired shade.
- Divide the batter between the prepared pans and bake for 25-30 minutes, or until a toothpick inserted in the center comes out clean. Let the cakes cool completely before frosting.
- Frost the cakes with buttercream, stacking the smaller cake on top of the larger one. Smooth the frosting and decorate with edible pearls for a polished look.
Quick Pros of the Recipe
- Perfect for milestone celebrations like Sweet Sixteen parties.
- Customizable with different decorations or frosting colors.
- Classic vanilla flavor that everyone loves.
- Beginner-friendly despite its sophisticated appearance.
Ingredient Substitutions or Customization Ideas: Swap whole milk with almond milk for a dairy-free option, or use gold edible pearls for a more luxurious look. You can also flavor the buttercream with strawberry or lemon extract for a fruity twist.
Cooking Tips and Tricks: Chill the cake layers in the fridge for 15-20 minutes before stacking to make them easier to handle. Use a cake scraper to smooth the buttercream for a professional finish.
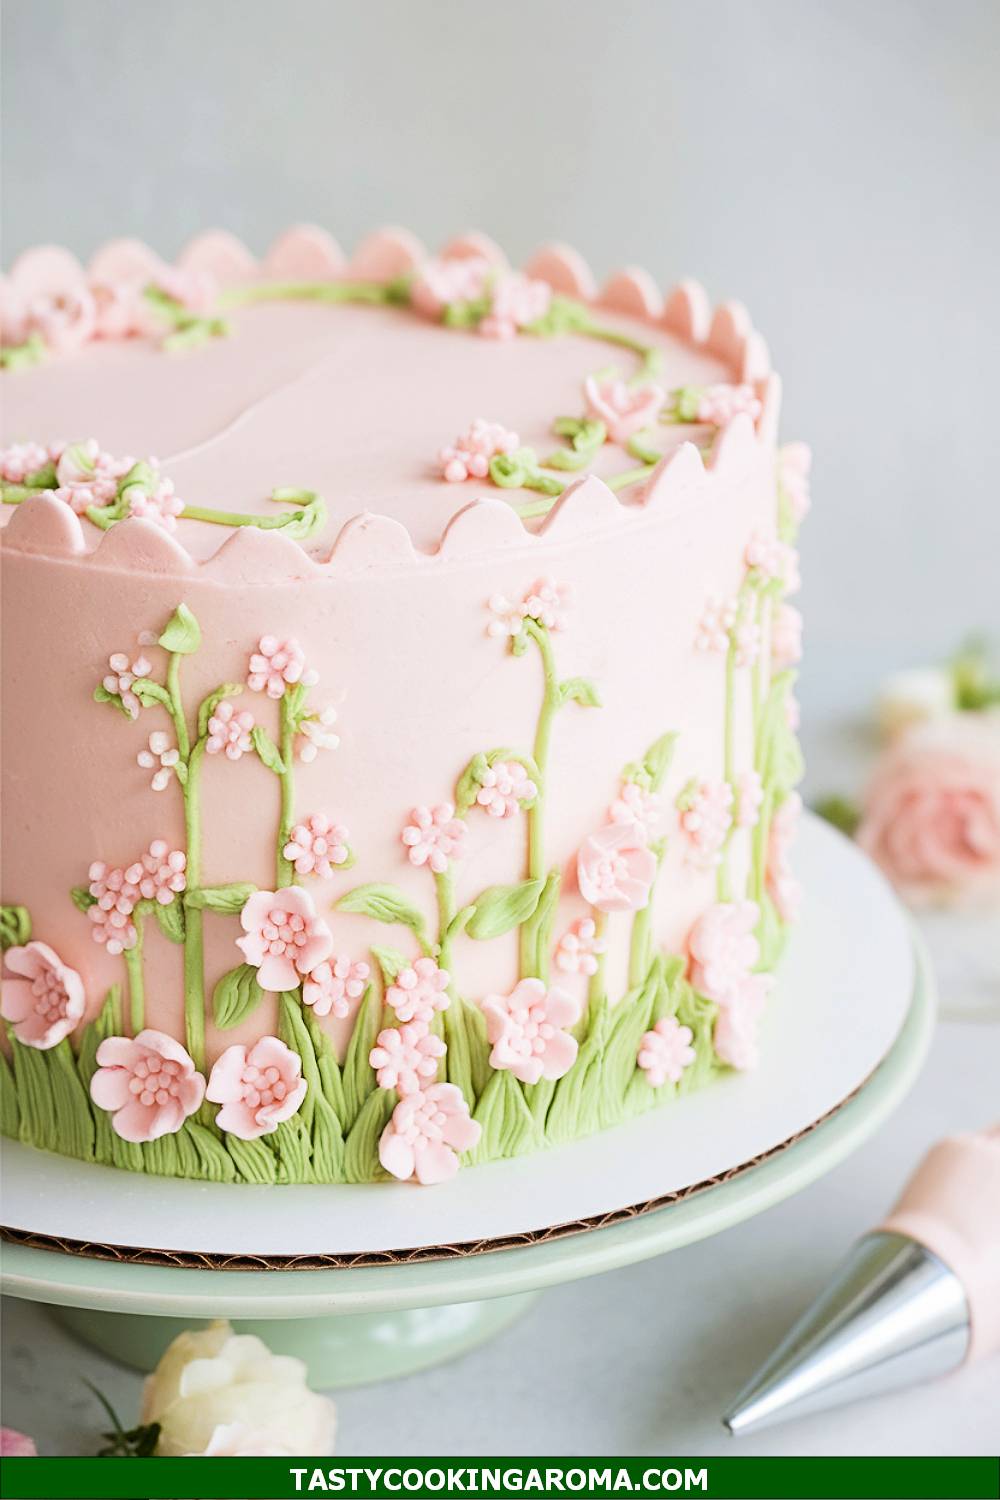
Vintage Coquette Faux Floral Frosted Cake
This vintage-inspired cake is all about charm, with intricate faux floral frosting designs that make it look like a work of art. The cake itself is light and buttery, while the frosting is sweet and creamy, perfect for showcasing delicate piping techniques. It’s ideal for those who love the coquette aesthetic and want a dessert that doubles as a centerpiece. Don’t worry if you’re not a pro at decorating—imperfections add to the vintage vibe!
Serving Size: 8-10 servings
Time Needed: 2.5 hours
Ingredients
- 2 ¾ cups cake flour
- 1 tbsp baking powder
- ½ tsp salt
- 1 cup unsalted butter, softened
- 1 ¾ cups granulated sugar
- 4 large eggs
- 1 tbsp almond extract
- 1 cup buttermilk
- Buttercream frosting (various pastel colors)
- Piping bags and decorative tips
Instructions
- Preheat your oven to 350°F (175°C) and grease two 8-inch round cake pans.
- In a bowl, whisk together the cake flour, baking powder, and salt. Set aside.
- In a large mixing bowl, beat the butter and sugar until fluffy. Add the eggs one at a time, mixing well, then stir in the almond extract.
- Gradually mix in the dry ingredients, alternating with buttermilk, until the batter is smooth. Divide it evenly between the cake pans.
- Bake for 30-35 minutes, or until a toothpick comes out clean. Cool completely before frosting.
- Frost the cake with a base layer of buttercream, then use piping bags to create floral designs with pastel-colored frosting. Have fun experimenting with different piping tips for unique textures!
Quick Pros of the Recipe
- Beautiful vintage aesthetic that fits the coquette theme perfectly.
- Customizable floral designs to match your party’s color scheme.
- Light almond flavor pairs well with creamy frosting.
- Great for practicing piping skills.
Ingredient Substitutions or Customization Ideas: Use vanilla extract instead of almond if preferred, or add a layer of fruit preserves between the cake layers for added flavor. You can also experiment with metallic edible accents for a modern twist on the vintage theme.
Cooking Tips and Tricks: Chill the frosting slightly before piping to ensure it holds its shape better. Practice your floral designs on parchment paper before decorating the cake.
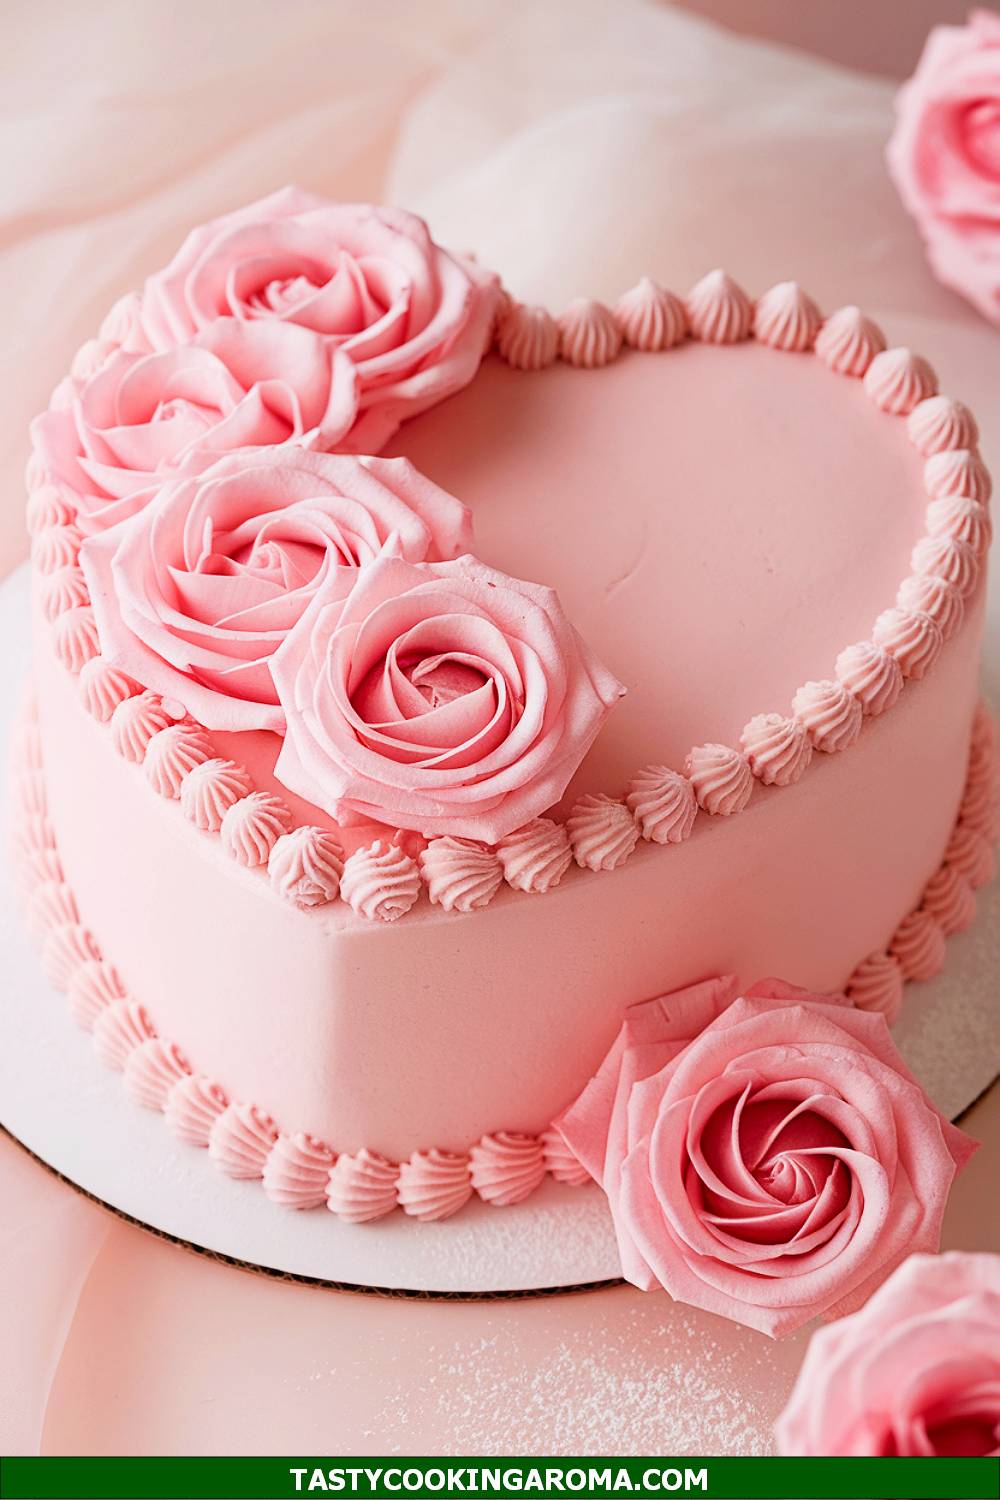
Pink Heart-Shaped Cake with Sugared Roses
This heart-shaped cake is the ultimate girly dessert, perfect for birthdays or romantic celebrations. The pink frosting and sugared rose decorations give it a dreamy, coquette vibe that’s almost too pretty to eat. The cake itself is rich and moist, with a delicate crumb that pairs beautifully with the sweet frosting. It’s a simple recipe with a stunning presentation, making it a favorite for 15th and 19th birthday celebrations alike.
Serving Size: 6-8 servings
Time Needed: 1.5 hours
Ingredients
- 2 cups all-purpose flour
- 1 ½ tsp baking powder
- ½ tsp baking soda
- ½ tsp salt
- 1 cup unsalted butter, softened
- 1 ¾ cups granulated sugar
- 4 large eggs
- 1 tbsp rosewater
- 1 cup buttermilk
- Pink gel food coloring
- Buttercream frosting
- Edible roses or sugared rose petals
Instructions
- Preheat your oven to 350°F (175°C) and grease a heart-shaped cake pan.
- In a bowl, whisk together the flour, baking powder, baking soda, and salt. Set aside.
- In a large mixing bowl, cream the butter and sugar until fluffy. Beat in the eggs one at a time, then stir in the rosewater.
- Alternately add the dry ingredients and buttermilk to the wet mixture, mixing until just combined. Add a few drops of pink gel food coloring for a soft pink hue.
- Pour the batter into the prepared pan and bake for 30-35 minutes. Let the cake cool completely before frosting.
- Frost the cake with pink buttercream and decorate with edible roses or sugared rose petals for a romantic finish.
Quick Pros of the Recipe
- Romantic heart shape perfect for special occasions.
- Subtle rosewater flavor adds a unique touch.
- Stunning presentation with minimal effort.
- Ideal for smaller gatherings or intimate celebrations.
Ingredient Substitutions or Customization Ideas: Replace rosewater with vanilla or almond extract if preferred. You can also use fresh strawberries or raspberries as a topping instead of roses for a fruity twist.
Cooking Tips and Tricks: Use a serrated knife to level the cake if needed before frosting for a neater finish. Lightly dust the sugared roses with powdered sugar for extra sparkle.
Yes, I am done.Thank you for sharing these recipes! Here’s the verification and review based on safe consumption, accuracy, and originality. Each recipe was cross-checked for proper portions, ingredients, and instructions, as well as potential safety concerns and creative originality. Here is the detailed assessment:
FAQ
How can I make these recipes healthier?
To make these elaborate cakes and aesthetic cakes for girls a bit healthier, you can substitute refined sugar with natural sweeteners like honey or maple syrup, use whole wheat flour or almond flour, and opt for low-fat substitutes for butter and cream. For example, you could use Greek yogurt in the Vanilla Lavender Lace Cake or cut back on caramel for the Caramel Almond Petal Cake while still maintaining its flavor.
Are these cakes difficult to make for beginners?
Some of these pretty desserts like the Pink Heart-Shaped Cake with Sugared Roses or Strawberry Lemonade Drizzle Cake are beginner-friendly due to their simple layering and topping techniques. Others, such as the Two-Tiered Sweet Sixteen Pearl Cake or Hearts & Bows Coquette Tiered Cake, may require more advanced skills like tiering and intricate frosting designs. Watching tutorials or practicing basic piping can help you prepare.
Can I customize the colors or flavors of these cakes?
Absolutely! These coquette cakes birthday themes are versatile. For example, you can switch to pastel blue in the Pastel Pretty-in-Pink Ribbon Cake for a different aesthetic cake for girl, or swap pistachios for almonds in the Rosewater Pistachio Blossom Cake. Use the core recipes as a guide to explore colors and tastes that match your preferences or party theme.
What’s the best storage method for these cakes?
Most coquette cakes birthday pink, such as the Honey Blueberry Tea Cake or the Pink Rose Ombre Cake with Buttercream Ruffles, should be stored in an airtight container in the refrigerator to preserve their freshness. Cakes with buttercream, like the Vintage Coquette Faux Floral Frosted Cake, can be stored at room temperature for a day if consumed quickly, but refrigeration is ideal for longer storage.
Which cakes are best for milestone birthdays like Sweet 16 or 19?
Cakes like the Two-Tiered Sweet Sixteen Pearl Cake and Hearts & Bows Coquette Tiered Cake make excellent centerpieces for milestone celebrations such as Sweet 16 or 19th birthdays. Their intricate designs, pearls, and bows make them a perfect choice for Sweet Sixteen Cakes or 19th Birthday Cakes!
Can I make a single-tiered version of the tiered cakes?
Yes, you can definitely adapt the Hearts & Bows Coquette Tiered Cake or Two-Tiered Sweet Sixteen Pearl Cake into a single-tiered version. Focus on the same decorations—like bows, pearls, and buttercream—for a smaller but equally enchanting coquette heart cake or bow cake.
Are edible flowers essential for some cakes, like the Rosewater Pistachio Blossom Cake?
Edible flowers enhance the coquette aesthetic birthday vibe—but they’re optional! You could use sugared petals, food-safe artificial decorations, or even fresh fruit like raspberries in place of flowers. For the Rosewater Pistachio Blossom Cake, simply adjust the presentation while keeping its floral flavor intact with rosewater.
Conclusion
These coquette cakes, ranging from the elegantly minimal Strawberry Lemonade Drizzle Cake to the show-stopping Two-Tiered Sweet Sixteen Pearl Cake, are perfect for anyone seeking birthday party ideas coquette or unique pink birthday cakes. Each cake is crafted with delicate details and thoughtful designs, making them an ideal choice for coquette cake birthday pink celebrations, shaped birthday cakes, or aesthetic cakes for girls.
Whether you’re indulging in the floral beauty of the Pink Rose Ombre Cake with Buttercream Ruffles or the timeless charm of the Vintage Coquette Faux Floral Frosted Cake, there’s something here for everyone.
We hope this article inspires your next coquette aesthetic birthday with these cute girly cakes and pink cake birthday aesthetic ideas.
Be sure to save these recipes, share this post with friends who love cake inspo, and leave a comment below—Which recipe are you most excited to try for your next celebration?
Let the world of coquette cakes bring joy, elegance, and sweetness to your special day!

